|

Online Reference Guide
|
|
Basic Scanning / Scanning an Image
Scanning from the Full Auto Mode
In the Full Auto mode, an image is automatically optimized. You can scan quickly and easily without changing any complex settings in the Full Auto mode.
Follow the steps below to scan reflective documents or transparent materials from the Full Auto mode.
 |
Note:
|
 | -
In the Full Auto mode, you can scan transparent materials in color (color films). If you want to scan monochrome negative film, switch to the Manual mode.
|
 |
Note for Macintosh users:
|
 |
Most illustrations shown in this section are for Windows, so they may vary in appearance from what actually appears on your screen. The instructions are the same, except as noted.
|
 |
Start the TWAIN-compliant application. (The example used here is ArcSoft PhotoImpression.)
|
 |
Click the Get Photo button and then click the Camera/Scanner button on the main screen.
|
 |
Choose EPSON TWAIN 5 from the Select Source list and click the Acquire button (for Windows users) or the OK button (for Macintosh users) to open EPSON TWAIN.
|
 |  |
Note:
|
 |  | -
You usually need to choose EPSON TWAIN 5 only the first time you use the scanner with your application.
|
 |  | -
For detailed settings, refer to your application's documentation.
|
 |
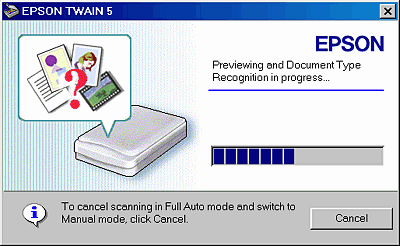
The following window appears.
|

EPSON TWAIN automatically previews the image, and recognizes the document source and type. See Document Type Recognition setting.
If you want to make more settings, click Cancel and then click the  button (for Windows users) or the arrow on the bottom left corner of the window (for Macintosh users) to open the customizing menu for the Full Auto mode. See Customizing the Full Auto Mode Settings for more details.
If you want to switch to the Manual mode, click Cancel and then click the Manual mode button to open the Manual mode window. For information on the Manual mode, see Overview of the Manual Mode Window for details.
 |  |
Note:
|
 |  | -
Depending on the image you want to scan, you may not get the expected scanned image. In this case, scan the image in the Manual mode.
|
 |  | -
You cannot click Cancel when the scanner is warming up.
|
 |
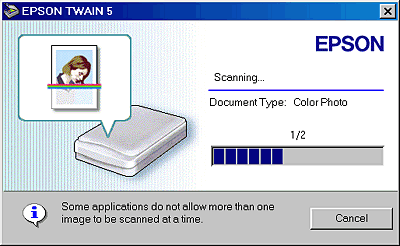
After EPSON TWAIN has previewed and recognized the document type, the following window appears. You can see the document type and the icon in the window.
|

EPSON TWAIN automatically sets the Image Location setting and Exposure setting, and then starts scanning. If you scan multiple photos, the number of scanned image will be indicated.
To cancel the scanning, click Cancel.
 |
The scanned image is sent to the application.
|
 |
Note:
|
 | -
Depending on the application, you may not be able to scan multiple images.
|
 | -
You cannot scan an image which exceeds the available memory or disk space. If you try to scan a very large image, an alert appears on the screen.
|
 | -
For information on further editing of the scanned images, refer to your application's documentation.
|
 | -
After an image is scanned, be sure to save or export it.
|
 | -
The mode you finish the last time opens the next time you start EPSON TWAIN.
|
Document Type Recognition setting
The image is automatically recognized as one of the following document type:
|
Document Source
|
Document Type
|
Icon
|
|
Reflective
|
Color Photo
|

|
|
Black & White Photo
|
|
Illustration
|

|
|
Text/Line Art
|

|
|
Color Document
|

|
|
Black & White Document
|
|
Film
|
Color Negative Film
|

|
|
Color Positive Film
|
Image Location setting
|
Auto Locate:
|
The scanner automatically locates and selects the target image. The image appears without white borders. (If the document type is document or Text/Line Art, a 2 mm margin is added around all edges of the location.) If the document type is photo or film, Auto Locate applies to each photo; otherwise it covers the whole area of the image.
|
|
Detect Skew Angle:
|
The scanner automatically detects the skew of the target image. If the document type is photo or film, Detect Skew Angle applies to each photo. If the document type is Text/Line Art, it covers the whole area of the image.
|
Exposure setting
The scanner automatically optimizes the exposure of an image defined by Auto Locate. The Gamma, Highlight, and Shadow settings are automatically set.

[Top]
| Version 1.00E, Copyright © 2002, SEIKO EPSON CORPORATION |
button (for Windows users) or the arrow on the bottom left corner of the window (for Macintosh users) to open the customizing menu for the Full Auto mode. See Customizing the Full Auto Mode Settings for more details.