|

Reference Guide
|
|
How to / Installing and Removing Options
Envelope Feeder
 Installing
 Removing
To install the Envelope Feeder, you must remove the MP tray first.
Installing
Follow the instructions below.
Before installing
 |
Turn off the printer.
|
 |
Unplug the printer's power cord from the electrical outlet.
|
 |
Remove all interface cables from the interface connectors.
|
 |
Unpack the Envelope Feeder and remove all protective materials.
|
Installing
 |
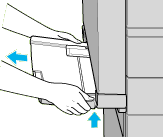
Remove the MP tray by lifting it slightly and pulling it out toward you. The MP tray does not detach easily; use sufficient force to pull it away from the printer.
|

 |
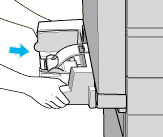
Hold the Envelope Feeder horizontally with both hands.
|
 |
Push it straight to the MP tray's original position until it clicks firmly into place.
|

After installing
 |
Reconnect any interface cables you removed.
|
 |
Make sure the printer is turned off. Plug the power cord into an electrical outlet.
|
 |
Turn on the printer.
|
To confirm that the Envelope Feeder is installed correctly, print a status sheet. If the feeder is not listed on the status sheet, try reinstalling it.

[Top]
Removing
 |
Note:
|
 | -
When replacing the Imaging Cartridge or clearing a paper jam, make sure to temporarily remove the Envelope Feeder before opening cover A.
|
 | -
Always have either the Envelope Feeder or the MP tray installed. If neither of them are installed, the message Set MP Tray appears on the control panel.
|
To remove the Envelope Feeder, follow the instructions below.
Before removing
 |
Turn off the printer.
|
 |
Unplug the printer's power cord from the electrical outlet.
|
 |
Remove all interface cables from the interface connectors.
|
Removing
 |
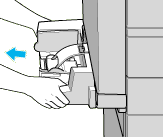
Slightly lift the Envelope Feeder and pull it out toward you. The Envelope Feeder does not detach easily; use sufficient force to pull it away from the printer.
|

 |
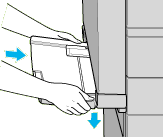
Push the MP tray straight into the printer until it clicks firmly into place.
|

After removing
 |
Reconnect any interface cables you removed.
|
 |
Make sure the printer is turned off. Plug the power cord into the printer, then into an electrical outlet.
|
 |
Turn on the printer.
|

[Top]
| Version 1.00E, Copyright © 2002, SEIKO EPSON CORPORATION |
Installing
Removing