|

User's Guide
|
|
Maintenance and Transportation
Attaching the Manual Cutter Unit
 Removing the Manual Cutter Unit
To attach the manual cutter unit, follow the steps below.
 |
Note:
|
 | |
A manual cutter unit has either two or three holes on each side. The illustration used here is a manual cutter unit with three holes. The instructions are the same, except as noted.
|
|
 |
Make sure that the printer is turned off.
|
 |
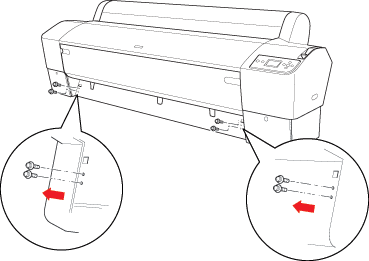
Using the screwdriver, loosen the four screws (silver ones) on the platen and then remove them.
|
 |  |
Note:
|
 |  | |
Do not loosen the black screws.
|
|

 |
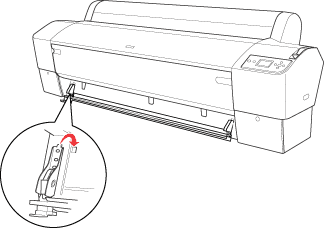
Hold the cutter unit, and hook its left side to the left square hole on the platen.
|

 |
Similarly, hook the other side to the right square hole on the platen.
|
 |
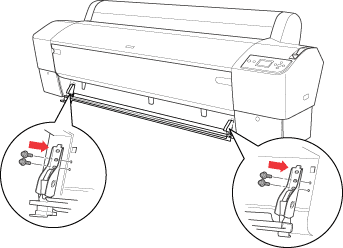
Secure the cutter unit with the four screws you removed in step 2. Use the second and third holes from the top.
|

 |  |
Note:
|
 |  | -
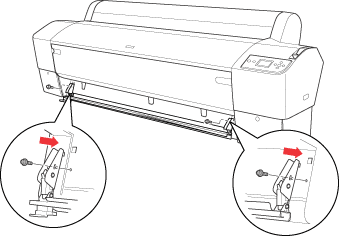
If your manual cutter unit has only two holes on each side, use the lower hole to secure the cutter unit with the screw. Keep the other two screws and do not lose them.
|
|

 |  | -
If you are not using the cutter blade unit, fully slide it to the left so that it will not damage your print data.
|
|
 |  | -
See the Manual Paper Cutter Unit manual shipped with your Manual Paper Cutter Unit for "Using the Manual Cutter Unit".
|
|
Removing the Manual Cutter Unit
Remove the manual cutter unit when you transport the printer.
 |
Using the screw driver, loosen the screws on the platen.
|
 |
Unhook and remove the cutter from the printer.
|
 |
Secure the four screws you removed on the platen.
|

[Top]
| Version NPD1450-00, Copyright © 2005, SEIKO EPSON CORPORATION |
Removing the Manual Cutter Unit