|

User's Guide
|
|
Maintenance and Transportation
Replacing the Paper Cutter
When the paper cutter does not cut cleanly, it may be blunt and require replacement.
 |
Warning:
|
 | |
Be careful not to cut yourself while replacing the paper cutter.
|
|
To check the product code of the Auto Cutter Spare Blade, see Consumable Products.
To replace the paper cutter, follow the steps below.
 |
Make sure the printer is on.
|
 |
Press the Menu  button to enter the Menu mode. button to enter the Menu mode.
|
 |
Press the Paper Feed  button or Paper Feed button or Paper Feed  button to display MAINTENANCE, and then press the Menu button to display MAINTENANCE, and then press the Menu  button. button.
|
 |
Press the Paper Feed  button or Paper Feed button or Paper Feed  button to display CUTTER REPLACEMENT. button to display CUTTER REPLACEMENT.
|
 |
Press the Menu  button. EXECUTE is displayed on the LCD panel, then press the Enter button. EXECUTE is displayed on the LCD panel, then press the Enter  button. button.
|
 |
Caution:
|
 | |
Never move the paper cutter holder by hand. Otherwise, damage to your printer may occur.
|
|
 |
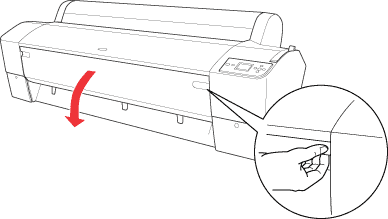
When the paper cutter holder stops at the replacement position, OPEN FRONT COVER TO SEE CUTTER REPLACEMENT LABEL appears. Open the front cover.
|
 |
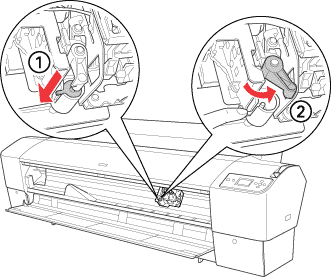
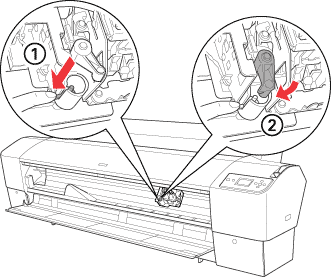
When SEE LABEL TO REPLACE CUTTER appears on the LCD panel, push in the side pin while turning the paper cutter cover to the right to open the casing.
|
 |  |
Note:
|
 |  | |
Do not touch the circuit board attached to the print head when replacing the cutter blade.
|
|
 |
Slowly take your finger off the side pin. The paper cutter raises so it can be removed.
|
 |  |
Note:
|
 |  | |
Be careful not to let the cutter or the spring coil pop out of the casing.
|
|
 |
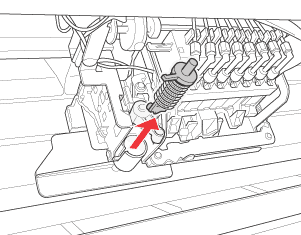
Carefully remove the old cutter from the printer.
|
 |
Remove the new paper cutter from its package.
|
 |
Make sure the spring coil is inside the cutter holder and if necessary, reinstall the coil.
|
 |
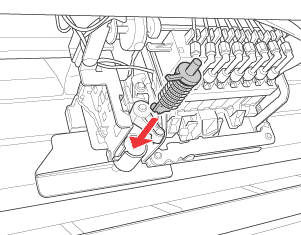
Fully insert the new cutter into the paper cutter holder in the direction as shown below.
|
 |
Push in the side pin while turning the paper cutter cover to the left to close the casing.
|
 |
Make sure that CLOSE FRONT COVER is displayed, then close the front cover. The cutter holder moves to the home (far right) position.
|
 |
Wait until READY appears on the LCD panel. Paper cutter replacement is complete.
|

[Top]
| Version NPD1450-00, Copyright © 2005, SEIKO EPSON CORPORATION |