|

Reference Guide
|
|
Various Printing Options
Printing on Roll Paper
 Handling roll paper
 Printing on roll paper
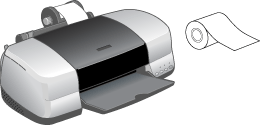
When printing on roll paper, you can print panoramic photographs or print documents continuously.
 |
Note:
|
 | |
This feature is not available with Mac OS X.
|
|
Handling roll paper
Refer to the section below for loading roll paper.

[Top]
Printing on roll paper
You can change the margins for roll paper with the printer driver settings. Refer to the section below to print without margins on either side of your printout.
 Borderless Printing
In this section, you will learn the procedure to print with margin on both sides of your printout.
For Windows
 |
Access the printer driver.
|
 |
Select Roll as the Source setting under Paper Options on the Main menu.
|

 |
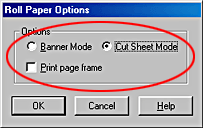
Make appropriate Options settings in the Roll Paper Options dialog box.
|
Select Cut Sheet Mode to print standard-sized data. Select Banner Mode to print longer data.
 |
Click OK to return to the Main menu.
|
 |
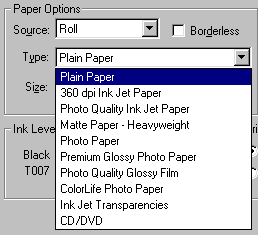
Select the desired Type setting under Paper Options on the Main menu.
|
 |
Select the desired Size setting under Paper Options on the Main menu.
|
 |
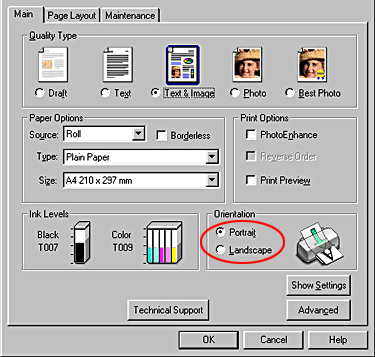
Select Portrait (tall) or Landscape (wide) under Orientation on the Main menu to change the orientation of your printout.
|
 |
Click OK to close the driver setting dialog box.
|
 |
Print your data.
|
 |
When printing is finished, press the  roll paper button once to print a cutting guideline about 14 mm from the bottom of the print data. roll paper button once to print a cutting guideline about 14 mm from the bottom of the print data.
|
 |
To print the next document, press the  roll paper button to feed the paper back to the printing position. roll paper button to feed the paper back to the printing position.
|
The above steps ensure that the space between pages is about 35 mm. If you do not need this space, skip pressing the  roll paper button in step 10 and start printing the next document.
For Macintosh
 |
Access the printer driver.
|
 |
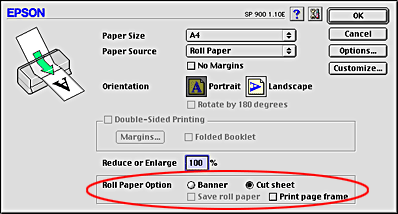
Select the desired Paper Size setting in the Page Setup dialog box.
|
 |
Select Roll Paper as the Paper Source setting in the Page Setup dialog box.
|

 |
Select Portrait (tall) or Landscape (wide) in the Page Setup dialog box to change the orientation of your printout.
|
 |
Make appropriate Roll Paper Option settings at the bottom of the Page Setup dialog box.
|
Select Cut Sheet Mode to print standard-sized data. Select Banner Mode to print longer data.
 |
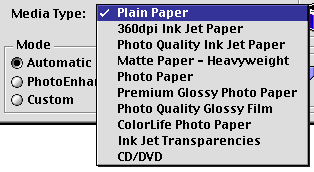
Select the desired Media Type setting in the Print dialog box.
|
 |
Click OK to close the driver setting dialog.
|
 |
Print your data.
|
 |
When printing is finished, press the  roll paper button once to print a cutting guideline about 14 mm from the bottom of the print data. roll paper button once to print a cutting guideline about 14 mm from the bottom of the print data.
|
 |
To print the next document, press the  roll paper button to feed the paper back to the printing position. roll paper button to feed the paper back to the printing position.
|
The above steps ensure that the space between pages is about 35 mm. If you do not need this space, skip pressing the  roll paper button in step 9 and start printing the next document.

[Top]
| Version 1.00E, Copyright © 2002, SEIKO EPSON CORPORATION |
Handling roll paper
Printing on roll paper
Borderless Printing
roll paper button in step 10 and start printing the next document.
roll paper button in step 9 and start printing the next document.