|
Close
Loading Roll Paper
Follow the procedure described below to install the roll paper holders and load the roll paper.
 |
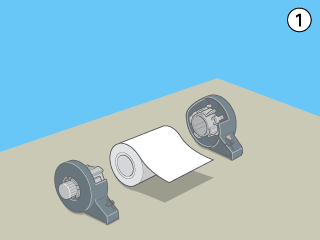
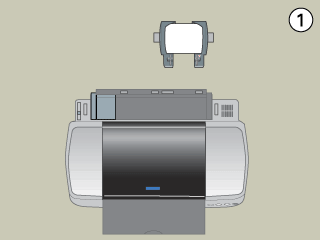
Attach the roll paper holders to the roll paper.
|
 |  |
Note:
|
| | |
Remove the transparent sheet after putting together the roll and the holders.
|
|
 |
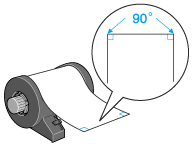
Using a triangle, check that the end of the roll is cut perpendicularly to the edges, as shown.
|
|  |
Caution:
|
| | |
Always use a triangle or other tool to ensure that the end of the roll is cut perpendicularly. A diagonal cut may cause paper feed problems.
|
|
 |
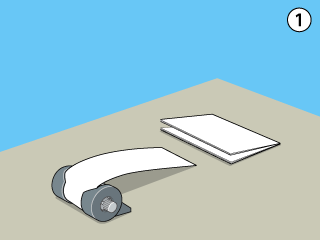
To flatten the roll paper, place it printable side up between the pages of the instruction booklet packaged with the roll paper, to protect it. Then, roll the booklet in the opposite direction to the paper's curl.
|
 |
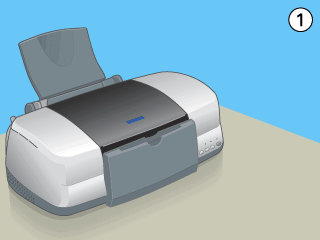
Remove the paper support, lower the output tray, and then turn on the printer.
|
 |
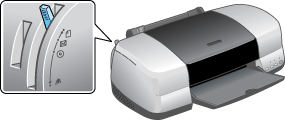
Make sure that the adjust lever is set to the  position. position.
|
 |
Insert the roll paper holder adapter into the slot at the rear of the printer, and then attach the roll paper holders to the adapter.
|
 |
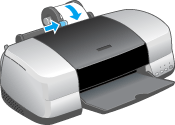
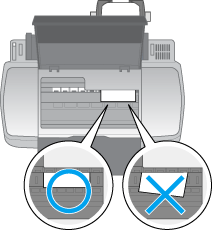
Gently insert the end of the paper into the printers as far as it will go, flush with the right edge guide. Slide the left edge guide against the left edge of the printer.
|
 |
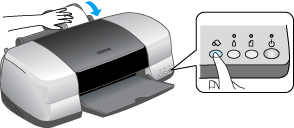
To load the paper correctly, you must hold the paper in place with your hand while you press the  roll paper button. The paper will feed into the printer. roll paper button. The paper will feed into the printer.
|
 |
Open the printer cover and make sure that the paper is feeding correctly. If it is not straight, press the roll paper button for at least three seconds to eject the paper. The maintenance light comes on. Press the roll paper button to clear the error, then feed the paper again.
|
The roll paper is now loaded. Next, set up the printer software and try printing. For details on setting up the printer software, refer to "Printing on Roll Paper".

[Top]
Close
|