 Using the printer driver with Windows 7, Vista, XP, and 2000
 Printer driver settings overview
Printer Software
Using the printer driver with Windows 7, Vista, XP, and 2000
Printer driver settings overview
You can access the printer driver from your Windows applications or from the Start menu.
See Changing the printer driver settings to check and change printer driver settings.
| Note: |
|
Follow these steps to access the printer driver from a Windows application:
 | Select Print Setup or Print from the File menu of your application software. In the Print or Print Setup dialog box displayed, make sure that your printer is selected in the Name drop-down list. |

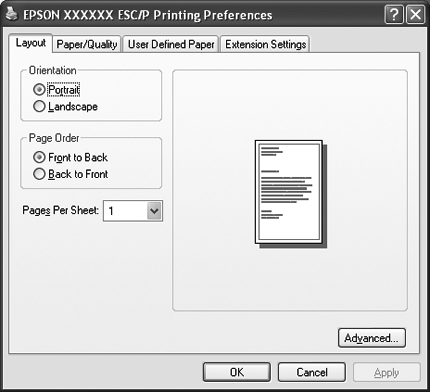
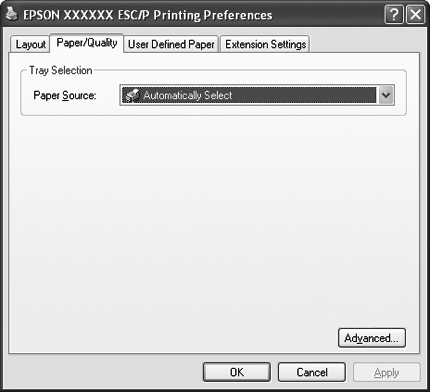
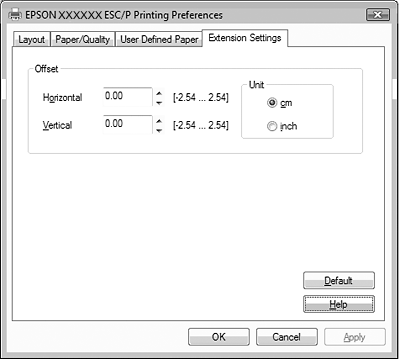
 | Click Printer, Setup, Properties, or Options. (The button you click depends on your application and you may need to click a combination of these buttons.) The Document Properties window appears, and you see the Layout, Paper/Quality, User Defined Paper and Extension Settings menus. These menus contain the printer driver settings. |

 | To view a menu, click the corresponding tab at the top of the window. See Changing the printer driver settings to change the settings. |

Follow these steps to access the printer driver from the Start menu:
 |
For Windows 7: Click Start, and click Devices and Printers. |
For Windows Vista:
Click Start, click Control Panel, click Hardware and Sound, and then click Printers.
For Windows XP Professional edition:
Click Start, and click Printers and Faxes.
For Windows XP Home edition:
Click Start, click Control Panel first, and then click Printers and Faxes.
For Windows 2000:
Click Start, point to Settings, and then select Printers.
 | Right-click your printer icon, and click Printing Preferences. The screen displays the Document Properties window, which contains the Layout, Paper/Quality, User Defined Paper and Extension Settings menus. These menus display the printer driver settings. |

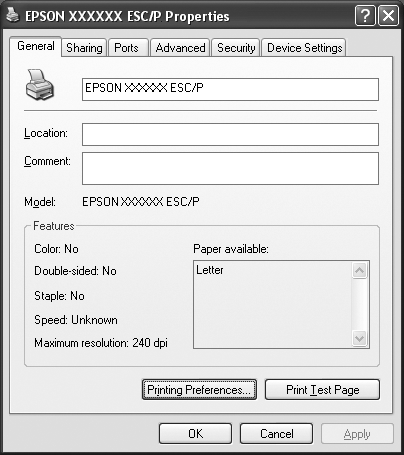
When you click Properties (Windows Vista, XP, and 2000) or Printer properties (Windows 7) in the menu displayed by right-clicking the printer icon, the Properties window appears, which includes menus used to make the printer driver settings.
| Note: |
|

 | To view a menu, click the corresponding tab at the top of the window. See Printer driver settings overview for information on how to change the settings. |
Your printer driver has four menus from which you can change the printer driver settings; Layout, Paper/Quality, User Defined Paper, and Extension Settings. You can also change settings on the Utility menu in the printer software. For an overview of the available settings, see Printer driver settings overview. If you are using Windows XP or 2000, you can also view online help by right-clicking items in the driver and selecting What's this?.
Click the Help button on the Printer Driver screen.

When you finish making your printer driver settings, click OK to apply the settings, or click Cancel to cancel your changes.
Once you have checked your printer driver settings and changed them if necessary, you are ready to print.
The following tables show the Windows printer driver settings. Note that not every setting is available in all versions of Windows. For more details, see Help for the printer driver.
|
Settings |
Explanations |
|
Paper Size |
Select the size of the paper you want to use. If you do not see your paper size, use the scroll bar to scroll through the list. If your paper size is not included in the list, see Definition of custom paper size for instructions. |
|
Orientation |
Select Portrait or Landscape. |
|
Paper Source |
Select the paper source you want to use. |
|
Resolution/ Graphics Resolution |
Select the printing resolution you want. The higher the resolution you select, the more detailed your printout will be; however, increasing the resolution slows printing. |
|
Print Quality |
Select a print quality option from the Print quality list. |
|
Halftoning |
Select the type of halftoning to use when printing graphics. To let the printer determine the best halftone quality, use Auto Select. |
|
Printer Font Setting |
Select a character table to use. You can select one of two character table, Standard and None (Bit Image printing). When Standard is selected, the printer uses the device fonts. When None is selected, the printer uses bit map images instead of the device fonts. For details on the fonts which are included in each table, see Electronic. |
|
Paper Order* |
Select whether to print from front to back or back to front. |
|
Pages Per Sheet* |
Select the number of pages that you want to print onto a single page. |
|
Copy Count* |
When you select more than one in the Number of copies box, this check box appears and you can select whether to collate the pages of the copies. |
|
Advanced Printing Features* |
Select Enable or Disable for the metafile Spooling. |
|
Print Optimizations* |
Select Disable when the printer uses the device fonts and select Enable when the printer uses the device fonts. |
|
Top Margin Priority |
Select which setting for the print-start position is to be used; driver setting or printer setting. For more details, see Help for the printer driver. |
|
Packet Mode |
Ordinarily, there is no need to change this setting. If you change the printer's Packet Mode settings, change this setting to match. If the printer and printer driver settings are different, you may not be able to print correctly. For more details, see Help for the printer driver. |
|
User Defined Paper |
If your paper is not included in the Paper Size drop-down list, you can add the size to the list. For more details, see Help for the printer driver. |
|
Offset |
This setting allows you to offset the image on the page. That is, you can adjust the position of the printed image. If the offset you specify moves a portion of the image out of the printer's printable area, that portion will not be printed. |
| * For details, see Windows help. |
If your paper is not included in the Paper Size drop-down list, you can add the size to the list.
 |
For Windows 7: Click Start, and click Devices and Printers. |
For Windows Vista:
Click Start, click Control Panel, click Hardware and Sound, and then click Printers.
For Windows XP Professional x64 Edition:
Click Start, and click Printers and Faxes.
For Windows XP Professional:
Click Start, and click Printers and Faxes.
For Windows XP Home Edition, click Start, and click Control Panel, then click Printers and Faxes.
For Windows 2000:
Click Start, point to Settings, and click Printers.
 | Right click your printer icon, and click Printing Preferences. |
 | Select the User Defined Paper menu. |
 | Enter the paper size in the Paper Size fields. |
 | Click Apply and then click OK. |
| Note: |
|
|
Settings |
Explanations |
|
EPSON Status Monitor 3 |
You can access EPSON Status Monitor 3 when you click this button. To monitor the printer, make sure the Monitor the printing status check box is selected. |
|
Monitoring Preferences |
Click this button to open the Monitoring Preferences dialog box where you can make settings for EPSON Status Monitor 3. See Setting up EPSON Status Monitor 3 for more information. |
 Previous |
 Next |