|

Online Reference Guide
|
|
Setting up the Scanner Server PC
Installing the TCP/IP Protocol
 Installing the TCP/IP protocol (Windows Millennium Edition, 98, and 95)
Installing the TCP/IP protocol (Windows 2000)
Installing the TCP/IP protocol (Windows NT 4.0)
Installing the TCP/IP protocol (Windows Millennium Edition, 98, and 95)
To install the TCP/IP protocol on the scanner server PC and client PCs on the network, follow the instructions below.
 |
Click the Start button on the Windows task bar and point to Settings, then select Control Panel.
|
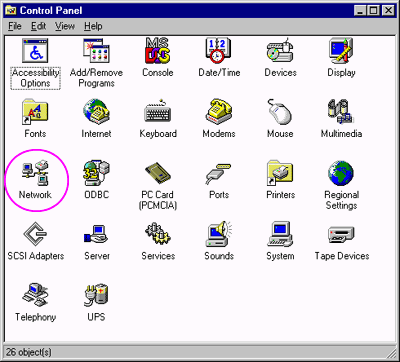
The Control Panel window appears.
 |
Double-click the Network icon in Control Panel.
|
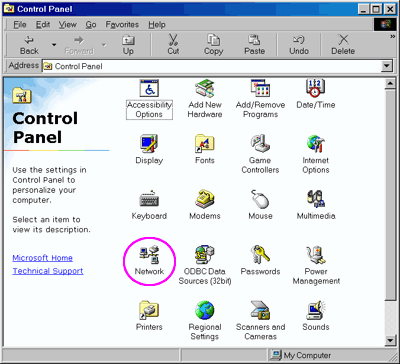
The Network dialog box appears.
 |
Click the Configuration tab.
|
 |
Check that TCP/IP protocol is included in the The following network components are installed: list box.
|
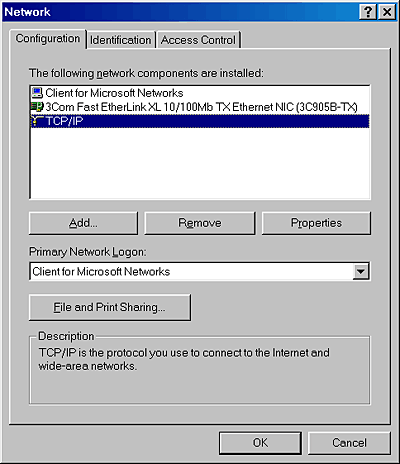
If the TCP/IP protocol appears in the list box, proceed to the following section Setting the Scanner Server PC's IP Address. Otherwise, proceed to step 5.
 |
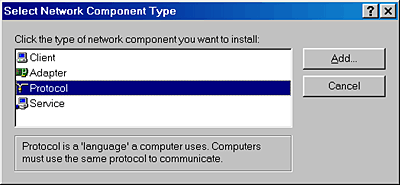
Click Add.
|
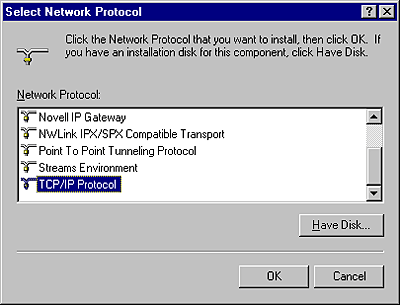
The Select Network Component Type dialog box appears.
 |
Select Protocol from the list and click Add.
|
 |
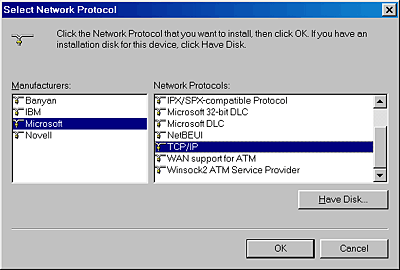
Select Microsoft from Manufacturers box and TCP/IP from Network Protocols, and click OK.
|

[Top]
Installing the TCP/IP protocol (Windows 2000)
To install the TCP/IP protocol on the scanner server PC and client PCs on the network, follow the instructions below.
|
|
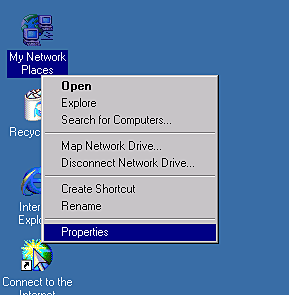
Right-click the My Network Places icon and select Properties.
|
|
|
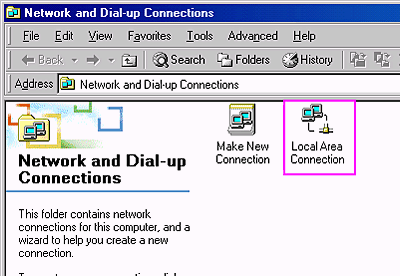
Double-click Local Area Connection.
|
|
|
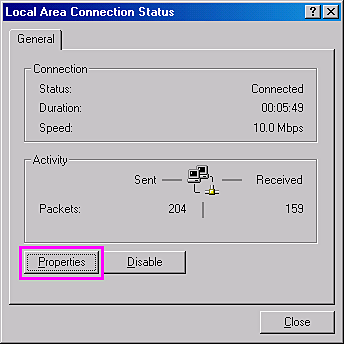
Click Properties.
|
|
|
Check that Internet Protocol (TCP/IP) is included in the Local Area Connection Properties list box.
|

If the Internet Protocol (TCP/IP) appears in the list box, proceed to Setting the Scanner Server PC's IP Address. Otherwise, proceed to step 5.
|
|
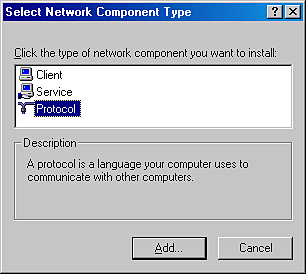
Click Install. The Select Network Component Type box appears.
|
|
|
Select Protocol from the list and click Add.
|
|
|
Select Internet Protocol (TCP/IP) in the Network Protocol list box and click OK.
|
[Top]
Installing the TCP/IP protocol (Windows NT 4.0)
To install the TCP/IP protocol on the scanner server PC and client PCs on the network, follow the instructions below.
|
|
Click the Start button on the Windows task bar and point to Settings, then select Control Panel.
|
The Control Panel window appears.
|
|
Double-click the Network icon in Control Panel.
|
|
|
Click the Protocols tab.
|
|
|
Check that TCP/IP Protocol is included in the Network Protocols: list box.
|
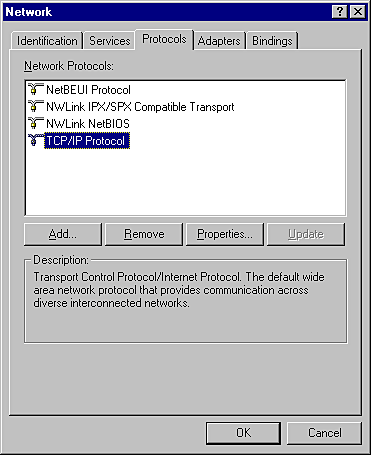
If TCP/IP Protocol already appears in the list box, proceed to the section Setting the Scanner Server PC's IP Address. Otherwise, proceed to step 5.
|
|
Click Add.
|
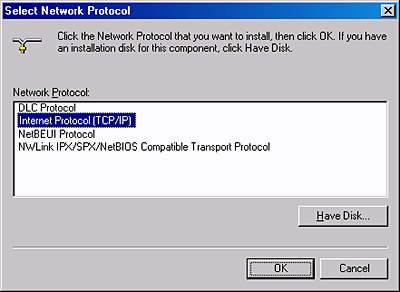
The Select Network Protocol dialog box appears.
|
|
Select TCP/IP Protocol from the list and click OK.
|
[Top]
| Version 1.00E, Copyright © 2001, SEIKO EPSON CORPORATION |


