|

Reference Guide
|
|
How to / Installing and Removing Options
Large Capacity Paper Unit
 Installing
Installing
To install the Large Capacity Paper Unit follow the instructions below.
 |
Note:
|
 |
It is best to install the Large Capacity Paper Unit when you first set up the printer.
|
Before installing
 |
Turn off the printer.
|
 |
Unplug the printer's power cord from the electrical outlet.
|
 |
Remove all interface cables from the interface connectors.
|
 |
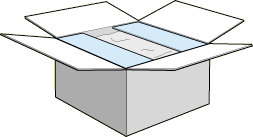
Open the box with the Large Capacity Paper Unit. Cut the tape that holds the cardboard inserts circled in the illustration below.
|
 |
Remove the inserts and all other protective materials inside the box. Make sure the contents of the package match the items on the included packing list.
|
 |  |
Note:
|
 |  |
Remove the packaging materials from the unit and store them for future use.
|
Installing
 |
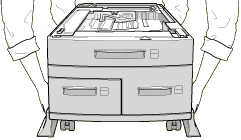
Carefully lift the Large Capacity Paper Unit out of the box with two or more people, and place it near the printer.
|
 |
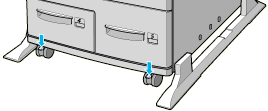
Lock the casters at the bottom of the unit by pushing their levers down.
|
 |
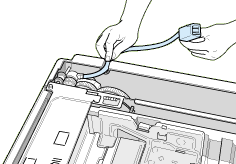
At the back of the unit, push the power cable into the slot.
|
 |
Carefully lift the printer with two or more people.
|
 |  |
Caution:
|
 |  | -
The printer weighs about 50 kg (110 lb); always lift it with two or more people.
|
 |  | -
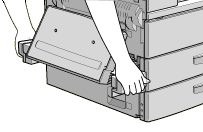
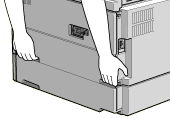
Grasp the printer at the locations indicated below.
|
|
|
|
|
left side
|
right side
|
 |
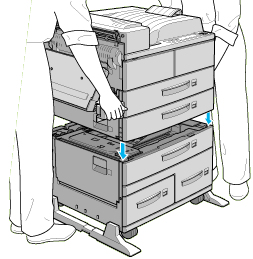
Align each of the printer's corners with those of the unit, then lower the printer until it rests securely on the unit.
|
 |
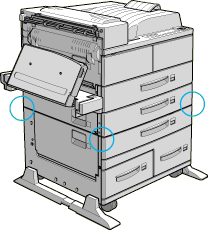
Make sure all corners of the printer fit firmly onto the unit.
|
After installing
 |
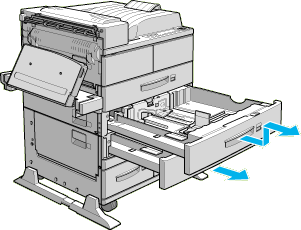
Pull out lower cassette 2 as far as it will go. Then lift it up slightly, and completely remove it.
|
 |
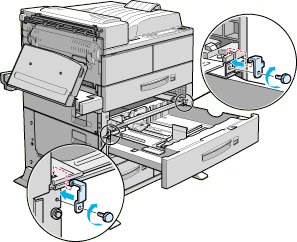
Pull out lower cassette 3. Take out and open the included package of metal fittings and screws.
|
 |
Attach the two metal fittings with the screws as shown below. Note that the shapes of the two fittings are different.
|
 |
Push cassette 3 back into the unit, then replace cassette 2.
|
 |
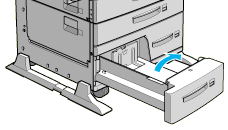
Pull out cassette 4 and remove the protective materials inside.
|
 |
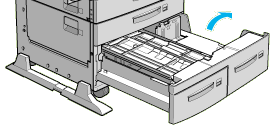
Pull out lower cassette 5 and remove the protective materials inside.
|
 |
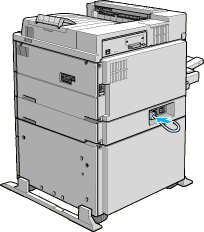
Plug the cable from the Large Capacity Paper Unit into the appropriate connector at the back of the printer.
|
 |
Reconnect any interface cables you removed.
|
 |
Make sure the printer is turned off. Plug its power cord into an electrical outlet.
|
 |
Turn on the printer.
|
Make sure the cables connecting the options to the printer are connected securely.

[Top]
| Version 1.00E, Copyright © 2002, SEIKO EPSON CORPORATION |
Installing