|

Network Guide
|
|
How To / Installing the Printer Driver
OS/2
 LPR printing
 NetBEUI printing
This section explains how to configure and use the print server with an IBM OS/2 System, which includes OS/2 Warp 3 and 4 (OS/2 Warp Connect and OS/2 Warp Server).
LPR printing
 |
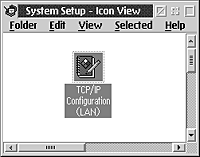
Double-click the OS/2 system folder, then the System Setup folder, and then double-click the TCP/IP Configuration icon.
|
 |
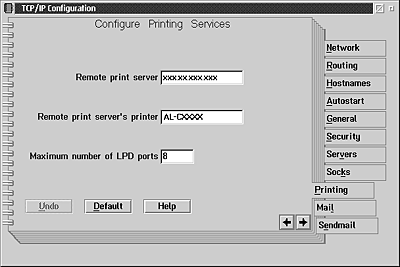
Click the Printing tab.
|
 |
Enter the IP address of the print server in the Remote print server box and the name of the remote print server's printer in the second text box. Enter a value of 1 or greater in the Maximum number of LPD ports box.
|
 |
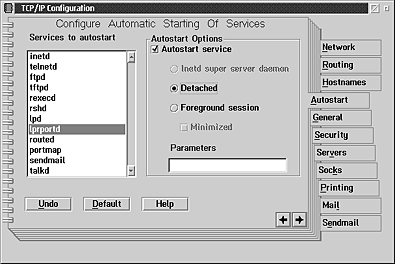
Click the Autostart tab.
|
 |
Select lprportd from the Services to autostart list. Check the Autostart service check box, and select the Detached radio button.
|
 |
Save the settings you made in the TCP/IP Configuration dialog box, and restart your computer.
|
Setting up your printer
 |
Double-click Template from the OS/2 System folder.
|
 |
Drag Printer to your desktop to create a printer.
|
 |
Double-click the Printer icon.
|
 |
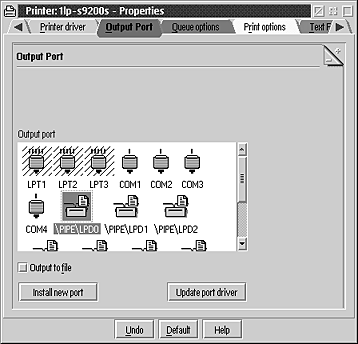
Select Properties from the control menu, then click the Output Port tab.
|
 |
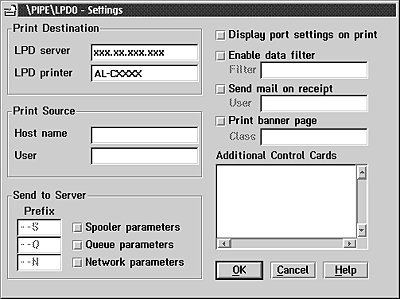
From the Output Port list box, select one from \PIPE\LPD0 to \PIPE\LPDn (where n is the maximum number of LPD ports). The \PIPE\LPD -Settings dialog box will appear.
|
 |
Enter the IP address of the print server in the LPD server box. Enter the printer name set in step 2 in the LPD printer box.
|
 |
Close the Printer icon to exit printer configuration.
|

[Top]
NetBEUI printing
 |
Be sure that IBM OS/2 NetBIOS is installed on your computer.
|
 |
To create a printer, double-click the target printer icon to open the Properties dialog box. Then click the Output Port tab.
|
 |
Select the port.
|
 |
Connect to the printer from the command line.
|
Example: Connect the printer to LPT1.
net use LPT1: \\NetBIOS name of print server\ Device name of print server
 |
Note:
|
 | |
To change the NetBIOS name and device name, use EpsonNet WinAssist or WebAssist running on Windows Me/98/95/2000/NT.
|
|

[Top]
| Version NPD0133-03, Copyright © 2003, SEIKO EPSON CORPORATION |
LPR printing
NetBEUI printing