|

Reference Guide
|
|
How To / Clean and Transport the Printer
Cleaning the Printer
 Cleaning the printer case
 Cleaning the paper roller
The printer needs only minimal cleaning. If you notice a decline in print quality, clean the inside of the printer as described in this section.
You should also clean the paper cassette and the printer cover every few months. These procedures are described later in this section.
Cleaning the printer case
If the printer's outer case is dirty or dusty, turn off the printer and clean it with a soft, clean cloth dampened with a mild detergent.
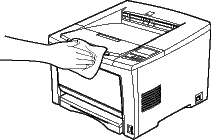
 |
Caution:
|
 |
Never use alcohol or thinner to clean the printer cover; these chemicals can damage the components and the case. Be careful not to get water on the printer mechanism or any electronic components.
|

[Top]
Cleaning the paper roller
Paper is sometimes dusted with a powder to keep the image on one sheet from bleeding over to the back of the sheet stacked on top of it. When feeding such paper from the MP tray, the dust tends to get onto the paper roller and eventually causes misfeeds to occur. Use the following procedure to clean the paper roller when you start having feed problems from the MP tray.
Follow these steps to clean the paper roller:
 |
Make sure the printer is turned off.
|
 |
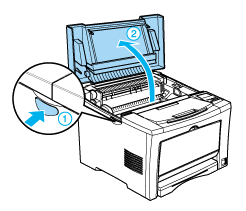
Open the printer cover by pressing the latch.
|
 |  |
Warning:
|
 |  |
Be careful not to touch the fuser, which is marked CAUTION! HIGH TEMPERATURE, or the surrounding areas. If the printer has been in use, the fuser and the surrounding areas may be very hot.
|
 |
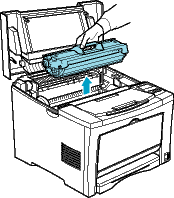
Remove the imaging cartridge from the printer.
|
 |  |
Caution:
|
 |  |
Do not touch the transfer roller to avoid the degradation of the print quality.
|
 |
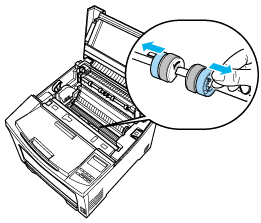
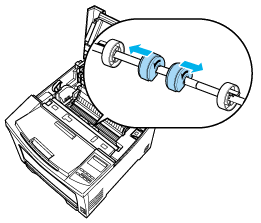
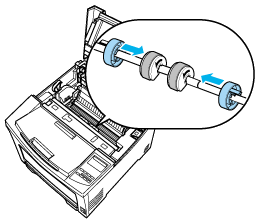
Grip the tabs on the ring located on the both sides of the paper rollers, and move them to the outside as shown in the illustration below.
|
 |
Move the paper rollers slightly to the outside and then detach them from the shaft.
|
 |
Gently wipe the rubber part of the paper roller with a well-wrung cloth.
|
The printer has two paper rollers.
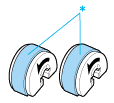
* Wipe the rubber part carefully.
 |
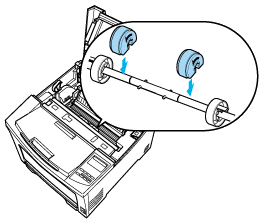
Reattach the paper rollers onto the shaft, making sure that the arrow on the paper roller is on the right as shown in the illustration below.
|
 |
Move the paper rollers toward the center of the shaft, making sure that the pins on the shaft fit into the grooves on each roller.
|
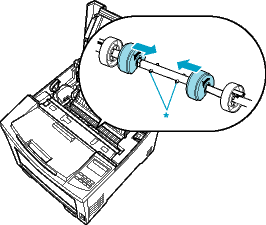
* pins
 |
Move the rings back into position so they secure the paper rollers in place.
|
 |
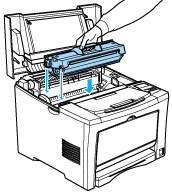
Reinstall the imaging cartridge.
|
 |
Close the printer cover until it clicks shut.
|

[Top]
| Version 1.00E, Copyright © 2002, SEIKO EPSON CORPORATION |
Cleaning the printer case
Cleaning the paper roller