|

Reference Guide
|
|
How to / Install and Remove Options
Envelope Feeder
 Installing
 Removing
Installing
To install the Envelope Feeder follow the instructions below.
Before Installing
 |
Turn off the printer.
|
 |
Unplug the printer's power cord from the electrical outlet.
|
 |
Unpack the Envelope Feeder and remove all protective materials.
|
Installing
 |
Open the MP Tray.
|
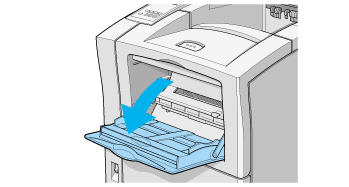
 |
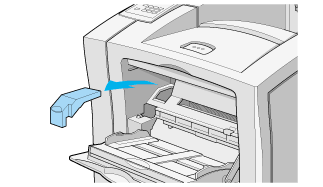
Remove the small cap from the inner left side of the MP tray as shown below.
|
 |  |
Note:
|
 |  |
Take care not to lose the small cap, as you need to replace it when you remove the Envelope Feeder.
|
 |
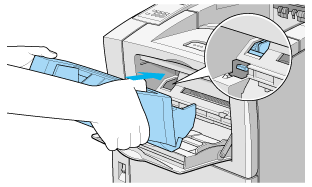
Hold the Envelope Feeder horizontally with both hands.
|
 |
Note the location of the interface plug on the Envelope Feeder and its counterpart on the printer. Make sure that the plug is inserted properly into the receptacle on the printer.
|
 |
Push it straight into position directly above the MP tray.
|
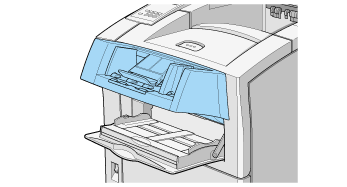
After installing
 |
Make sure the printer is turned off.
|
 |
Plug the printer's power cord into an electrical outlet
|
 |
Turn on the printer.
|

[Top]
Removing
To remove the Envelope Feeder, follow the instructions below.
Before removing
 |
Turn off the printer.
|
 |
Unplug the printer's power cord from the electrical outlet.
|
Removing
 |
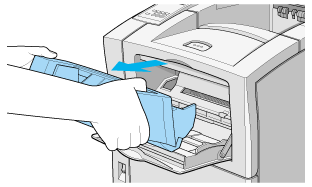
Grasp the Envelope Feeder with both hands.
|
 |
Lift the Envelope Feeder slightly and pull it out.
|
 |
Replace the small cover on the gears and electronic connector.
|
 |
Store the Envelope Feeder in its original carton until the next time you use it.
|

[Top]
| Version 1.00E, Copyright © 2001, SEIKO EPSON CORPORATION |
Installing
Removing