|

Reference Guide
|
|
How To / Installing and Removing Options
Face-up Tray
 Installing the Face-up tray
Using the Face-up tray
Removing the Face-up tray
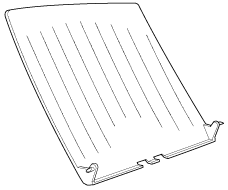
The printer normally outputs paper face-down on top of the printer. If you want face-up output, you can install the optional Face-up Tray (C12C813801). This tray gives you immediate viewing of your printed output and is recommended for printing on media that requires a straight-through paper path, such as labels and transparencies.
Installing the Face-up tray
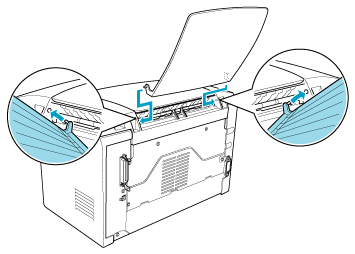
Follow the instructions below to attach the Face-up Tray to the printer:
 |
Turn off the printer.
|
 |
Attach the Face-up Tray by inserting the pegs into the holes on the printer one side at a time. Do not force both sides in at once.
|

[Top]
Using the Face-up tray
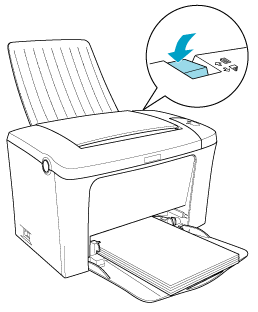
The printer is factory set for face-down output. After installing the Face-up tray, you can switch the paper path from face-down to face-up by pushing the paper path selector down. The paper path selector is located on the right side of the printer, near the back.
[Top]
Removing the Face-up tray
|
|
Turn off the printer.
|
|
|
Remove the Face-up tray.
|
 |
Switch the paper path selector up.
|
[Top]
| Version 1.00E, Copyright © 2002, SEIKO EPSON CORPORATION |

