|

Reference Guide
|
|
How To / Paper Handling
Loading Paper
 MP tray and lower paper cassette
This section describes how to load paper into the MP tray and the lower cassette. If you use special media such as transparencies or envelopes, see also Printing on Special Media.
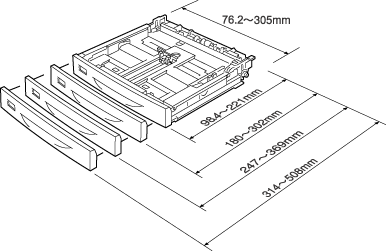
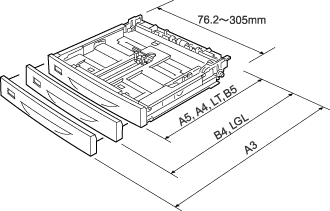
You can load various paper sizes by expanding the MP tray or lower cassette as shown in the illustration below.
|
|
|
|
for MP tray
|
for Standard lower cassette
|
 |
Note:
|
 | |
When loading 432 mm or longer size paper into the MP tray, remove the MP tray cover and let the bottom edge of the paper stick out.
|
|
MP tray and lower paper cassette
The MP tray is the most flexible paper source, accommodating various paper sizes and media types. See MP tray for details.
For information on the paper sizes and types supported by the lower paper cassette, see Lower paper cassette.
 |
Note:
|
 | |
MP tray can be set into the upper cassette slot only, and lower paper cassette can be set into the lower cassette slot only. Do not set into the different slot by force.
|
|
Follow these steps to load paper into the MP tray.
 |
Note:
|
 | |
The procedure for loading paper into the lower paper cassette is the same as that for the MP tray.
|
|
 |
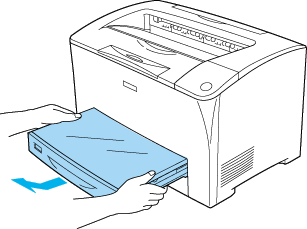
Pull out the MP tray.
|
 |
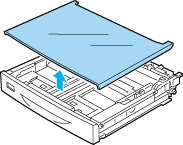
Remove the MP tray cover.
|
 |
Adjust the cassette size to accommodate the paper you are loading.
|
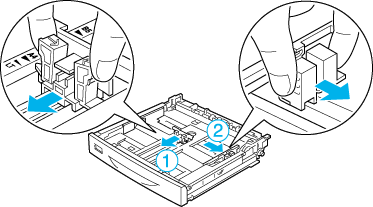
When loading A4, Letter (LT), B5, or A5 size paper
Slide the side paper guide outward while pinching the knob. Then, slide the end paper guide while pinching the knob, to accommodate the paper you are loading.
When loading A3, B4, LGL size paper
Unlock the cassette lock levers.
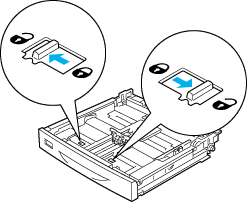
Expand the cassette to accommodate the paper you are loading, and lock the cassette lock levers.
 |  |
Note:
|
 |  | |
When loading A3 size paper, expand the cassette all the way out until the A3 arrow mark is aligned opposite with the arrow mark below the lock lever. When loading B4 or LGL size paper, expand the cassette until the B4/LG14 arrow mark is aligned opposite with the arrow mark below the lock lever.
|
|
* Do not hold the roller when expanding the cassette. Doing so may damage the cassette.
Slide the side paper guide outward while pinching the knob. Then, slide the end paper guide while pinching the knob, to accommodate the paper you are loading.
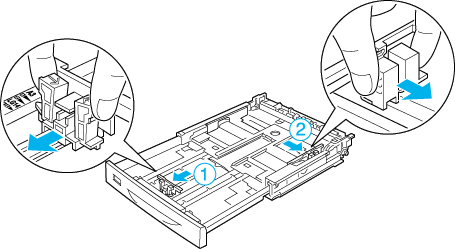
 |
Load a stack of the desired media on the center of the cassette with the printable surface facing up. Then slide the side paper guide while pinching the knob until it is against the right side of the stack to get a snug fit.
|
* Maximum capacity
 |
Set the cassette label into the label holder on the front of the cassette.
|
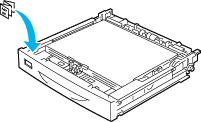
 |
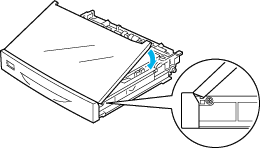
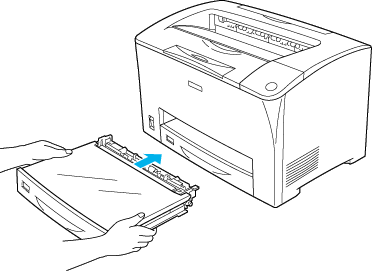
Replace the MP tray cover, making sure the front edge is flush and as far forward as possible. And reinsert the cassette in the printer.
|
 |  |
Note:
|
 |  | |
When loading paper that is 432 mm or longer, you do not have to reattach the MP tray cover.
|
|
 |
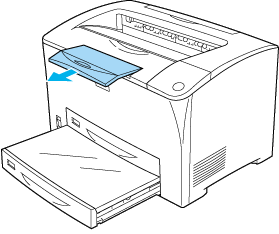
Extend the paper support to accommodate the size of the paper loaded in the lower paper cassette to prevent it from slipping off the printer.
|
When using the MP tray or the lower cassette, the following paper sizes are detected automatically.
|
Detected paper sizes:
|
A3, A4, A5, B4, B5, Letter (LT), Legal (LGL)
|
When loading paper sizes that are not detected automatically, be sure to use the MP tray. And make sure that the MP Tray Paper Size setting is set to the paper size that you are loading.
For Windows, access the printer driver, click the Optional Settings tab, and click Printer Settings. Then set the MP tray Paper Size.
For Macintosh, access the printer driver, open the Printer Setup dialog box, and click Printer Settings. Then set the MP tray Paper Size in the Printer Settings dialog box.

[Top]
| Version 1.10E, Copyright © 2003, SEIKO EPSON CORPORATION |
MP tray and lower paper cassette