|

Reference Guide
|
|
Using the Control Panel / Using Advanced Copy Modes
Using the Remove Shadows Mode
The Remove Shadows mode allows you to eliminate unwanted shadows from copies of documents that cannot be laid flat against the scanner glass. For example, you can use this feature to remove the shadows from the center and edges of a thick book, as shown below.
|
Center of Book
|
Edges of Book
|

|

|
 |
 Areas to be deleted Areas to be deleted
|
 |
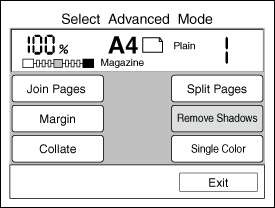
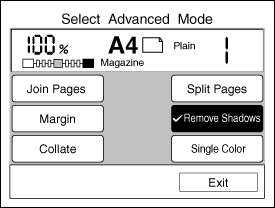
Press the Remove Shadows button on the Select Advanced Mode screen.
|
 |  |
Note:
|
 |  |
If no button is pressed for more than 1 minute when in Remove Shadows mode, any changes made are canceled and the Ready to Copy screen appears with the original settings preserved.
|
 |
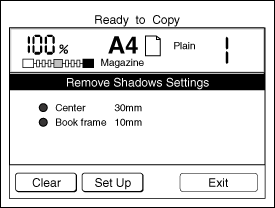
The following screen appears if Remove Shadow is already set. Press the Setup button and go on to the next step.
|
 |  |
Note:
|
 |  | -
Press the Clear button to clear the original setting.
|
 |  | -
Press the Exit button to exit this setting. The Ready to Copy screen appears.
|
 |
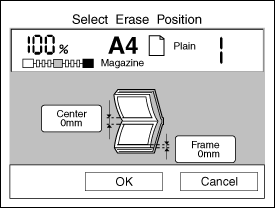
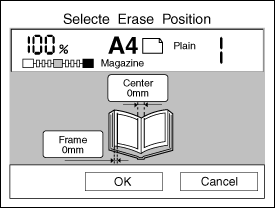
To set the width of the area to be removed, press the Center or Frame button on the Select Erase Position screen.
|
The appearance of this screen differs depending on whether the Paper setting specifies vertical or horizontal document placement on the document table. Make sure the Paper setting matches the actual document orientation on the document table.
|
Vertical Document Placement
|
|
|
|
Horizontal Document Placement
|
|
|
 |
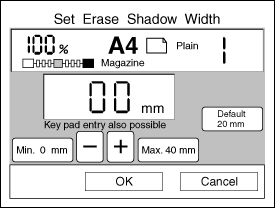
Specify a shadow width between 0 mm and 40 mm. Press the + or - button to increase or decrease the width in 1 mm increments, or enter a value using the numeric key pad.
|
 |
Press the OK button to return to the Select Erase Position screen. If necessary, select the other shadow area and specify the width as described above.
|
 |
Press the OK button to apply your settings and return to the Select Advanced Mode screen.
|

[Top]
| Version 1.00E, Copyright © 2002, SEIKO EPSON CORPORATION |