|

Reference Guide
|
|
Paper Handling
Loading Paper
 MP tray
 Standard lower cassette and optional paper cassette unit
 Output tray
This section describes how to load paper. If you use special media such as transparencies or envelopes, see also Printing on Special Media.
MP tray
The MP tray is the most flexible paper source, accommodating various paper sizes and media types. For information on the paper sizes and types supported by the MP tray, see Paper Sources.
Follow the steps below to load paper.
 |
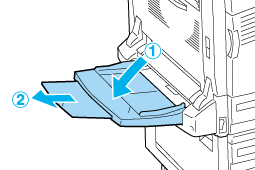
Open the MP tray, then pull out the expansion tray on the MP tray to accommodate the size of the media you want to load.
|
 |
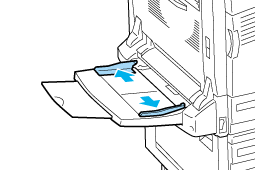
Slide the paper guides outward wider than the paper width.
|
 |
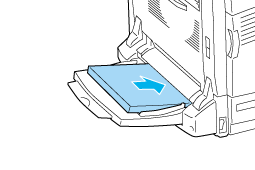
Load a stack of the desired media with the printable surface facing down, and gently push the paper until it stops.
|
 |  |
Caution:
|
 |  | -
Different sizes or types of paper cannot be loaded all together on the MP tray. Doing so may cause a paper jam.
|
|
 |  | -
Do not load a stack of paper that exceeds the upper limit line. It may cause a paper jam or printer breakdown.
|
|
 |
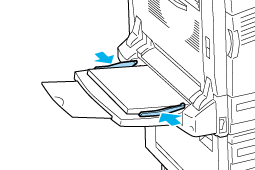
Slide the paper guides to fit the paper.
|
 |
Select the Paper Source and Paper Size settings that match the loaded media by using the printer driver or the printer's control panel.
|
 |  |
Note:
|
 |  | |
When loading paper with the MP tray, you need to specify the paper size as the printer does not detect the paper size automatically.
|
|
Loading Long-size paper
 |
Open the MP tray, then pull out the expansion tray on the MP tray to accommodate the size of the media you want to load.
|

 |
Slide the paper guides outward wider than the paper width.
|

 |
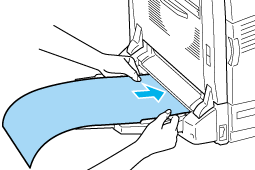
Load a stack of long-size paper with the printable surface facing down by holding the paper with both hands as shown below.
|
 |  |
Caution:
|
 |  | |
Do not curl the paper end when loading it. Feeding curled paper may cause the paper to jam or to be folded.
|
|
 |  |
Note:
|
 |  | |
When loading long-size paper on the MP tray, load one sheet at a time.
|
|
 |
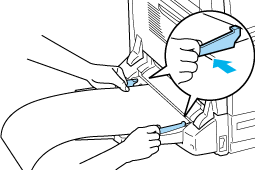
Slide the paper guides to fit the paper. Sliding either paper guide will also move the other guide.
|
 |
Select the Paper Source and Paper Size settings that match the loaded media by using the printer driver or the printer's control panel.
|

[Top]
Standard lower cassette and optional paper cassette unit
For information on the paper sizes and types supported by the standard lower cassette and optional paper cassette unit, see Paper Sources.
Follow the steps below to load paper.
 |
Note:
|
 | |
The following illustrations show the standard lower cassette.
|
|
 |
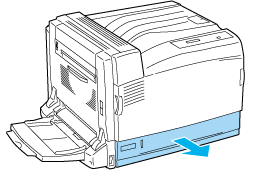
Pull out the standard lower cassette.
|
 |
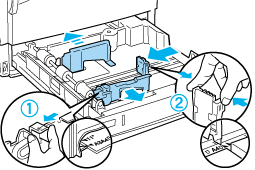
Slide the paper guides outward while pinching the knob. Then, slide the end paper guide while pinching its knob, to accommodate the paper you are loading.
|
 |
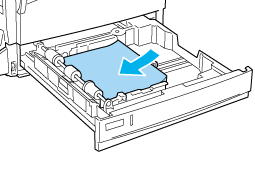
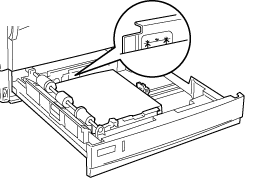
Load a stack of the desired media on the center of the cassette with the printable surface facing up.
|
 |  |
Note:
|
 |  | |
Up to 500 sheets of paper can be loaded.
|
|
 |
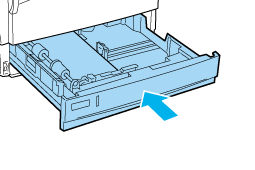
Reinsert the cassette into the printer.
|
 |
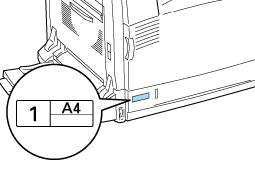
Affix the appropriate paper size label provided onto the front of the cassette.
|

[Top]
Output tray
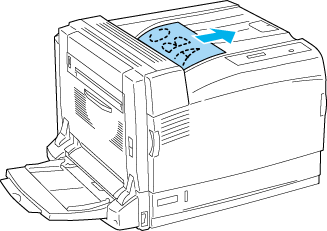
The output tray is located on the top of the printer. Since printouts are output face-down, this tray is also referred to as the face-down tray. This tray can hold up to 500 sheets.
 |
Note:
|
 | |
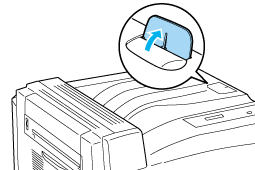
When you output the large size paper such as A3, raise the stopper to prevent your printouts from slipping off the printer.
|
|

[Top]
| Version NPD0750-00, Copyright © 2004, SEIKO EPSON CORPORATION |
MP tray
Standard lower cassette and optional paper cassette unit
Output tray