 |
 | Loading Paper |
|
 MP tray MP tray
Standard lower paper cassette and optional paper cassette unit
Output tray
This section describes how to load paper. If you use special media such as transparencies or envelopes, see also Printing on Special Media.
Follow the steps below to load paper.
 |
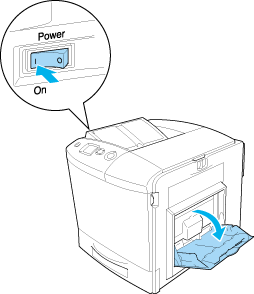
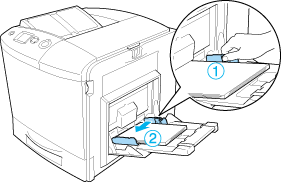
Turn the printer on. Press the latch on the MP tray and open the tray.
|
 |
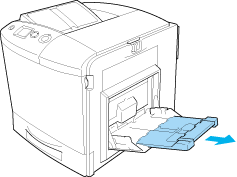
Pull out the expansion tray on the MP tray to accommodate the size of the paper you want to load.
|
|  |
Note: |
| |
|
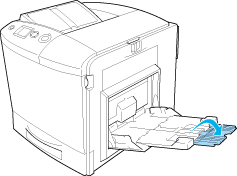
When you use A4, Letter or larger sizes of paper, unfold the expansion tray 2 by lifting it up.
|
|
 |
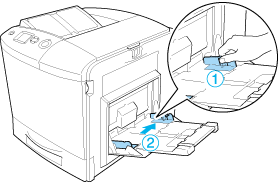
Pinch the knob and the paper guide together, then slide the right paper guide outward.
|
 |
Load a stack of the desired paper on the center of the tray. Make sure to load it with the printable surface down.
|
| |
Note: |
 |
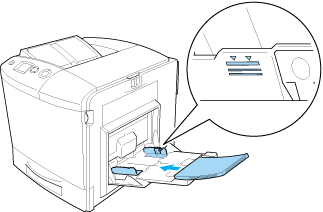
Pitch the knob and the paper guide together, then slide the side paper guide until it is against the right side of the stack to get a snug fit.
|
| |
Note: |
| |
|
After loading paper, set the MP Tray Size setting to match the loaded paper size on the control panel.
|
|
 Top Top
| Standard lower paper cassette and optional paper cassette unit |
Loading Paper
Follow the steps below to load paper. The illustrations show the standard lower paper cassette.
|
|
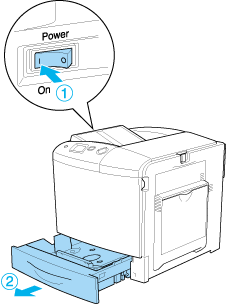
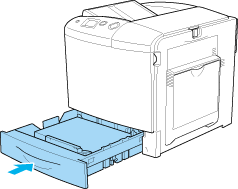
Turn the printer on and pull out the paper cassette.
|
|
|
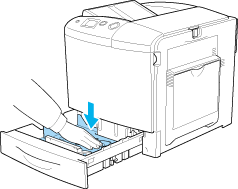
Push the tray in the paper cassette down.
|

|
|
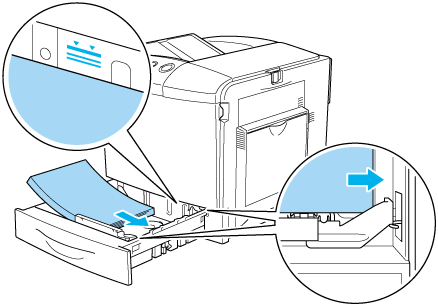
Load a stack of paper into the paper cassette. Make sure to load it with the printable surface up.
|
| |
Note: |
|
|
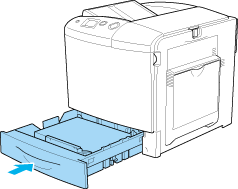
Reinsert the paper cassette.
|
| |
Note: |
| |
|
After loading paper, set the LC Size setting to match the loaded paper size on the control panel.
|
|
Changing the paper size
Follow the steps below to change the paper size loaded in the paper cassette.
|
|
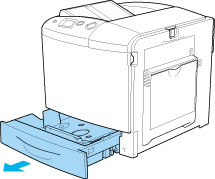
Pull out the paper cassette. If paper is loaded in the paper cassette, remove it.
|
|
|
Push the tray in the paper cassette down.
|
|
|
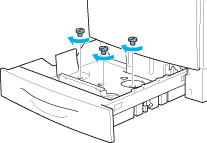
Remove the three screws securing the tray in the paper cassette.
|
|
|
Slide the three paper guides to fit the paper size that you want to use.
|
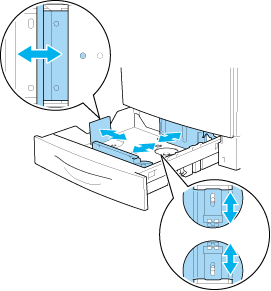
|
|
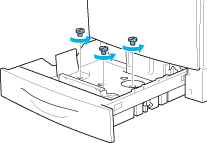
Secure the three paper guides with the three screws.
|
 |
Load the paper and reinsert the paper cassette.
|
| |
Note: |
| |
|
After loading paper, set the LC Size setting to match the loaded paper size on the control panel.
|
|
Top
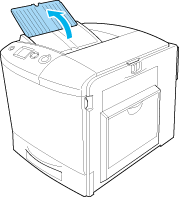
The output tray is located on the top of the printer. Since printouts are output face-down, this tray is also referred to as the face-down tray. This tray can hold up to 250 sheets.
|
Note: |
|
|
When using transparencies, remove each sheet from the output tray after it is printed to prevent it from curling.
|
|
If the printouts do not stack well, open the extension on the output tray.
Top
| |