|

Reference Guide
|
|
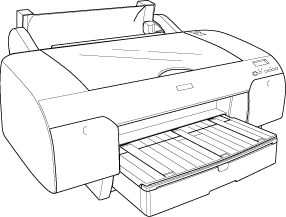
Paper Handling
Using Roll Paper
 Attaching the roll paper to the spindle
Attaching the spacer to the spindle
Removing the roll paper from the spindle
Loading the roll paper
Using the roll paper belt
Cutting roll paper or printing page lines
Attaching the roll paper to the spindle
When installing the roll paper onto the spindle, follow these steps.
 |
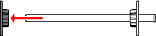
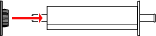
Slide the black movable flange off the end of the spindle.
|
 |
When attaching roll paper with 2-inch core, remove the gray attachments.
|
 |  |
Note:
|
| | |
Keep the gray attachments in a safe place for future use.
|
|
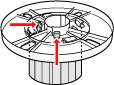
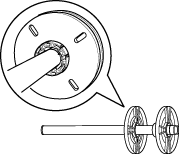
When attaching roll paper with 3-inch core, slide the gray attachments to the black and white ones, matching the four arrows.
 |
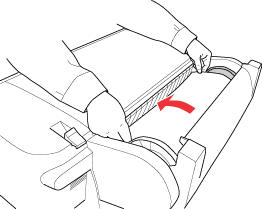
Place the roll paper on a flat surface so that it does not unwind. Slide the roll paper onto the spindle and onto the white flange until it fixes into place.
|

| |
Note:
|
| | |
Do not stand the spindle when attaching the roll paper. It may cause a slant paper feeding.
|
|
 |
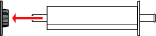
Slide the black movable flange (removed in step 1) onto the spindle and into the end of the roll paper until it fixes into place.
|

[Top]
Attaching the spacer to the spindle
When you perform borderless printing on roll paper with a width of 8 inches or 420mm (A2), you need to attach a spacer to the spindle.
To attach the spacer to the spindle, follow these steps.
|
Note:
|
| |
You cannot attach the spacer to the spindle when the gray attachments for roll paper with a 3-inch core are attached to the spindle.
|
|
|
|
Slide the black movable flange off the end of the spindle.
|
|
|
Slide the spacer onto the white flange.
|
|
|
Slide the roll paper until it fixes into place.
|
|
|
Slide the black movable flange onto the spindle and into the end of the roll paper until it fixes into place.
|
[Top]
Removing the roll paper from the spindle
To remove the roll paper from the spindle, follow these steps.
|
|
Place the paper loaded spindle down on a flat surface.
|
|
|
Slide the black movable flange off the end of the spindle by tapping the same end of the spindle with your hand to loosen it. The flange is removed.
|
|  |
Caution:
|
| | |
To remove the black movable flange from the spindle, do not hold the spindle vertically and tap the end on the floor; otherwise, damage may occur.
|
|
|
|
Remove the roll paper from the spindle.
|

|
Note:
|
| |
Store unused roll paper in its original package. Put the roll paper into the plastic bag, and outer package so as to avoid moisture problems.
|
|
[Top]
Loading the roll paper
To load roll paper, follow these steps.
|
|
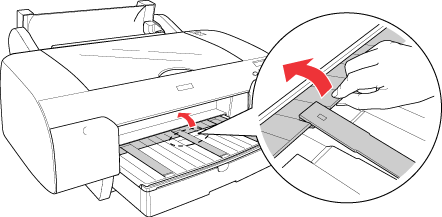
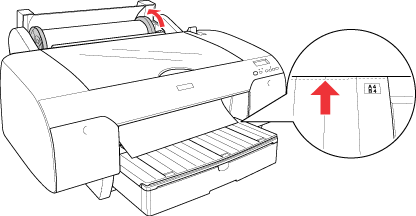
Open the roll paper cover.
|
|
|
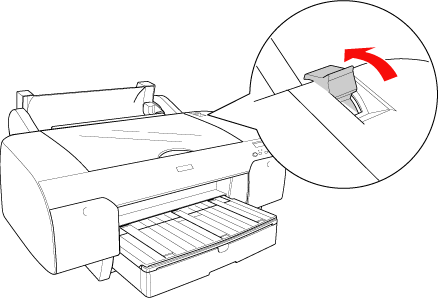
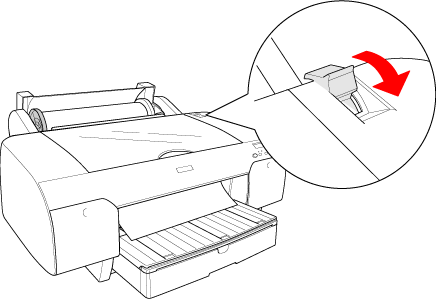
Move the paper lever to the released position.
|
|
|
Raise the roll paper support.
|
|
|
Make sure that the black movable flange is fixed into the end of the roll paper properly.
|
 |
Hold the roll paper spindle so that the black movable flange is on the left side.
|
 |
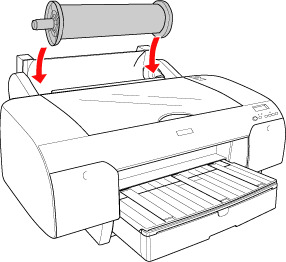
Make sure that the roll paper is attached to the printer properly.
|
 |
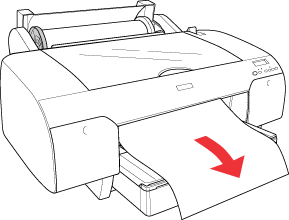
Hold the both sides of the paper, and load the paper into the paper insertion slot. Pull the paper until it hangs down over the paper tray.
|
| |
Note:
|
| |
If you load thin paper, press the Paper Feed button  to decrease the value of paper suction. If you load thick and curled paper, press the Paper Feed button to decrease the value of paper suction. If you load thick and curled paper, press the Paper Feed button  to increase the value of paper suction. to increase the value of paper suction.
|
|
 |
Hold the both fixed and movable flanges, and rewind the paper to the line marked with A4/B4.
|
 |
Move the paper lever to the secured position. The printer automatically feeds the paper to the printing position.
|
 |
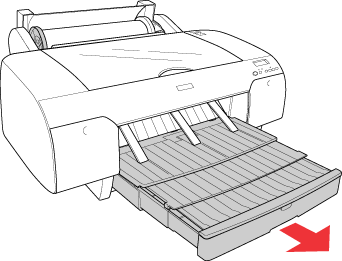
Extend the paper tray and paper tray cover according to the paper size.
|
 |
Close the roll paper cover.
|
 |
Press the Paper Source  button to select Roll Auto Cut On button to select Roll Auto Cut On  or Roll Auto Cut Off or Roll Auto Cut Off  . .
|
Now the printer is ready to print. While the printer is printing, do not open the top cover. If the top cover is opened while printing, the printer stops printing, and then restarts printing when the top cover is closed. Stopping and restarting printing may reduce the print quality.
[Top]
Using the roll paper belt
The roll paper belt is packed with the optional 2/3 inch Dual Roll Feed Spindle. You can also purchase the optional roll paper belt
If you use roll paper belt, tap the end of the roll paper belt lightly on the roll paper. The belt will wrap itself around the roll paper.

To remove the roll paper belt, simply unwrap it from around the paper. While you do not use the roll paper belt, keep it wound around the end of the spindle.
[Top]
Cutting roll paper or printing page lines
When your print job is finished, the printer cuts the roll paper automatically or prints page lines around the printed data according to your settings. You can make these settings using the control panel or printer software.
|
Note:
|
| -
Printer driver settings usually overrides control panel settings. Use your printer driver make settings whenever possible.
|
|
| -
When the printer cuts the printout, it may take a little time to proceed with cutting after printing is finished.
|
|
Cutting the roll paper automatically
To cut the roll paper automatically after printing, follow these steps.
|
|
Before printing, press the Paper Source button to select Roll Auto Cut On .
|
|
|
Print your data.
|
To make the auto cut setting using the printer driver, see Making the Auto Cut setting for Windows, Making the Auto Cut setting for Mac OS 8.6 to 9.x, or Auto Cut for Mac OS X.
Cutting the roll paper with cut button
To cut the roll paper with cut button after printing, follow these steps.
|
|
Before starting printing, press the Paper Source button to select Roll Auto Cut Off .
|
|
|
Print your data.
|
|
|
Press the Paper Feed button or Paper Feed button to match the cutting position on the paper with the cutting position on the left side of the print head.
|

|
|
Press the Paper Source button to select Roll Auto Cut On .
|
|
|
Press and hold the Paper Source button for 3 seconds. The printer cuts the printout at the cutting position.
|
Printing page lines
If you want to print continuously on roll paper first, then cut the page yourself after you finish printing, use the Print Page Line setting.
To make the Print Page Line setting using the control panel, see PAGE LINE.
To make the Print Page Line setting using the printer software, see Print Page Line for Windows, Print Page Line for Mac OS 8.6 to 9.x, or Print Page Line for Mac OS X.
[Top]
| Version 1.10E, Copyright © 2004, SEIKO EPSON CORPORATION |