 |
 |
|
||
 |
||||
Diagnosing the Problem
Troubleshooting printer problems is best handled in two steps: first diagnose the problem, then apply likely solutions until the problem is fixed.
The information that you need to diagnose and solve most common problems is provided by online problem solving, the control panel, the status monitor, or by running a printer operation check. Refer to the appropriate section below.
If you have a specific problem relating to print quality, a printout problem not related to print quality, or a paper feeding problem, or if the printer does not print at all, refer to the appropriate section.
To solve a problem, you may need to cancel printing.
Error indicators
You can identify many common printer problems by checking the error indicators on the printer’s control panel. If the printer stops working and you cannot solve the problems, see the table of the error indicators and solutions provided in the booklet.
Status monitor
If a problem occurs while printing, an error message will appear in the status monitor window.
When you need to replace an ink cartridge, click the How To button on the window, and the status monitor will lead you step-by-step through the cartridge replacement procedure.
To confirm the status of each ink cartridge, see one of the following sections:
 See Using EPSON Status Monitor 3 (Windows)
 See Using EPSON Status Monitor (Mac OS X)
 See Using EPSON Status Monitor 3 (Windows)
 See Using EPSON Status Monitor (Mac OS X)
If an error message appears indicating the printer’s ink pads are nearing the end of their service life, contact Epson support to replace them. When the printer’s ink pads are saturated, the printer stops and Epson support is required to continue printing.
Running a printer operation check
If you are unable to determine the source of the problem, run a printer operation check to help you determine whether the problem comes from the printer or your computer.
To run a printer operation check, follow these steps.
 |
Make sure both the printer and computer are turned off.
|
 |
Disconnect the cable from the interface connector of the printer.
|
 |
Make sure that A4 size paper is loaded in the sheet feeder.
|
 |
Press the
 On button to turn on the printer. On button to turn on the printer. |
 |
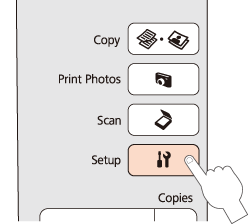
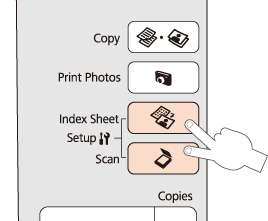
Press the buttons used to enter setup mode on your printer.
|
|
SX420W
SX425W NX420 |
SX218
TX220 520 NX220 |
 |
 |
 |
Press the
 or or  button to select Nozzle Check. button to select Nozzle Check. |
 |
Press the
 Start button to start the ink nozzle check. Start button to start the ink nozzle check. |
A test page prints showing a nozzle check pattern. If the pattern has gaps, you need to clean the print head.
 See Cleaning the Print Head
 See Cleaning the Print Head
If the test page prints, the problem probably lies in your software settings, the cable, or your computer. It is also possible that your software may not be installed correctly. Try uninstalling your software and reinstalling it.
 See Uninstalling the Printer Software
 See Uninstalling the Printer Software
If the test page does not print, you may have a problem with your printer. Try the suggestions in the following section.
 See The Printer Does Not Print
 See The Printer Does Not Print
