![]()
Online Reference Guide
|
|
Index |
|
Search |
|
Glossary | |||||
|
|
Contents |
|
Help |
|
||||||
|
|
|
|||||||||||||||||||||||||||||||||
Options
Follow the steps below to install the Automatic Document Feeder on your EPSON scanner.
 | Make sure your scanner is turned off, and unplug the scanner's power cord. |
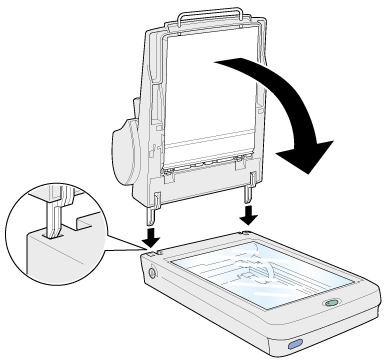
 | Remove your scanner's document cover by opening it and pulling it straight up. (See Removing the Cover for Thick or Large Documents (For Perfection 1640SU/Perfection 1640SU Photo Users).) |
 | Remove the protective materials from the Automatic Document Feeder. |
 | Insert the hinges on the Automatic Document Feeder into the holes at the back of the scanner and close the Automatic Document Feeder. |
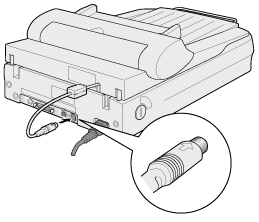
 | Attach the Automatic Document Feeder's connector to the scanner's option connector. |
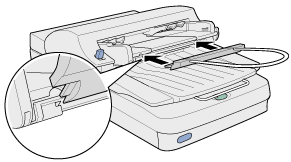
 | Attach the paper support to the Automatic Document Feeder. |
 | Note: |
| After you install the Automatic Document Feeder, be sure to select Auto Document Feeder in the Document Source settings in the Manual mode. |
 Previous |
 Next |
| Version 1.00E, Copyright © 2001, SEIKO EPSON CORPORATION |