![]()
Online Reference Guide
|
|
Index |
|
Search |
|
Glossary | |||||
|
|
Contents |
|
Help |
|
||||||
|
|
|
|||||||||||||||||||||||||||||||||
Understanding EPSON TWAIN Pro Features / Using the Preview Window
Making and modifying marquees
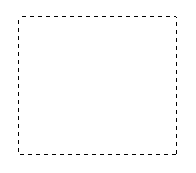
A marquee is a frame that you draw around a portion of a previewed image to select it. You can use one marquee to select an area you want to enlarge using the Preview buttons, or you can use one or several marquees to adjust and to scan selected portions of an image.
To create a marquee, move the pointer over the image in the Preview window. The pointer becomes a set of cross-hairs. Hold down the mouse button and drag the cross-hairs over an area of the image, then release the mouse button to create the marquee.
The frame around the marquee appears as a moving dotted line, indicating that it is active, which means that it can be resized.
Only one marquee can be active at a time, and if you make several marquees, the last marquee you make becomes the active marquee. To make a different marquee active, click anywhere inside the marquee.
 | Note: |
|
|
Follow the instructions below to select multiple marquees, and to resize and move marquees.
If you select several marquees at once, you can apply image adjustments to all of the selected areas, and you can scan each of the selected areas individually with a single click of the Scan button.
To select several marquees at once, click each marquee while holding down the Ctrl key on your keyboard. The frames around selected marquees become static dotted lines, and the last marquee you click becomes the active marquee. To cancel the selection of a marquee, click it again while holding down the Ctrl key.
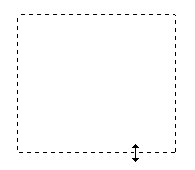
When you move the cross-hairs over the edge of the active marquee, the cross-hairs will change to a double-headed arrow as shown below. (You may need to click the marquee first to make it active). Drag the arrow to resize the marquee. To resize the marquee proportionally, press the Shift key while dragging the arrow.
| Note: |
| You cannot resize an active marquee if any other marquees are selected. To cancel the selection of a marquee, click the marquee while holding down the Ctrl button on your keyboard. |
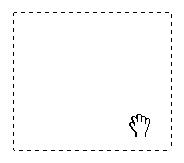
To move the active marquee, move the cross-hairs inside the marquee until the cross-hairs change into a hand, then drag the marquee to move it. To move more than one marquee at a time, first select the marquees by clicking them while holding down the Ctrl key on your keyboard. To move the marquee or group of marquees in a straight line vertically or horizontally, press the Shift key while dragging an active or selected marquee.
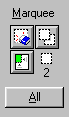 |
The Marquee tools described below help you to work with marquees and to automatically place marquees around images in the Preview window. |
Clicking the  Delete button removes the active and selected marquees. To delete all marquees at once, first click the All button, then click this button.
| Note: |
| When the Preview window is active, you can also delete the active and selected marquees by pressing the Delete key on your keyboard. |
Clicking the  Duplicate button creates another marquee the same size as the active marquee. Clicking this button while holding down the keys noted in the table below causes the duplicate marquee to appear in the specified orientation relative to the original marquee.
|
Horizontal |
Vertical |
|
Ctrl key |
Alt key |
| Note: |
| This button is unavailable when one or more marquees are selected in addition to the active marquee. |
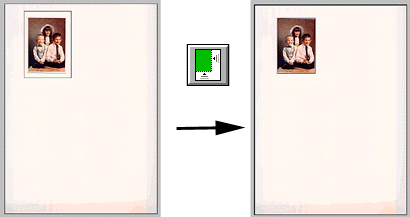
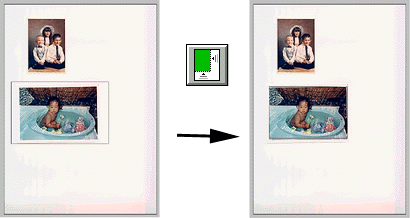
Click the  Auto Locate button to automatically frame a previewed image with a marquee, thus eliminating unnecessary borders.
| Note: |
| The Auto Locate feature is automatically activated when scanning without previewing. |
If the previewed image consists of several images separated by white space, clicking the Auto Locate button places a single marquee around all of the images. If any of the images are already surrounded by active or selected marquees, clicking this button adjusts the marquees to match the size of the images.
 |
This indicates the number of marquees in the Preview window. |
Click this button to select all marquees in the Preview window. This feature is useful when you want to scan all the selected areas, or when you want to delete all marquees.
 Previous |
 Next |
| Version 1.00E, Copyright © 2001, SEIKO EPSON CORPORATION |