|

Reference Guide
|
|
How To / Replacing Consumable Products
Replacing the Photoconductor Unit
If the print quality has declined, print a status sheet and confirm the photoconductor unit life. If the photoconductor unit is almost out of life, replace the unit according to the following instructions.
 |
Make sure the output tray at the top of the printer is lowered.
|
 |
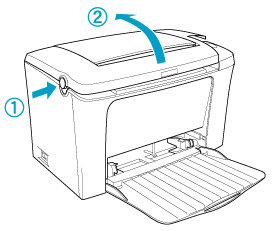
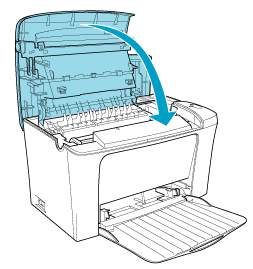
Open the printer cover by pressing the latch button on the left side of the printer and lifting the cover up all the way.
|
 |  |
Caution:
|
 |  | |
You must completely open the printer cover to replace the photoconductor unit; otherwise, you may damage the printer.
|
|
 |
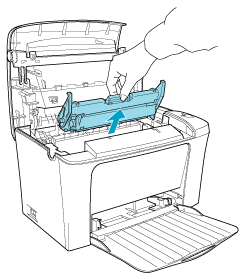
Slide the photoconductor unit gently out of the printer, as shown below.
|
 |  |
Warning:
|
 |  | |
Do not touch the fuser, which is marked CAUTION Hot Surface Avoid Contact. If the printer has been in use, the fuser may be very hot.
|
|
 |
Properly dispose of the used photoconductor unit.
|
 |
Remove the new photoconductor unit from its bag.
|
 |  |
Caution:
|
 |  | |
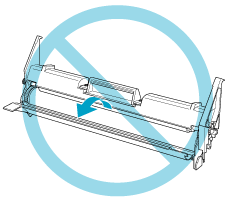
Never touch the photoconductor unit's light-sensitive drum; otherwise, print quality may decline.
|
|
 |
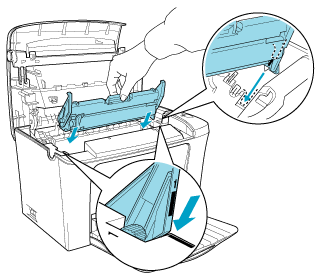
Insert the pins on both sides of the new photoconductor unit into the grooves inside the printer. Slide the unit gently into the opening until it locks into place.
|
 |
Lower the printer cover. Press it gently until it clicks shut.
|
 |
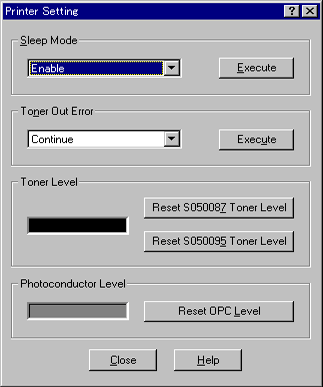
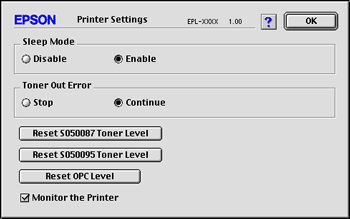
Clear the photoconductor level counter.
|
For Windows
Access the printer driver. Click the Optional Settings tab, and click Printer Setting. Click Reset OPC Level, and the Reset OPC Level dialog box appears.
For Macintosh
Select Chooser in the Apple menu. Click Setup, and click Printer Settings. Click Reset OPC Level, and the Reset OPC Level dialog box appears.
 |
Click OK to reset the Photoconductor level counter.
|

[Top]
| Version 1.00E, Copyright © 2002, SEIKO EPSON CORPORATION |