 |
 MP tray MP tray
Lower cassette
Output tray
This section describes how to load paper. If you use special media such as transparencies or envelopes, see also Printing on Special Media.
Follow the steps below to load paper.
 |
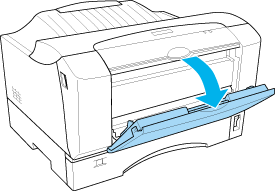
Open the MP tray.
|
 |
Pull out the support tray according to the paper you are loading.
|

 |
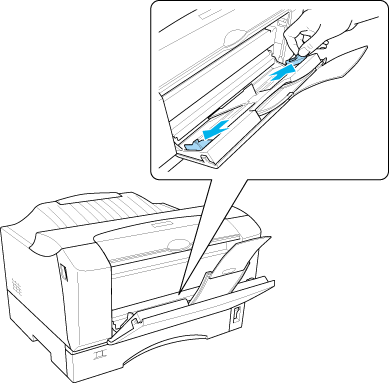
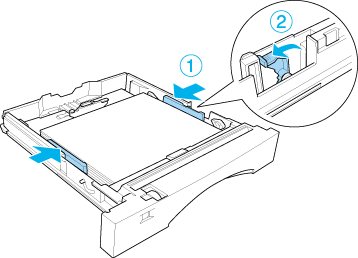
Slide the paper guides outward while pinching the knob and the paper guide together.
|
 |
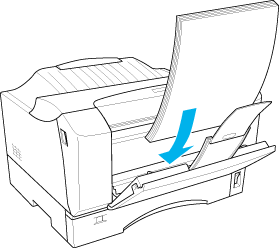
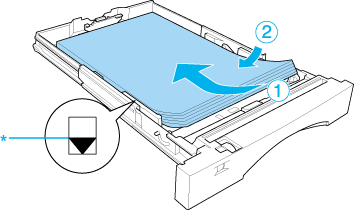
Load a stack of the desired paper on the center of the tray with the printable surface facing down.
|
|  |
Note: |
| |
|
|
Long edge first:
|
A4, A5, B5, LT, GLT, EXE, transparencies, labels
|
|
Short edge first:
|
A3, B4, LGL, HLT, GLG, F4, envelopes
|

-
The printing speed may decrease extremely when printing on paper sizes other than A3, A4, B4, B5, LT, or LGL. If this happens, wait 10 minutes without printing. Doing this returns the printing speed to normal.
|
|
 |
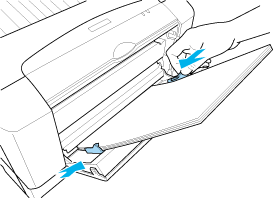
Then, while pinching the knob and the paper guide together, slide the side paper guide until it is snugly against the right side of the stack of paper.
|
Follow the steps below to load paper.
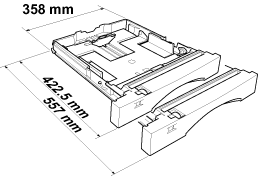
You can load various paper sizes by expanding the lower cassette as shown in the illustration below.
|
|
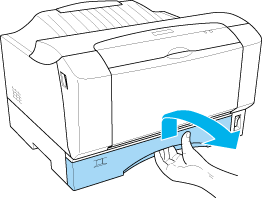
Raise the edge of the lower cassette slightly when pulling it out.
|
|
|
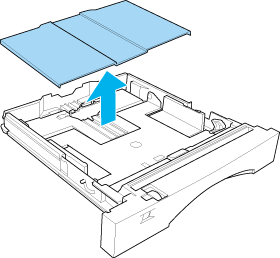
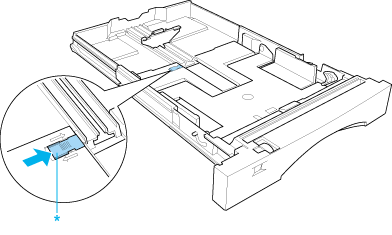
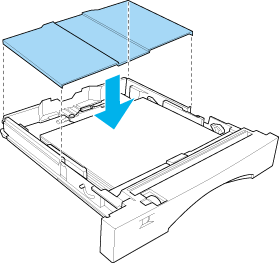
Remove the lower cassette cover.
|
|
|
Adjust the cassette size when loading A3, B4, and LGL size paper to accommodate the paper you are loading.
|
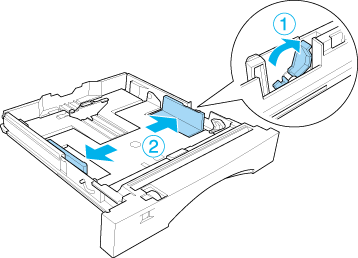
Expand the cassette to accommodate the paper you are loading, and then lock the cassette lock lever.

|
|
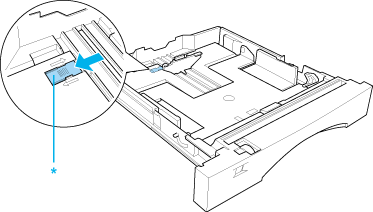
Open the clamp and then slide the paper guide outward.
|
|
|
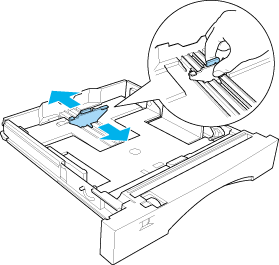
Slide the end paper guide outward while pinching the knob and the paper guide together.
|
 |
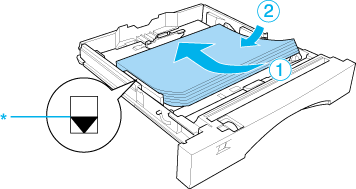
Load a stack of the desired media on the center of the cassette with the printable surface facing up. Then, while pinching the knob against the side paper guide, slide it snugly against the side of the media.
|
| |
Note: |
| |
|
|
Long edge first:
|
A4, A5, B5, LT
|
|
Short edge first:
|
A3, B4, LGL, HLT
|
-
The printing speed may decrease extremely when printing on paper sizes other than A3, A4, B4, B5, LT, or LGL. If this happens, wait 10 minutes without printing. Doing this returns the printing speed to normal.
|
|
 |
Slide the side paper guide to align the paper, and then close the clamp.
|
 |
Replace the lower cassette cover.
|
 |
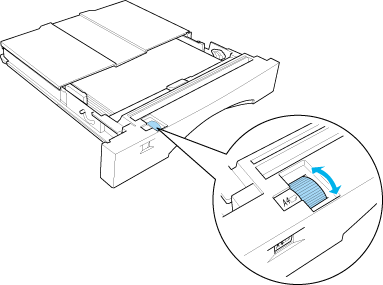
Set the paper size dial to the size of the paper that you loaded.
|
|
Available paper sizes:
|
A3, A4, A5, B4, B5, Letter (LT), Legal (LGL)
|
 |
Reinsert lower cassette into the printer.
|

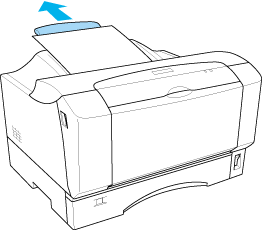
The output tray is located on the top of the printer. Since printouts are output face-down, this tray is also referred to as the face-down tray. This tray can hold up to 250 sheets. Extend the paper support to prevent your printouts from slipping off the printer.
If the printouts do not stack well, extend the paper support of the output tray.
| |


 Top
Top