|

Reference Guide
|
|
Problem Solver
Clearing Jammed Paper
 Precautions for clearing jammed paper
Paper jam - cover A
Paper jam - cover A or B
Paper jam - MP tray or cassette
If paper becomes jammed in the printer, the EPSON Status Monitor 3 provide alert messages.
Precautions for clearing jammed paper
Be sure to observe the following points when you clear jammed paper.
-
Do not remove jammed paper by force. Torn paper can be difficult to remove and might cause other paper jams. Pull it gently in order to avoid tearing.
-
Always try to remove jammed paper with both hands to avoid tearing it.
-
If jammed paper is torn and remains in the printer, or if paper is jammed in a place not mentioned in this section, contact your dealer.
 |
Warning:
|
 | |
Unless specifically instructed in this guide, be careful not to touch the fuser, which is marked CAUTION HOT SURFACE, or the surrounding areas. If the printer has been in use, the fuser and the surrounding areas may be very hot. If you must touch one of these areas, wait 40 minutes to allow the heat to subside before doing so.
|
|

[Top]
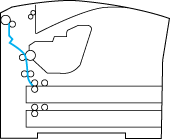
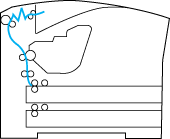
Paper jam - cover A
When a paper jam occurs in the location shown in the illustration below, follow these steps to clear paper jams from Cover A.
 |
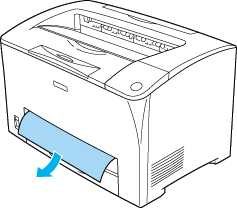
Open Cover A.
|

 |
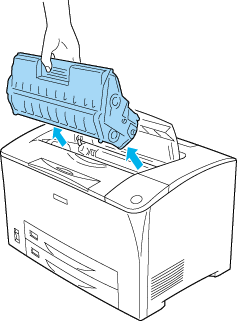
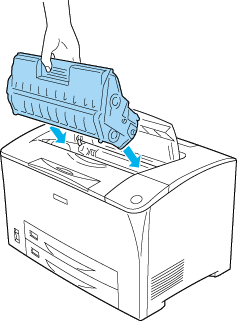
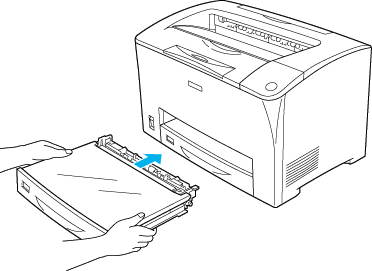
Hold the handle of the imaging cartridge and pull out.
|
|  |
Note:
|
| | |
Place the cartridge on a clean, flat surface.
|
|
 |
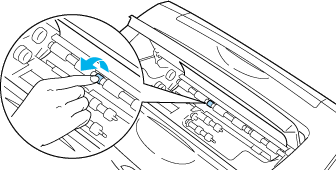
Spin the green part on the pickup roller to bring out jammed paper.
|
 |
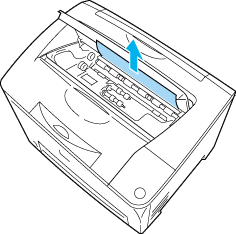
Gently pull out any sheets that have fed part way into the printer.
|
 |
Reinstall the imaging cartridge.
|
| |
Note:
|
| | |
Insert the cartridge with the arrow mark on the top of the imaging cartridge facing toward Cover A.
|
|
 |
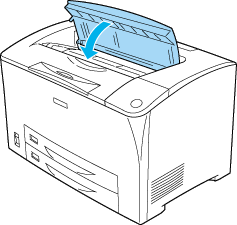
Close Cover A until it clicks shut.
|
[Top]
Paper jam - cover A or B
When a paper jam occurs in the location shown in the illustration below, follow these steps to clear paper jams from Cover A or B.
|
Warning:
|
| |
Unless specifically instructed in this guide, be careful not to touch the fuser, which is marked CAUTION HOT SURFACE, or the surrounding areas. If the printer has been in use, the fuser and the surrounding areas may be very hot. If you must touch one of these areas, wait 40 minutes to allow the heat to subside before doing so.
|
|
|
|
Open Cover A.
|
|
|
Hold the handle of the cartridge and pull it out.
|
| |
Note:
|
| | |
Place the cartridge on a clean, flat surface.
|
|
|
|
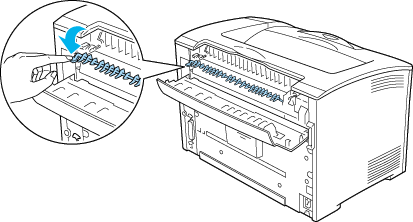
If there is any jammed paper, remove it gently with both hands. Be careful not to tear the jammed paper.
|
| |
Note:
|
| | |
When jammed paper cannot be removed easily, turn the roller to take tension off the paper, then pull it straight out.
|
|
|
|
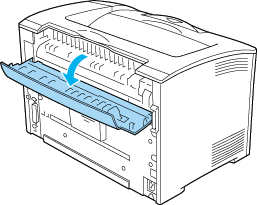
Open Cover B.
|
|
|
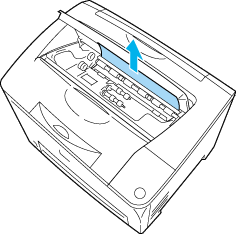
Open the paper holder by pulling down on the lever on which a green label is attached as shown below.
|
|
Warning:
|
| |
Be careful not to touch the roller in the fuser unit, because they may be hot.
|
|
|
|
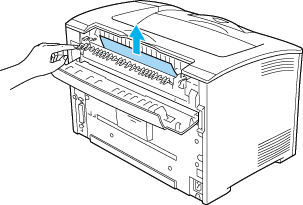
If there is any jammed paper, remove it gently. Be careful not to tear the jammed paper.
|
 |
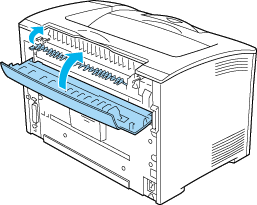
Close the paper holder and close Cover B.
|
 |
Reinstall the imaging cartridge.
|
 |
Close Cover A until it clicks.
|
[Top]
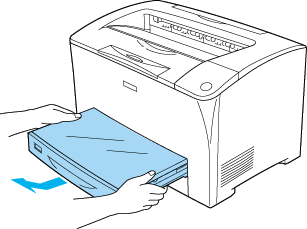
Paper jam - MP tray or cassette
When a paper jam occurs in the location shown in the illustration below, follow these steps to clear paper jams in paper cassettes.

|
|
Pull out the cassette from the printer.
|
|
|
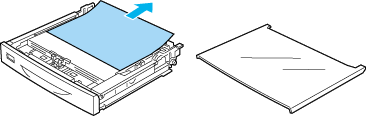
Remove the cassette's cover and discard any crumpled paper. Then, reattach the cover.
|
|
|
Gently remove the jammed paper with both hands. Be careful not to tear the jammed paper.
|
| |
Note:
|
| | |
Confirm that the jammed paper is not still deep inside the printer.
|
|
|
|
Reinsert the paper cassette.
|
|
|
Open Cover A and then close Cover A again.
|

| |
Note:
|
| | |
After opening and closing Cover A, the error message is cleared.
|
|
[Top]
| Version 1.10E, Copyright © 2003, SEIKO EPSON CORPORATION |

