|

Reference Guide
|
|
How to / Replacing Consumable Products
Developer Cartridge
When developer cartridges run out of toner, a message appears on the LCD panel or the EPSON Status Monitor 3 utility to inform you of the condition. According to the message on the LCD panel or on the window of the EPSON Status Monitor 3 utility, replace the correct developer cartridge from the list below:
|
Developer Cartridge (Black)
Developer Cartridge (Yellow)
Developer Cartridge (Magenta)
Developer Cartridge (Cyan)
|
S050033
S050034
S050035
S050036
|
Handling precautions
Always pay attention to the following handling precautions before replacing developer cartridges:
-
Do not install used developer cartridges into the printer.
-
Wait for at least one hour before installing a developer cartridge after moving it from a cool to a warm environment to prevent damage from condensation.
 |
Warning:
|
 | -
Do not touch the toner and avoid all contact with your eyes. If toner gets on your skin or clothes, wash it off with soap and water immediately.
|
 | -
Keep developer cartridges out of the reach of children.
|
 | -
Do not dispose of used developer cartridges in fire, as they may explode and cause injury. Dispose of them according to local regulations.
|
Replacing a developer cartridge
Follow these steps to replace a developer cartridge:
 |
Confirm the color of the developer cartridge that needs to be replaced by checking the LCD panel.
|
 |
Open the front cover.
|
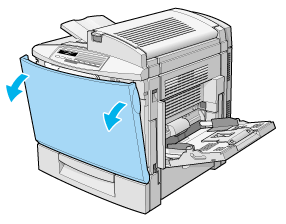
 |
Check which color currently appears in the cartridge installation window.
|
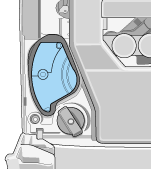
If you see the color that you need to replace, go to step 6.
If you see a different color, go to the next step.
 |
Press the green button, as shown below.
|
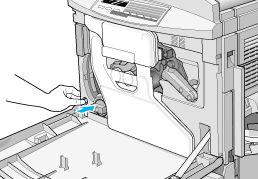
 |
Turn the knob counterclockwise until it stops. The next cartridge appears in the cartridge installment window.
|
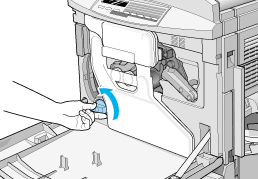
Repeat steps 4 and 5 until you see the color that you need to replace.
 |  |
Note:
|
 |
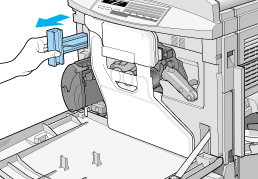
Pull the cartridge eject lever until the cartridge protrudes from the slot, then remove the cartridge.
|
 |
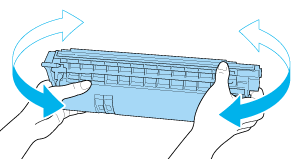
Take a new cartridge of the color to be replaced out of its package, and gently shake it from side to side and front to back to distribute the toner evenly.
|
 |
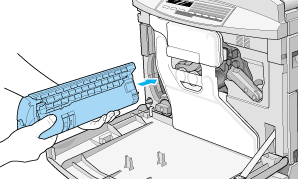
Hold the cartridge as shown below, and insert it all the way into the developer cartridge slot until it clicks.
|
 |
If you need to replace another cartridge, repeat steps 3 to 8.
|
 |
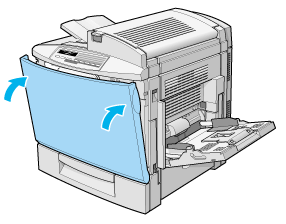
Close the front cover.
|

[Top]
| Version 1.00E, Copyright © 2001, SEIKO EPSON CORPORATION |