|

Reference Guide
|
|
Printing Basics
For Windows Users
 Step 1. Choosing the data to print
 Step 2. Preparing and loading paper
 Step 3. Making the printer driver settings
 Step 4. Printing your data
This section outlines the basic printing procedure, using the example of printing on a single sheet.
Step 1. Choosing the data to print
Choose an A4-size data to print. Any data, such as photo or text, is OK.

[Top]
Step 2. Preparing and loading paper
After choosing the data, prepare the A4-size plain paper and load it in the printer.
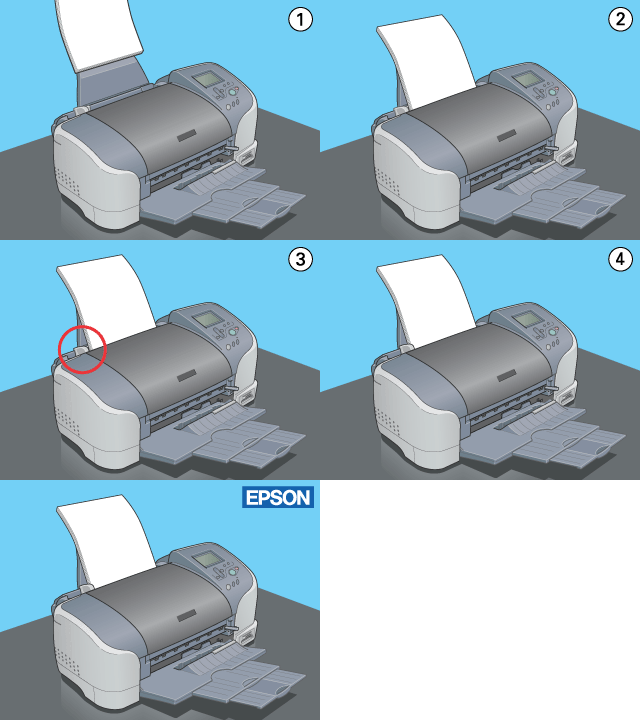
To load the paper, follow the instructions below.
 |
Lower the output tray. Next, slide the left edge guide so that the distance between the edge guides is slightly wider than the width of your paper.
|
 |
Fan a stack of paper, then tap it on a flat surface to even the edges.
|
 |
Load the stack of paper in the sheet feeder with the printable side up and the right edge of the paper resting against the right edge guide. Then, slide the left edge guide against the left edge of the paper.
|


[Top]
Step 3. Making the printer driver settings
To change the printer driver settings to A4-size plain paper, follow the instructions below.
 |
Select Print or Print Setup on the File menu of the Windows application.
|
 |
In the dialog box that appears, click Printer, Setup, Options, or Properties. (Depending on your application, you may need to click a combination of these buttons.) The printer software opens.
|
 |
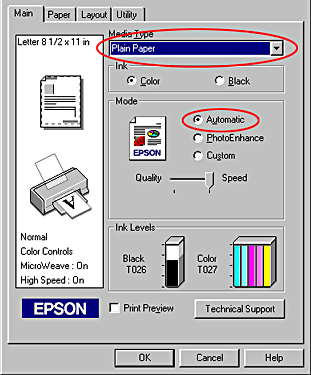
Click the Main tab, select Plain Paper as the Media Type setting, and Automatic as the Mode setting.
|

 |
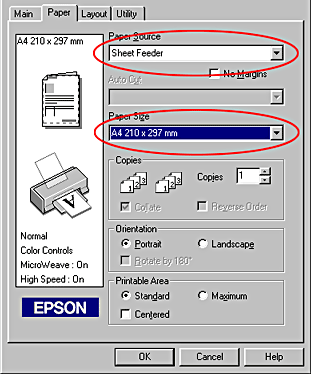
Click the Paper tab, select A4 as the Paper Size setting, and Sheet Feeder as the Paper Source setting.
|

 |
Click OK to close the window.
|

[Top]
Step 4. Printing your data
Now, print the data from your application.
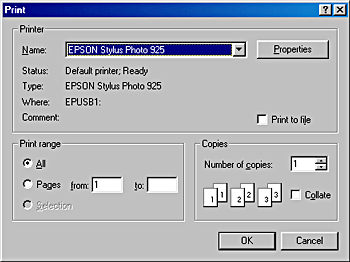
Click OK to print.

This completes the basic printing procedure. If you would like to try advanced printing, see Various Printing Options.

[Top]
| Version 1.00E, Copyright © 2002, SEIKO EPSON CORPORATION |
Step 1. Choosing the data to print
Step 2. Preparing and loading paper
Step 3. Making the printer driver settings
Step 4. Printing your data