|

Reference Guide
|
|
How To / Checking Printer Condition and Maintaining
Aligning the Print Head
 For Windows
 For Macintosh
If you notice a misalignment of vertical lines or horizontal banding, you may be able to solve this problem from your computer using the Print Head Alignment utility in your printer software. Refer to the appropriate section below.
For Windows
Follow the steps below to align the print head using the Print Head Alignment utility.
 |
Make sure that A4 or Letter size plain paper is loaded in the sheet feeder.
|
 |
Access the printer software, click the Maintenance tab, and then click the Print Head Alignment button.
|
 |
Click Next in the Print Head Alignment dialog box.
|
 |
Click Print to print the alignment sheet for black printing.
|
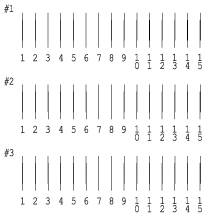
The following are examples of the alignment sheet for black printing.
 |
From each pattern on the printed test sheet, choose the vertical line that is aligned best. For each pattern, select the corresponding line number from the appropriate list in the Print Head Alignment dialog box, and then click Next. The new settings are put into effect.
|
 |
Note:
|
 | |
If you cannot find a line that is aligned correctly, select the number of the line closest to being correct and click Realignment. The lines you selected will be reset to the center (number 8) position and the alignment test sheet will be printed again.
|
|

 |
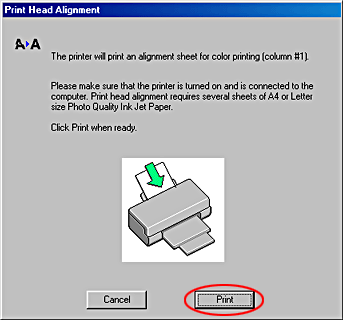
Click Print to print column #1 of the alignment sheet for color printing.
|
Column #1 of the alignment sheet is printed.
 |
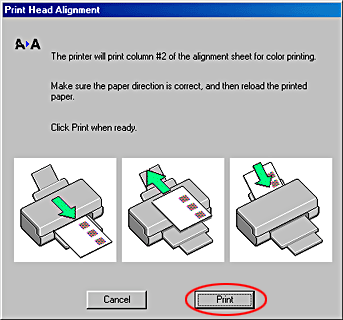
Follow the on-screen instructions for loading paper, and then click Print to print column #2.
|
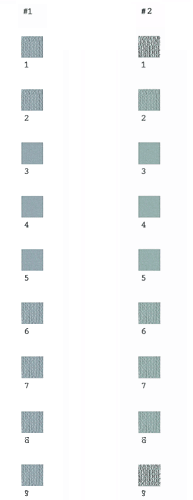
The following are examples of the alignment sheet for color printing.
 |
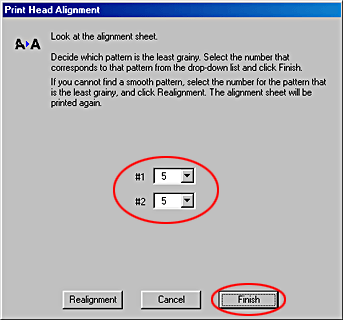
Look for a pattern that does not contain any dark or light banding. Next, select the corresponding pattern number from the appropriate list in the Print Head Alignment dialog box. Then click Finish. The new settings are put into effect.
|
 |
Note:
|
 | |
If all of the patterns contain banding, select the pattern with the least amount of banding and click Realignment. The selected pattern will be shifted to the center position and a new alignment sheet will be printed.
|
|

[Top]
For Macintosh
Follow the steps below to align the print head using the Print Head Alignment utility.
 |
Make sure that A4 or Letter size plain paper is loaded in the sheet feeder.
|
 |
For users of Mac OS 8.1 or later (except Mac OS X), access the printer software, click the  Utility icon button, and then click the Print Head Alignment button. Utility icon button, and then click the Print Head Alignment button.
For users of Mac OS X, double-click the EPSON Printer Utility icon in the Applications folder in Macintosh HD (the default hard disk name), select your printer, click OK in the Printer List window, and then click the Print Head Alignment button in the Utility dialog box.
|
 |
Click Next in the Print Head Alignment dialog box.
|
 |
Click Print to print the alignment sheet for black printing.
|
The following are examples of the alignment sheet for black printing that are printed by the printer first.

 |
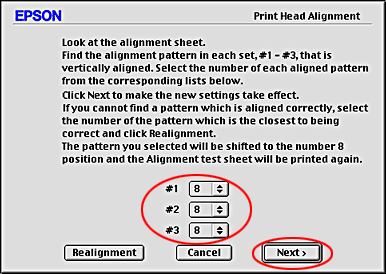
From each pattern on the printed test sheet, choose the vertical line that is aligned best. For each pattern, select the corresponding line number from the appropriate list in the Print Head Alignment dialog box, and then click Next. The new settings are put into effect.
|
 |  |
Note:
|
 |  | |
If you cannot find a line that is aligned correctly, select the number of the line closest to being correct and click Realignment. The lines you selected will be reset to the center (number 8) position and the alignment test sheet will be printed again.
|
|
 |
Click Print to print column #1 of the alignment sheet for color printing.
|
Column #1 of the alignment sheet is printed.
 |
Follow the on-screen instructions for reloading paper, and then click Print to print column #2.
|
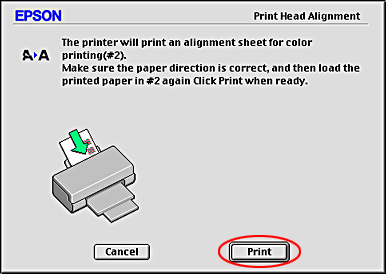
The following are examples of the alignment sheet for color printing.

 |
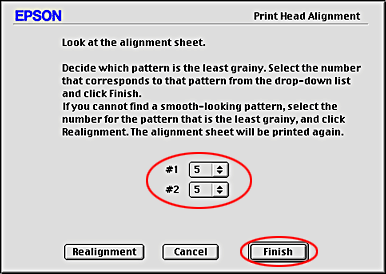
Look for a pattern that does not contain any dark or light banding. Next, select the corresponding pattern number from the appropriate list in the Print Head Alignment dialog box. Then click Finish. The new settings are put into effect.
|
 |
Note:
|
 | |
If all of the patterns contain banding, select the pattern with the least amount of banding and click Realignment. The selected pattern will be shifted to the center position and a new alignment sheet will be printed.
|
|

[Top]
| Version 1.00E, Copyright © 2002, SEIKO EPSON CORPORATION |
For Windows
For Macintosh