|

Reference Guide
|
|
Printer Software Functions / For Users of Mac OS X
Making Settings in the Print Dialog Box
 Making the Media Type setting
 Making the Color setting
 Making the Mode setting
 Previewing your printout
 Making Layout settings
 Saving the document as a PDF file
 Making the Color Management setting
 Showing the current settings in the Print dialog box
 Saving and using your settings in the Print dialog box
You can make Media Type, Mode, Color, Copies, and Pages settings in the Print dialog box. From this dialog box, you can preview the document before printing. Refer to the appropriate section below.
Making the Media Type setting
The Media Type setting determines what other settings are available, so you should always make this setting first.
In the Print dialog box with the Print Settings option selected, select the Media Type setting that matches the paper that is loaded in the printer. To find out what media type you are using, find your media in the Media Type Settings list, and refer to the corresponding media type under which it is grouped (shown in bold). For some media, there are several Media Type settings from which to choose.
 |
Note:
|
 | |
For the latest information on available media, visit our regional customer service web site. See Contacting Customer Support for details.
|
|

[Top]
Making the Color setting
The Color setting allows you to print in color or black and white. Click Color to print in color, or Black to print in black and white or grayscale.
 |
Note:
|
 | |
The following media cannot be printed in black ink. Black colors on these media are created by combining cyan, magenta, and yellow inks.
|
|
 | -
Glossy Paper-Photo Weight
|
|
 | -
Premium Semigloss Photo Paper
|
|

[Top]
Making the Mode setting
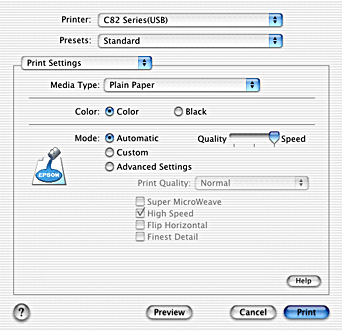
The Mode settings in the Print dialog box with Print Settings selected support several options. The Print dialog box with Print Settings selected is shown below.
The Mode settings are explained below.
|
Automatic
|
This mode provides the quickest and easiest way to start printing. See Using the Automatic mode for details.
|
|
Custom
|
This mode lets you choose from a list of ready-made or personalized settings suited to the kind of document that you want to print. See Using the Custom mode for details.
|
|
Advanced Settings
|
This mode lets you make more detailed printing settings. See Using the Advanced Settings mode for details.
|
In addition to making comprehensive Mode settings that affect overall print quality, you can also modify individual aspects of your printout using the settings contained in the Page Setup dialog box. See Making Settings in the Page Setup Dialog Box.
Refer to the appropriate section below.
Using the Automatic mode
When Automatic is selected as the Mode setting in the Print dialog box with Print Settings selected, the printer software takes care of all detailed settings based on the current Media Type and Color settings. To make the Color setting, see Making the Color setting. To make the Media Type setting, see Making the Media Type setting.
 |
Note:
|
 | |
Depending on the media selected in the Media Type list (while Automatic is selected), a slider appears to the right of the Mode settings, which lets you choose Quality or Speed. Select Quality when print quality is more important than speed.
|
|
Using the Custom mode
Selecting Custom as the Mode option enables the Custom Settings list, from which you can choose a ready-made setting designed for printing text and graphs. Or, you can select ColorSync, a color-matching method. You can also create and save your own custom settings. For details on making your own custom settings see Using the Advanced Settings mode.
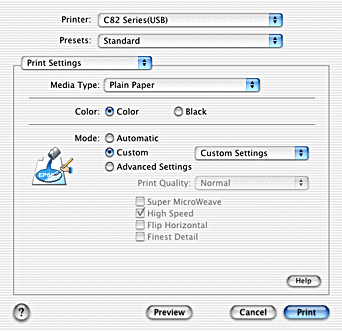
You can choose from the following by default.
|
Color-matching method
|
Description
|
|
Text/Graph
|
Good for printing presentation document such as graphs and charts.
|
|
Economy
|
Best for printing drafts of text.
|
|
ColorSync
|
Automatically adjusts printout colors to match the colors on your screen.
|
When you select a custom setting, other settings, such as Print Quality and Color Management, are made automatically. Changes to these settings are reflected in the display at the left side of the Print dialog box.
Follow the steps below to select a custom setting.
 |
Select Print Settings option from the pop-up menu in the Print dialog box.
|
 |
Select Custom as the Mode setting in the Print dialog box. This makes the Custom Settings list available to the right of the Custom radio button.
|
 |
From the Custom Settings list, select the most appropriate setting for the type of document or image that you want to print.
|
Using the Advanced Settings mode
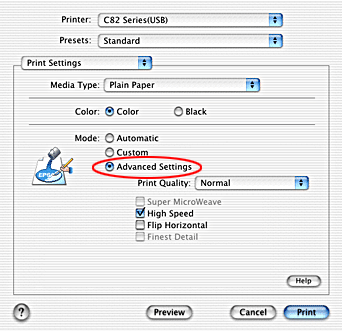
Selecting Advanced Settings as the Mode setting gives you complete control over your printing environment. Use these settings to experiment with new printing ideas or to fine-tune a range of print settings to meet your individual needs.
Follow the instructions below to make Advanced settings.
 |
Select the Print Settings from the pop-up menu in the Print dialog box.
|
 |
Select Advanced Settings as the Mode setting in the Print dialog box.
|
 |
Choose Color or Black as the Color setting.
|
 |
Specify a Print Quality setting.
|
 |
Make other settings as necessary. For details, see online help.
|
 |  |
Note:
|
 |  | |
Some settings may not be available, depending on the Media Type, Color, and Print Quality settings that you make.
|
|
Making the Copies setting
To make the Copies setting, select Copies & Pages from the pop-up menu, and then, in the Copies text box, enter the number of copies that you want to print in the Copies text box.
Making Print Order settings
To make the print order setting, select Copy & Pages from the pop-up menu, and then select Collated to print one complete document set at a time when printing multiple copies.
Making the Pages setting
To make the Pages setting, select Copies & Pages from the pop-up menu, and then select either All or From and to. If you select From and to, enter the first page of the appropriate range of pages in the From text box and the last page in the to text box.
Making the Color setting
To make the Color setting, select Print Settings from the pop-up menu, and then click Color to print in color, or Black to print in black and white or grayscale.
 |
Note:
|
 | |
The following media cannot be printed in black ink. Black colors on these media are created by combining cyan, magenta, and yellow inks.
|
|
 | -
Glossy Paper-Photo Weight
|
|
 | -
Premium Semigloss Photo Paper
|
|

[Top]
Previewing your printout
The Preview feature allows you to see how your document will look before actually printing it. Follow these steps to preview your document.
 |
Make your printer driver settings.
|
 |
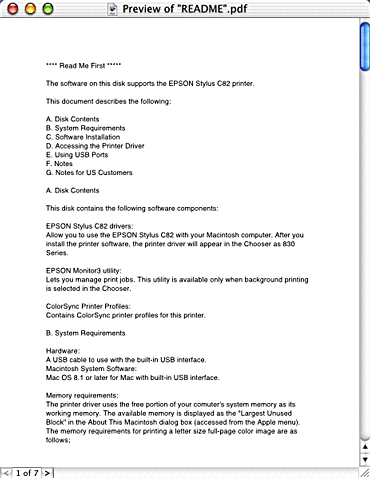
Click Preview in the Print dialog box. The Preview dialog box appears and displays a preview of your document.
|
 |  |
Note:
|
 |  | |
Preview is a standard feature of Mac OS X.
|
|

[Top]
Making Layout settings
From the pop-up menu, select Layout as the Multi-Page setting to print multiple pages of your document on one sheet of paper.
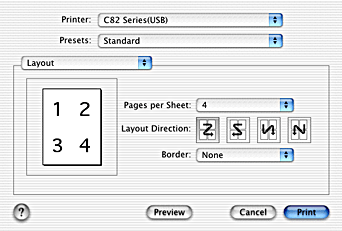
When Layout is selected, you can make the following settings.
|
Pages per Sheet
|
Prints multiple pages of your document on a single piece of paper. You can select from 1, 2, 4, 6, 9, or 16.
|
|
Layout Direction
|
Allows you to specify the order in which the pages will be printed on the sheet of paper.
|
|
Border
|
Prints a border around the pages printed on each sheet. You can select from None, Single hairline, Single thin line, Double hairline, or Double thin line.
|
 |
Note:
|
 | |
The Layout settings are a standard feature of Mac OS X.
|
|

[Top]
Saving the document as a PDF file
You can save the document as a PDF file by selecting Output Options from the pop-up menu in the Print dialog box. Follow the steps below.
 |
Make your printer driver settings.
|
 |
Select Output Options from the pop-up menu and select the Save as File Check box. The Print button changes into the Save button.
|
 |
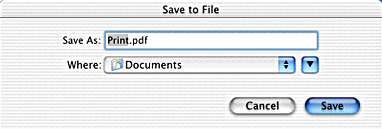
Click the Save button. The following dialog box appears.
|
 |
Select the location where you want to save the file, type a file name in the Save As text box, and then click Save.
|
 |  |
Note:
|
 |  | |
The Save as File setting is a standard feature of Mac OS X.
|
|

[Top]
Making the Color Management setting
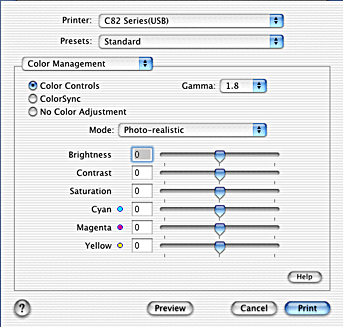
Selecting Color Management from the pop-up menu gives you control over the color matching and adjustment methods provided with the printer driver.
Follow the instructions below to make Color Management settings.
 |
Select Color Management from the pop-up menu in the Print dialog box. The following dialog box appears.
|
 |
Make the settings as necessary. For details, see online help.
|

[Top]
Showing the current settings in the Print dialog box
With Summary selected, you can confirm the current settings in the Print dialog box.
Select Summary from the pop-up menu. The following dialog box appears.
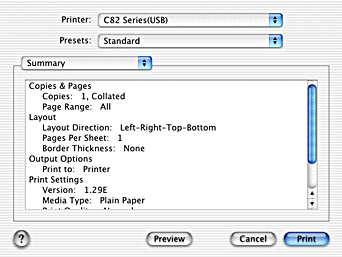
The current settings of Copies & Pages, Layout, Output Options, and Print Settings are displayed in the list.
 |
Note:
|
 | |
The Summary option is a standard feature of Mac OS X.
|
|

[Top]
Saving and using your settings in the Print dialog box
Saving your settings in the Print dialog box
To save your settings in the Print dialog box, select Save Custom Setting from the pop-up menu.
Your settings will be saved as Custom in the Saved Settings list. You can save only one set of custom settings.
 |
Note:
|
 | |
The Custom Setting option is a standard feature of Mac OS X.
|
|
Using your saved settings in the Print dialog box
To use your saved settings, select Custom in the Saved Settings list in the Print dialog box.
If you change the Media Type or Color settings while your customized setting is selected in the Saved Settings list, your saved setting is not affected by the change. To return to your saved setting, simply reselect it in the list.

[Top]
| Version 1.00E, Copyright © 2003, SEIKO EPSON CORPORATION |
Making the Media Type setting
Making the Color setting
Making the Mode setting
Previewing your printout
Making Layout settings
Saving the document as a PDF file
Making the Color Management setting
Showing the current settings in the Print dialog box
Saving and using your settings in the Print dialog box