![]()
Reference Guide
|
|
Index |
|
Search |
|
Glossary | |||||
|
|
Contents |
|
Help |
|
Safety | |||||
|
|
|
|||||||||||||||||||||||||||||||||
Replacing Photo Cartridge
Using the Control panel
 |
Press the  or or  to select More Options, then press the OK button. to select More Options, then press the OK button.
|
 |
Press the or to select Maintenance, then press the OK button.
|
 |
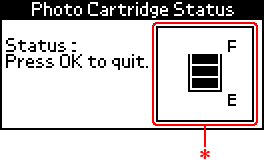
Press the or to select Cartridge Status, then press the OK button. The ink icon appear on the LCD panel.
|
 |
||
|
Ink icon indicates the amount of the ink remaining as follows:
|
Ink icon |
Status |
|
|
Ink remaining |
|
|
Photo cartridge is nearly empty. |
|
|
Photo cartridge is empty. Replace with a new one. |
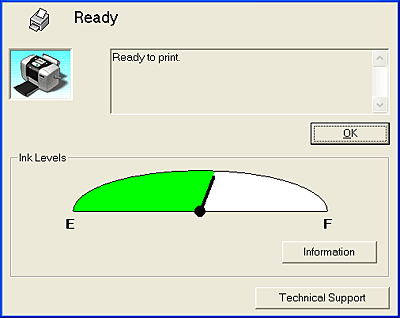
You can check the amount of ink remaining in the photo cartridge using EPSON Status Monitor 3 or the progress meter. Refer to the appropriate section below for details.
Access EPSON Status Monitor 3 in one of the following ways.
 See Monitoring Preferences
A graphic displays the remaining amount of ink.
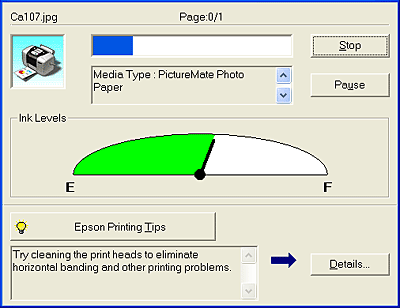
The progress meter dialog box appears automatically when you send a print job to the printer. You can check the remaining amount of ink from this dialog box.
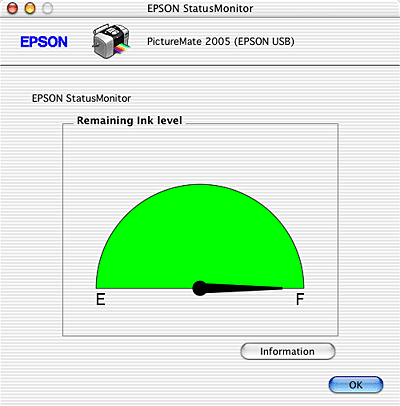
You can check the amount of ink remaining in the photo cartridge using EPSON StatusMonitor. Follow the steps below.
|
| Double-click Macintosh HD (the default hard disk name), double-click the Applications folder, then double-click the EPSON Printer Utility icon. The Printer List window appears. |
|
| Select your printer, then click OK. The EPSON Printer Utility dialog box appears. |
|
| Click the EPSON StatusMonitor button. The EPSON StatusMonitor dialog box appears. |
| Note: |
|
 Next |
| Version NPD1419-00, Copyright © 2005, SEIKO EPSON CORPORATION |
 ink icon
 comes on
 and
and  blinks