|

User's Guide
|
|
Replacing the Photo Cartridge
Checking the Photo Cartridge Status (Ink Level)
 Using the Control Panel
 For Windows
 For Mac OS X
Using the Control Panel
When the photo cartridge is low on ink, you see this icon in the upper-left corner of the LCD screen.
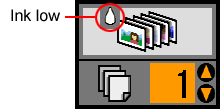
You can check the approximate ink level in your photo cartridge at any time.
 |
Press the Mode button to select  . .
|
 |
Press the  or or  button to select Check Ink Levels, then press the button to select Check Ink Levels, then press the  Start button. Start button.
|

 |
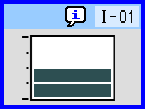
You see a screen showing the approximate ink level in your photo cartridge. Press the  Start button to close the screen. Start button to close the screen.
|

[Top]
For Windows
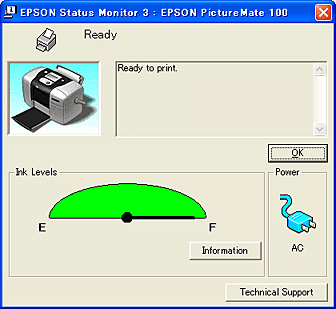
You can check the amount of ink remaining in the photo cartridge using EPSON Status Monitor 3 or the progress meter. Refer to the appropriate section below for details.
EPSON Status Monitor 3
Access EPSON Status Monitor 3 in one of the following ways.
-
Double-click the printer-shaped shortcut icon on your Windows taskbar. To add a shortcut icon to the taskbar, see the section below.
 See Monitoring Preferences
-
Open the printer driver, click the Maintenance tab, then click the EPSON Status Monitor 3 button.
A graphic displays the remaining amount of ink.
Progress meter
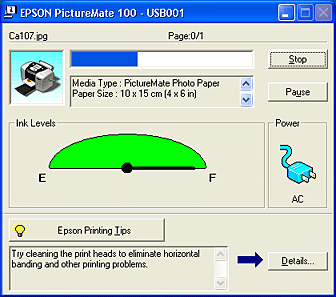
The progress meter dialog box appears automatically when you send a print job to the printer. You can check the remaining amount of ink from this dialog box.

[Top]
For Mac OS X
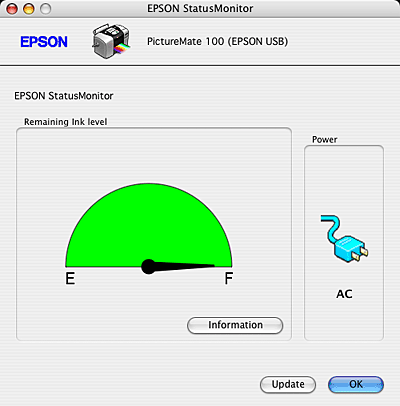
You can check the amount of ink remaining in the photo cartridge using EPSON StatusMonitor. Follow the steps below.
 |
Access the EPSON Printer Utility dialog box.
 See For Mac OS X See For Mac OS X
|
 |
Click the EPSON StatusMonitor button. The EPSON StatusMonitor dialog box appears.
|
 |  |
Note:
|
 |  | |
The graphic displays the amount of ink that remained when EPSON StatusMonitor was first opened. To update the ink-level information, click Update.
|
|

[Top]
| Version NPD1531-00, Copyright © 2005, SEIKO EPSON CORPORATION |
Using the Control Panel
For Windows
For Mac OS X