![]()
Reference Guide
|
|
Index |
|
Search |
|
Glossary | |||||
|
|
Contents |
|
Help |
|
||||||
|
|
|
|||||||||||||||||||||||||||||||||
Scanning / Various Scanning Options
For photos
Follow the steps below to make settings suitable for scanning photos (reflective documents) in the Professional Mode.
 | Place photos on the document table. If necessary, see the following section for more information. |
 | Placing Photos and Documents on the Document Table |
 | Start EPSON Scan and then select the Professional Mode. For details on how to select a scanning mode, see Changing the scanning mode. |
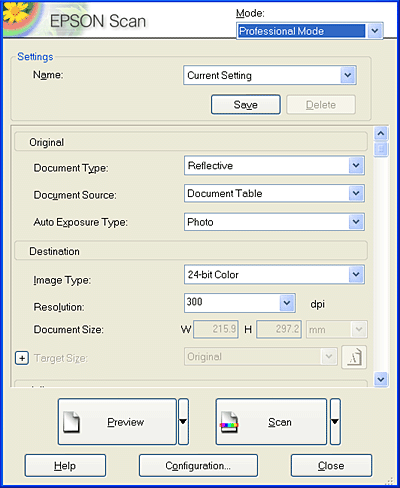
 | The setting window appears. Specify the settings to match your document, referring to the illustration and the table below. |
|
Original |
Document Type |
Reflective |
|
Document Source |
Document Table |
|
|
Auto Exposure Type |
Photo |
|
|
Destination |
Image Type |
Select a suitable image type. |
|
Resolution |
Select an appropriate resolution. See Select a suitable resolution. |
|
|
Target Size |
To be set in a later step. |
|
|
Adjustments |
To be set in a later step. |
|
 | Click the Preview button to preview the images. |
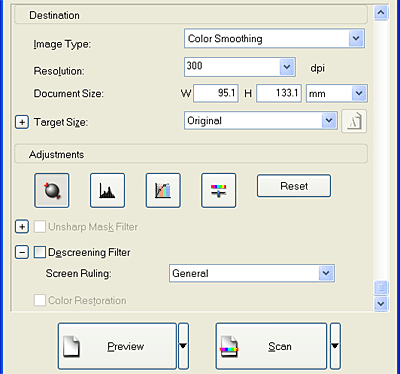
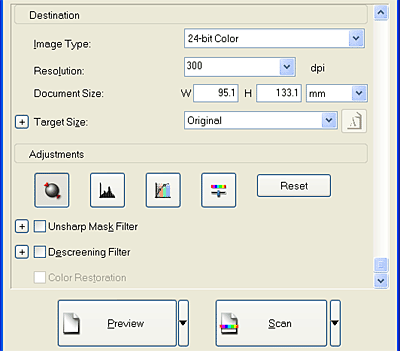
 | Use Target Size to specify the output size of the scanned images and then specify the Adjustments settings, if necessary. See Creating Beautiful Reproductions for details. |
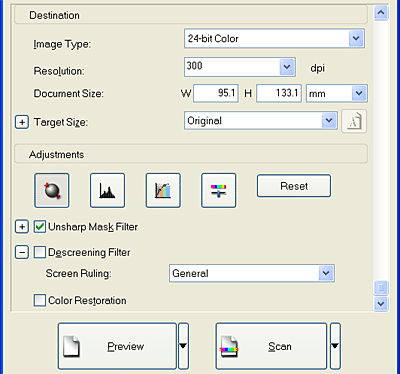
 | Click Scan to start scanning. |
The scanned images are sent to the application or saved in the specified folder.
When you specify a high resolution, the number of pixels of the data increases and the scanned image becomes fine in texture. However, increasing the resolution causes the data size to increase. Specify a suitable resolution according to the scanning purpose.
The following table indicates the suitable resolution to use according to the scanning purpose.
|
Purpose |
Resolution |
|
Sending E-mail |
96 to 150 dpi |
|
OCR (Optical Character Recognition) |
300 dpi |
|
Printing |
300 dpi |
|
Filing |
300 dpi |
|
Sending Fax |
200 dpi |
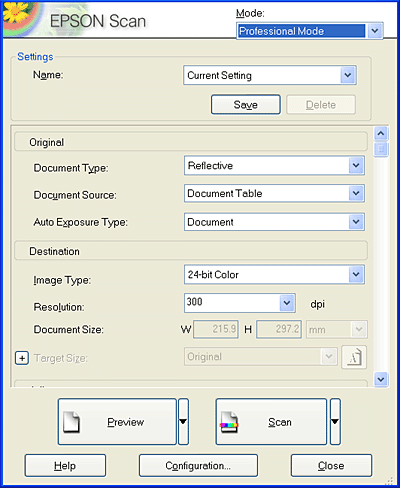
Follow the steps below to make settings suitable for scanning text and line art in Professional Mode. With this feature, outlines of text and line art are scanned and clearly defined. Clearly defined text can be reliably converted into text data using OCR software. See Scanning Documents to Convert to Text Data (OCR) for details.
|
| Place a document on the document table. |
| Placing Photos and Documents on the Document Table |
|
| Start EPSON Scan and then select the Professional Mode. For details on how to select a scanning mode, see Changing the scanning mode. |
|
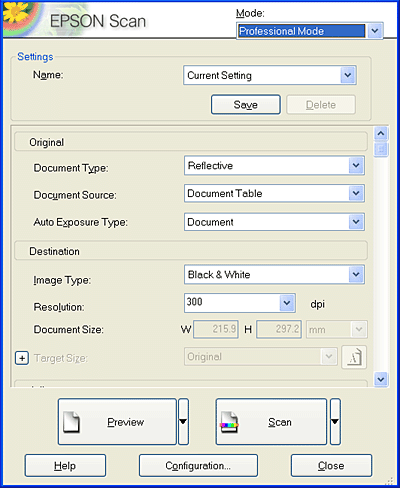
| The setting window appears. Specify the settings to match your document, referring to the illustration and the table below. |
|
Original |
Document Type |
Reflective |
|
Document Source |
Document Table |
|
|
Auto Exposure Type |
Document |
|
|
Destination |
Image Type |
Black&White is recommended. |
|
Resolution |
300 dpi for texts, |
|
|
Target Size |
To be set in a later step. |
|
|
Adjustments |
To be set in a later step. |
|
|
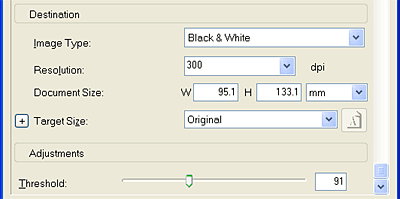
| Click the Preview button to preview the images. |
|
| Use Target Size to specify the output size of the scanned images and then specify the Adjustments settings, if necessary. See Creating Beautiful Reproductions for details. |
|
| Click Scan to start scanning. |
The scanned images are sent to the application or saved in the specified folder.
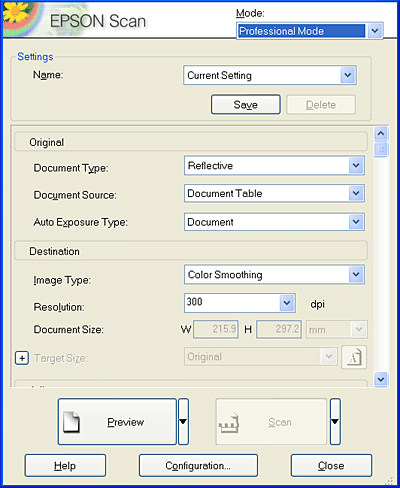
Follow the steps below to make settings suitable for scanning color documents in Professional Mode. With this feature, the use of colors on an original document is simplified to prevent the scanned image from being mottled. It is also suitable for modifying colors of an image with a color re-touching application.
|
| Place a document on the document table. |
| Placing Photos and Documents on the Document Table |
|
| Start EPSON Scan and then select Professional Mode. For details on how to select a scanning mode, see Changing the scanning mode. |
|
| The setting window appears. Specify the settings to match your document, referring to the illustration and the table below. |
|
Original |
Document Type |
Reflective |
|
Document Source |
Document Table |
|
|
Auto Exposure Type |
Document |
|
|
Destination |
Image Type |
Color Smoothing |
|
Resolution |
Select an appropriate resolution. See Select a suitable resolution. |
|
|
Target Size |
To be set in a later step. |
|
|
Adjustments |
To be set in a later step. |
|
|
| Click the Preview button to preview the images. |
|
| Use Target Size to specify the output size of the scanned images and then specify the Adjustments settings, if necessary. See Creating Beautiful Reproductions for details. |
|
| Click Scan to start scanning. |
The scanned images are sent to the application or saved in the specified folder.
Follow the steps below to make settings suitable for scanning newspapers and magazines in Professional Mode. Using this feature, you can avoid a blank area being scanned as a yellowish image or images on the back side of paper being scanned through.
|
| Place a document on the document table. |
| Placing Photos and Documents on the Document Table |
|
| Start EPSON Scan and then select Professional Mode. For details on how to select a scanning mode, see Changing the scanning mode. |
|
| The setting window appears. Specify the settings to match your document, referring to the illustration and the table below. |
|
Original |
Document Type |
Reflective |
|
Document Source |
Document Table |
|
|
Auto Exposure Type |
Document |
|
|
Destination |
Image Type |
Select an appropriate image type. |
|
Resolution |
Select an appropriate resolution. See Select a suitable resolution. |
|
|
Target Size |
To be set in a later step. |
|
|
Adjustments |
To be set in a later step. |
|
|
| Click the Preview button to preview the images. |
|
| Use Target Size to specify the output size of the scanned images and then specify the Adjustments settings, if necessary. See Creating Beautiful Reproductions for details. |
|
| Click Scan to start scanning. |
The scanned images are sent to the application or saved in the specified folder.
| Version NPD0683-00, Copyright © 2004, SEIKO EPSON CORPORATION |