![]()
Reference Guide
|
|
Index |
|
Search |
|
Glossary | |||||
|
|
Contents |
|
Help |
|
||||||
|
|
|
|||||||||||||||||||||||||||||||||
Scanning / How to
Adjusting settings in Professional Mode
Click the  Common Job Settings tab and a settings menu will appear in which you can define a number of parameters. There are three main items in this setting menu: Scan Options, Output Information and Hint.

|
|
This item allows you to select the color mode which you wish to apply to the scanned images. The Default color mode is "Color". Other options include Gray, Gray 16 bits, BW and Color 48 bits. |
|
|
Selects the resource type of the original. |
|
|
Sets the scanning resolution.The default resolution is 600dpi. Other available resolutions include: 75, 100, 150, 200, 300, 600, 1200, 2400, 4800, 9600 and 19200. |
|
|
Sets the exact size to which you wish to output your scanned images. |
|
|
If you are scanning images from magazines, newspapers or other printed materials, you will find that the scanned image appears to be covered by tiny screen patterns. To eliminate this screen pattern, you can use the options and choose the kind of original you want to descreen. EPSON Scan Tool Light will descreen the scanned image automatically. |
This sub-menu allows you to define various items. There are four items in this setting window: Scaling, ProportionLinkage, Document Width and Document Height.
This sub-menu offers you a hint for each function. These hints will help you to understand how to operate each function.
Click the  Color Adjust tab and a settings menu will appear in which you can define various items. There are five main items in this setting menu:
  Brightness and Contrast Adjustment,
  Color Balance,
  Curve Adjustment,
  Level Adjustment and
  Hue & Saturation Adjustment.
This item allows you to adjust the brightness and contrast of the scanned image.
You can manually type the values between -100 and 100 (the default is 0) into their text boxes. You can also drag the scroll bar left to decrease or right to increase the effect. We recommend you click the  Auto button to let the software adjust the effect automatically.
|
|
Load setting value. |
|
|
Save selected setting value. |
|
|
This item allows you to reset the brightness or contrast values. |
|
|
Reset both brightness and contrast values. |
|
|
Click the "Auto" button to let the software adjust the effect automatically. |
With the Color Balance menu, you can change the mixture of colors of an image and emphasize or diminish certain colors.
Color Balance Value: You can drag the triangles or enter the value (from -100 to 100) in the box directly to make adjustments.
To adjust the color balance, first, select the channel you want to adjust, then drag the triangles under the three color bars. You can also enter the desired values directly into the three text boxes to the right of the color bars.
For example, if the color of the brighter area in the original you scan appears to be bluish, you can first choose Highlight as the channel, and then drag the triangle under the Cyan-Red bar to the right, or drag the triangle under the Yellow-Blue bar to the left to eliminate the bluish effect.
|
|
Load setting value. |
|
|
Save selected setting value. |
|
|
This item allows you to reset the color balance value. |
|
|
Reset all color balance values. |
The Curve tool is used to adjust the brightness properties of midtone pixels in an image.
Use the Color Channel box to select the color channel to be adjusted. This allows you to adjust the curve property of each color channel respectively.
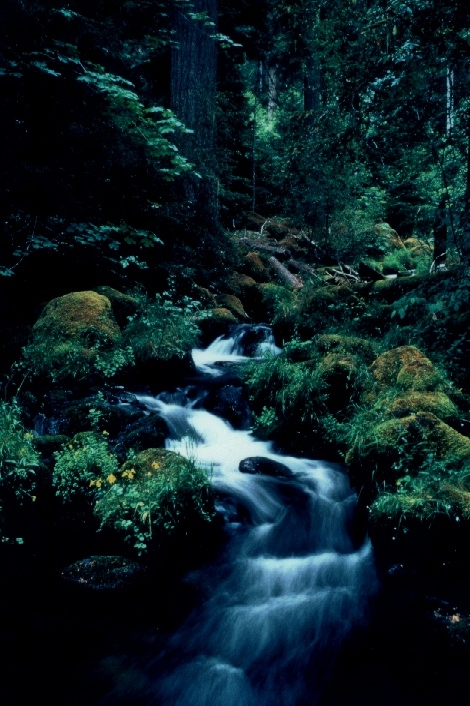
The x-axis in the Tonal Map represents the input brightness level of the pixels in an image. The y-axis represents the output brightness level of the image. By clicking and dragging the curve to change its shape, you can adjust the difference between the input and output brightness levels of an image without extensively modifying the dark and bright areas. If we compare the following images and their Tonal Maps:
The original image and its Tonal Map. The curve is straight and diagonal.
 |
 |
Drag the curve to the left, and the mid-tone area of the image becomes brighter.
 |
 |
Drag the curve to the right, and the mid-tone area of the image becomes darker.
 |
 |
You can also click the curve to add new points and further change the shape of the curve:
 |
 |
You can read the precise input/output value in the Input/Output Status Area.
|
|
Load setting value. |
|
|
Save selected setting value. |
|
|
This item allows you to reset the curve value. |
|
|
Reset all curve values. |
The Color Level dialog box shows the distribution of brightness levels of an image and its values as classified into the Input Level and the Output Level.
Use the Color Channel box to select a color channel to adjust. This will allow you to adjust the histogram property of each color channel respectively.
A histogram displays the distribution of dark and bright pixels in an image. The x-axis represents the brightness level that is divided into 256 (0 to 255) equal portions. The y-axis represents the quantity of pixels in each brightness level. A comparison of two images and their histograms follows:

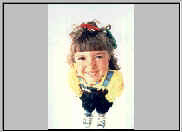
Brighter images have brighter pixels, therefore the bars in the right are higher than those in the left.
 |
 |
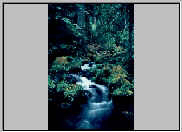
Darker images have darker pixels, therefore the bars in left are higher than those in the right.
 |
|
|
We can see that in Image 1, there is a higher contrast between the brighter and darker parts of the image. Bright and dark pixels occupy a larger portion of the total image. Therefore, in the histogram there are higher bars in the left (darker side) and right (brighter side). In the center the bars are relatively much lower, which means that there are only a few midtone pixels in the image.
In Image 2, pixels in objects possess greater levels of brightness and darkness. The distribution is more even than that in Image 1. Therefore, the brighter, midtone and darker pixels share evenly the total pixels in the image. This will make the histogram for Image 2 appear smoother.
 |
 |
 |
 |
| Image 1 | Image 2 |
To adjust a level, first choose the color channel. There are four radio boxes for the selection of channels. If you select Master, the level of all three color channels (red, green and blue) will be adjusted simultaneously. If you select one of the Red, Green, or Blue boxes, then only the selected color channel will be adjusted.
Next, you can adjust the level by dragging the triangle under the diagrams. The black handle (the left one) is for the adjustment of shadow, the gray handle (the middle one) is for mid-tone, and the white handle (the right one) is for highlight. In addition, you can adjust the values by directly entering the desired values in the text boxes. You can also press the Auto button to let EPSON Scan Tool Light automatically adjust the color level according to the color of the whole image.
Below is an example of using the histogram tools to enhance the image and add detail:
 |
 |
 |
 |
|
|
Load setting value. |
|
|
Save selected setting value. |
|
|
This item allows you to reset the level value. |
|
|
Reset all level values. |
Hue is a characteristic that distinguishes one color from another, while Saturation decides the intensity of a color.

You can use the Color Map to specify the hue and saturation of the color you want to use. Move the mouse cursor on the Color Map and then click on it. Drag within the Color Map to select the hue of the color you want to use. The distance from the center of the wheel decides the saturation of the color: the farther you drag the mouse cursor from the center of the Color Map, the higher the saturation.
You can drag the triangle under the Lightness Bar to adjust the lightness of the color you choose. To increase the lightness, drag the triangle to the right. Drag the triangle to the left to reduce the lightness.

When you drag within the Color Map to choose the hue and saturation of color or drag the triangle below the Lightness Bar to specify the lightness of color, the related information will also be shown in the Entry Boxes. You can also enter the values here directly.
|
|
Load setting value. |
|
|
Save selected setting value. |
|
|
This item allows you to reset the hue or saturation values. |
|
|
Reset all hue and saturation values. |
Click the  Job Occasion tab and a settings menu will appear. Note that these Job Occasion functions in Professional Mode are the same as those in Home Mode. Please refer to the instructions in Opening EPSON Scan Tool Light.

Professional Mode also provides you with the settings tool bar. There are four main items in the tool bar: File, Config, Special and Help.

|
Load |
Load setting value. |
|
Save |
Save selected setting value. |
|
Reset |
This item allows you to reset setting values. |
|
Auto Preview |
If you check this item, EPSON Scan Tool Light will automatically perform a preview when the modes are changed. |
||||||
|
Auto Function |
When you left click the mouse on the "Auto Function" item, the Auto Function Menu shown below will appear. There are three items to choose from: Auto Crop, Auto Rotate, Auto Type.
If you check this item, EPSON Scan Tool Light will crop the scanned images. With this function, you can choose to crop the maximum area of all image objects or crop specific areas for each object.
If you check this item, EPSON Scan Tool Light will automatically rotate the scanned image to the correct position.
If you check this item, EPSON Scan Tool Light will choose an appropriate image type to scan. You can also clear the check box and select an image from the drop-down list box. |
||||||
|
Preview Resolution |
You can change the preview resolution by inputting a value into the text box or by dragging the slider. |
|
Color Matching |
Left click the mouse on the "Color Matching" item and the Color Matching function will be enabled. This function maps image color through the color profile from the input device (scanner) to the output device (printer). |
| Note: |
|
To help you better understand and operate EPSON Scan Tool Light, you can access the online help provided in Professional Mode. Click the Help button and a submenu with the following items will appear.
Shows the scanner information in a dialog which includes: "Scanner Model", "Firmware Version", "Driver Version", "Device Manager", "USB Info", "Max Resolution", "Max Scan Area".
Please have the information provided in these menus ready in the event that you should ever need to contact technical support.
| Version NPD0862-00, Copyright © 2004, SEIKO EPSON CORPORATION |
 Image Type
 Resource Type
 Scan Resolution
 Output Size
 Descreen Selection
 Load
Load
 Save
Save
 Reset
Reset
 Reset All