 |
 |
|
||
 |
||||
Setting Up Your Printer on a Network
Sharing the printer
This section describes how to share the printer on a standard Windows network.
The computers on a network can share a printer that is directly connected to one of them. The computer that is directly connected to the printer is the printer server, and the other computers are the clients which need permission to share the printer with the printer server. The clients share the printer via the printer server.
According to the versions of Windows OS and your access rights on the network, perform the appropriate settings of the printer server and clients.
 Note:
Note:|
When sharing the printer, be sure to set EPSON Status Monitor 3 so that the shared printer can be monitored on the printer server and clients. See Setting up EPSON Status Monitor 3.
When connecting to a Windows XP shared printer, error and warning notifications do not appear during printing. Installing Windows XP Service Pack 1 or later will solve this problem.
When connecting to a shared printer beyond a router, error and warning notification for shared printers during printing is not available in some cases because of the router’s settings.
The printer server and clients should be set on the same network system, and they should be under the same network management beforehand.
The on-screen displays on the following pages may differ depending on the version of Windows OS.
|
Setting up your printer as a shared printer
Follow these steps to set the printer server.
 Note:
Note:|
You must access as the Administrators of the local machine.
|
 |
For a Windows 7 printer server, click Start, and click Devices and Printers.
|
For a Windows Vista printer server, click Start, click Control Panel, click Hardware and Sound, and then click Printers.
For a Windows XP Professional printer server, click Start, and click Printers and Faxes.
For Windows XP Home Edition printer server, click Start, click Control panel, then click Printers and Faxes.
For a Windows 2000 printer server, click Start, point to Settings, and click Printers.
 |
For Windows 7, right-click your printer icon, click Printer Properties, and then click the Sharing tab in the appearing screen.
|
For Windows Vista, XP, or 2000, right-click your printer icon, and click Sharing in the menu that appears.
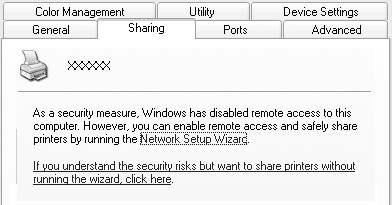
For Windows XP, if the following menu appears, click either Network Setup Wizard or If you understand the security risks but want to share printers without running the wizard, click here.
In either case, follow the on-screen instructions.
 |
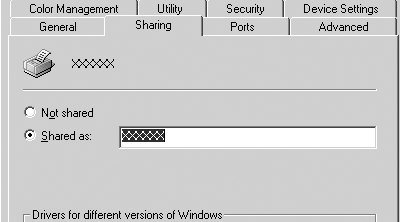
For a Windows 2000 printer server, select Shared as, then type the name in the Share name box and click OK.
|
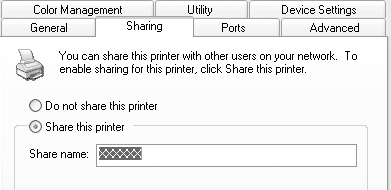
For a Windows 7, Windows Vista, or XP printer server, select Share this printer, then type the name in the Share name box and click OK.
 Note:
Note:|
Do not use spaces or hyphens for the share name, or an error may occur.
In Windows 7 or Vista, you cannot select share this printer until you click the Change sharing options button.
|
You need to set the client computers so that they can use the printer on a network. See the following pages for details:
Setting for the clients
This section describes how to install the printer driver by accessing the shared printer on a network.
 Note:
Note:|
To share the printer on a Windows network, you need to set the printer server. For details, see Setting up your printer as a shared printer.
This section describes how to access the shared printer on a standard network system using the server (Microsoft workgroup). If you cannot access the shared printer due to the network system, ask the administrator of the network for assistance.
When you want to use the EPSON Status Monitor 3 at clients, you have to install both of the printer driver and the EPSON Status Monitor 3 in each client from the CD-ROM.
If the printer drivers are not already installed on the client, please install them before performing these settings.
|
 |
On the Windows Start menu, open the Device and Printers, Printers or Printers and Faxes.
|
For Windows 7 clients, click Start, and click Devices and Printers.
For Windows Vista clients, click Start, click Control Panel, click Hardware and Sound, and then click Printers.
Windows XP Professional clients, click Start and then click Printers and Faxes.
Windows XP Home Edition clients, click Start, click Control Panel, and then click Printers and Faxes.
For Windows 2000 clients, click Start, click Settings, and then click Printers.
 |
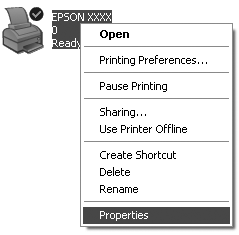
Right-click the icon for the printer you wish to change the settings for, and then click Properties (Windows Vista, XP and 2000) or Printer properties (Windows 7).
|
 |
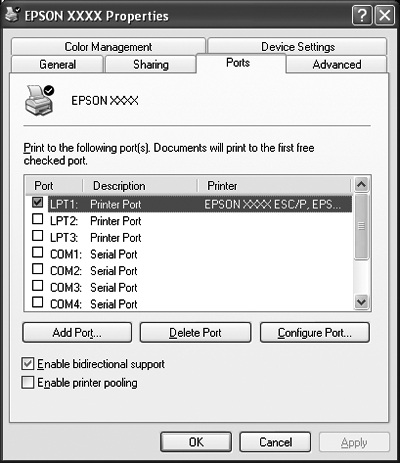
Click the Ports tab and then click Add Port.
|
 |
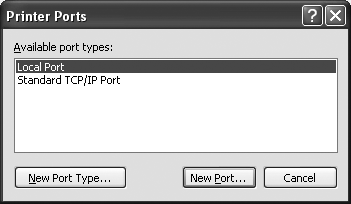
When the Printer Ports window appears, select Local Port, and then click New Port.
|
 |
Enter the following information for the port name and then click OK.
|
\\Name of computer connected to the target printer\name of shared printer

 |
After returning to the Printer Ports window, click Close.
|
 |
Check that the name you entered for the port has been added and selected, and then click Close.
|
Installing the printer driver from the CD-ROM
This section describes how to install the printer driver in the clients.
The on-screen displays on the following pages may differ depending on the version of Windows OS.
 Note:
Note:|
You must access Windows as the Administrator.
|
 |
Access the shared printer and a prompt may appear. Click OK, and then follow the on-screen instructions to install the printer driver from the CD-ROM.
|
 |
Insert the CD-ROM, then the EPSON Installation Program dialog box appears. Cancel the dialog box by clicking Cancel, then type the appropriate drive and folder names in which the printer driver for clients is located, then click OK.
|
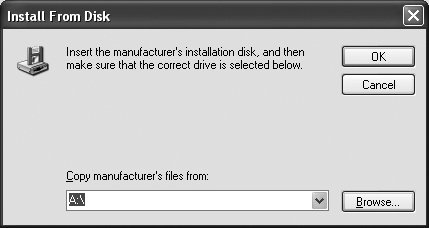
When installing drivers, “Digital Signature is not found.” may appear. Click Yes (for Windows 2000), Continue Anyway (for Windows XP) or Install this driver software anyway (for Windows 7 or Windows Vista) and continue installing.
The folder name differs depending on the OS being used.
|
Client’s OS
|
Folder Name
|
|
Windows 2000/XP/Vista/7 x86 Edition
|
\WINX86
|
|
Windows XP/Vista/7 x64 Edition
|
\WINX64
|
 |
Select the name of the printer, then click OK. Then follow the on-screen instructions.
|
 Note:
Note:|
If you also want to install EPSON Status Monitor 3, see Installing EPSON Status Monitor 3 for instructions.
If EPSON Status Monitor 3 is installed with the Windows Firewall feature turned on (recommended), the shared printer may not be able to be monitored. This problem can be resolved by adding EEBAgent.exe to Exceptions of the firewall function.
|
