|

Reference Guide
|
|
Setup & Maintenance / Installing Options
Stacker
Follow these steps to install the optional Stacker.
 |
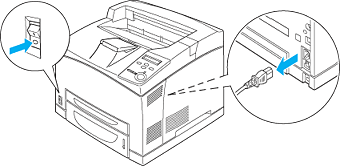
Turn off the printer and unplug the power cord and interface cable.
|
 |
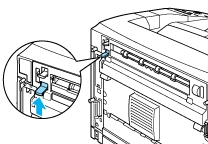
Lift the second lever at the top left corner of the back of the printer.
|
 |
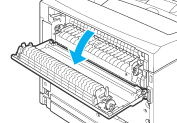
Open cover B.
|
 |
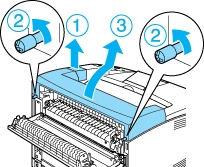
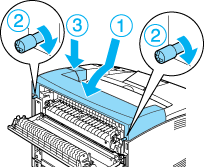
Remove the locking clip, and then lift the right and left levers to remove the top cover.
|
 |
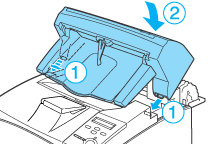
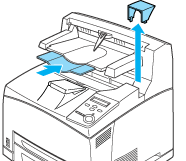
Insert the right and left tabs of the Stacker into the holes on the top of the printer and slowly lower it onto the top of the printer.
|
 |
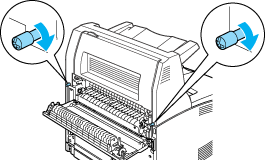
Secure the screws at both ends of the bottom of the stacker.
|
 |
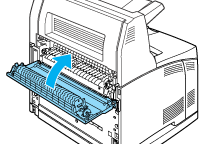
Close cover B.
|
 |
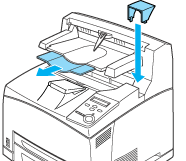
Attach the locking clip that was shipped with the Stacker and pull out the extension tray.
|
 |
Reconnect the interface cable and power cord, and then turn on the printer.
|
Removing the Stacker
Follow these steps to remove the optional Stacker.
|
|
Turn off the printer and unplug the power cord and interface cable.
|
|
|
Close the extension tray of the Stacker and remove the locking clip.
|
|
|
Lift up the second lever at the top left corner of the back of the printer to open cover B.
|

|
|
Remover the screws on both sides of the Stacker, and while holding up the Stacker, remove the right and left tabs from the holes on the top of the printer.
|

|
|
Insert the right and left tabs of the top cover into the holes on the top of the printer, and then attach the locking clip that was shipped with the printer.
|
|
|
Reconnect the interface cable and power cord, and then turn on the printer.
|

[Top]
| Version NPD0274-00, Copyright © 2003, SEIKO EPSON CORPORATION |

