|

Reference Guide
|
|
How To / Installing Options
Memory Module
Your printer is provided with 16MB of standard memory. You can increase printer memory up to 144MB by installing optional DIMM (Dual In-line Memory Module). Increasing the printer's memory allows you to print complex or graphics-intensive documents.
To install DIMM, see the following section or the Setup Sheet.
Before purchasing make sure that the DIMM you choose is compatible with EPSON products. For more details, contact your dealer or EPSON sales company.
|
Memory size
|
16MB, 32MB, 64MB, or 128MB
|
Follow these steps to install an optional memory module.
 |
Warning:
|
 | |
Be careful when working inside the printer as some components are sharp and may cause injury.
|
|
 |
Caution:
|
| |
Before you install a memory module, be sure to discharge any static electricity by touching a grounded piece of metal. Otherwise, you may damage static-sensitive components.
|
|
 |
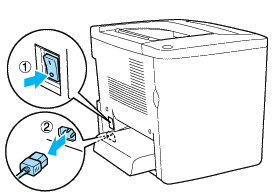
Turn the printer off and unplug the power cord.
|
 |
Prepare the printer as shown below to access the DIMM slot.
|

 |
Identify the DIMM slot (S0).
|

1. DIMM slot
 |
Insert the DIMM into DIMM slot (S0).
|

| |
Caution:
|
| | -
Do not force the DIMM into the slot.
|
|
| | -
Be sure to insert the DIMM facing the correct way.
|
|
| | -
You should not remove any modules from the circuit board. Otherwise, the printer will not work.
|
|
 |
Return the printer to its original state as shown below.
|

 |
Plug the printer's power cord into an electrical outlet.
|
 |
Turn on the printer.
|
Removing a memory module
Perform the installation procedure in reverse.

[Top]
| Version 1.00E, Copyright © 2002, SEIKO EPSON CORPORATION |


