For
Office BX610FW/Office TX610FW/SX610FW Series
Photo PX710W/Photo TX710W Series
Photo PX810FW/Photo TX810FW Series
 |
 |
|
||
 |
||||
Scanning Directly to an E-mail
You can scan and automatically attach scanned image file(s) to an e-mail message with the Scan to E-mail function on the control panel.
 |
Place your original(s) on the document table. See the booklet for instructions.
|
 |
Select the Scan to E-mail function on the control panel. Epson Scan automatically starts scanning your image as a JPEG file.
|
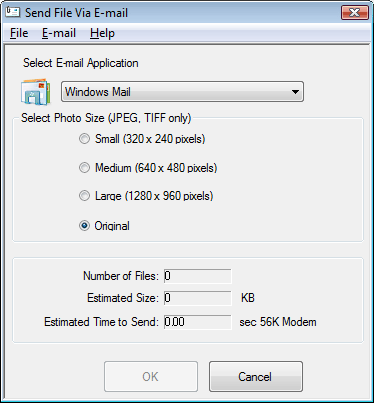
After scanning is finished, you see the Send File Via E-mail window.

 |
Select the e-mail program you use in the Select E-mail Application list.
|
 |
If you want to resize your image(s), choose an option under Select Photo Size.
|
 Note:
Note:|
The box at the bottom of the window displays information about the image file(s) you are attaching to the e-mail message.
|
 |
Click OK. Your e-mail program is opened and any scanned images you selected are attached to a new e-mail message. See your e-mail program Help if you need instructions on sending your e-mail message.
|