 See Canceling Printing
 |
 |
|
||
 |
||||
The Paper Jams
Removing jammed paper from the scanner unit
 |
 |
If the printer’s LCD screen tells you to press the OK button, press the OK button on the printer.
If the printer’s LCD screen tells you to turn off the printer, press the  On button to turn off the printer, and then work through the following steps. On button to turn off the printer, and then work through the following steps. |
 |
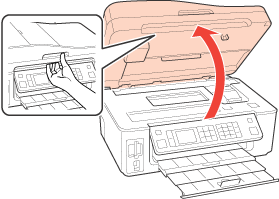
Raise the scanner unit.
|
 |
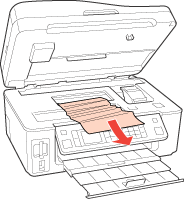
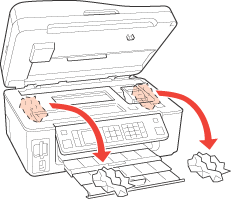
Remove all of the paper inside, including any torn pieces.
|
 |
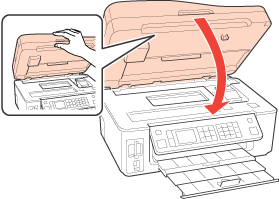
Close the scanner unit.
|
If the jammed paper remains near the rear feeder or output tray, carefully remove the paper.
Removing jammed paper from the automatic document feeder (ADF)
 |
If the printer’s LCD screen indicates that a paper jam has occurred, press the OK button on the printer.
|
 |
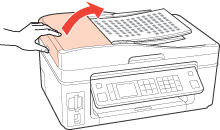
Open the ADF cover.
|
 Caution:
|
Make sure you open the ADF cover before removing jammed paper. If you do not open the cover, the printer may be damaged.
|
 |
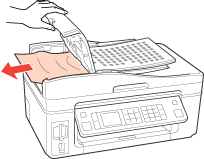
Carefully remove the jammed paper.
|
 |
If the printer’s LCD screen asks if you have removed the paper, press the OK button on the printer.
|
 |
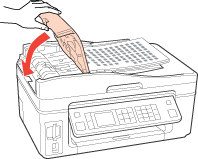
Close the ADF cover.
|
Preventing paper jams
If your paper jams frequently, check the following.
The paper is smooth, not curled or wrinkled.
You are using high quality paper.
The printable side of the paper is face up in the rear feeder.
The paper stack was fanned before loading.
The paper is not loaded above the  arrow mark inside the edge guide.
 arrow mark inside the edge guide.
The number of sheets in the paper stack does not exceed the limit specified for that paper.
 See Loading capacities for Epson special media.
 See Loading capacities for Epson special media.
The edge guide is snug against the left edge of the paper.
The printer is on a flat, stable surface that extends beyond the base in all directions. The printer will not operate properly if it is tilted.
