 |
 |
|
||
 |
||||
Scanning in Professional Mode
 |
Place your original(s) on the document table. See Placing Documents or Photos or Placing Film or Slides (Perfection V330 Photo Only) for details.
|
 |
Start Epson Scan. See Starting Epson Scan for details.
|
 |
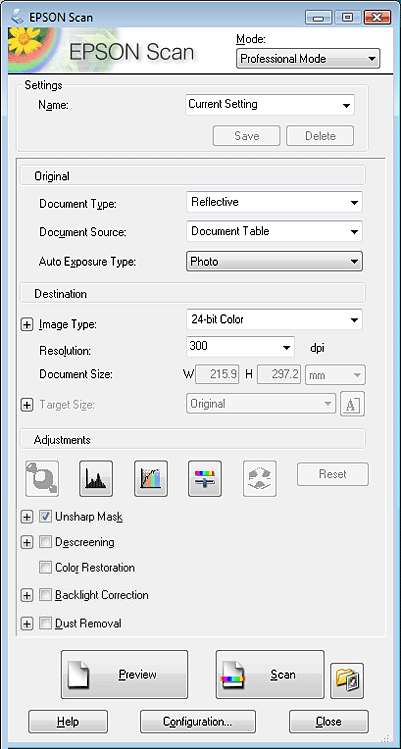
Select Professional Mode in the Mode list.
|

 Note:
Note:|
See Epson Scan Help for details.
|
 |
Select the type of original(s) you are scanning as the Document Type setting.
|
 |
Set the Document Source setting.
|
 |
If you select Reflective as the Document Type setting, select Photo or Document as the Auto Exposure Type setting.
|
If you select Film as the Document Type setting, select Positive Film, Color Negative Film, or B&W Negative Film as the Film Type setting.
 |
Set the Image Type setting.
|
 |
Select an appropriate resolution for your original(s) as the Resolution setting.
|
 |
Click Preview to preview your image(s). The Preview window appears and displays your image(s). See Previewing and Adjusting the Scan Area for details.
|
 |
Select the size of the scanned image(s) as the Target Size setting if necessary. You can scan your images at their original size, or you can reduce or enlarge their size by selecting Target Size.
|
 |
Modify the image quality if necessary. See Adjusting the Color and Other Image Settings for details.
|
 |
Click Scan.
|
 |
Your scanned image is saved in the file format and location you selected in the File Save Settings window. If you did not select any settings in the File Save Settings window, it is saved as a JPEG file in Pictures or My Pictures.
|