|

Reference Guide
|
|
Using Option / Using the Automatic Document Feeder
Cleaning and Replacing the Paper Path Guide
After you have used the Automatic Document Feeder for a long time, a line of dots may begin to appear on the scanned images. If this happens, follow the steps below to clean the paper path guide.
 |
Turn off the scanner.
|
 |
Remove the paper support.
|
 |
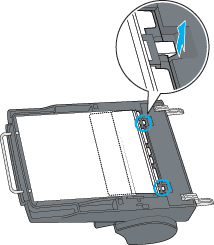
Turn the Automatic Document Feeder over and then release the clips that hold the paper path guide in place.
|
 |
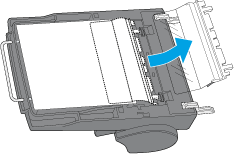
Remove the paper path guide.
|
 |
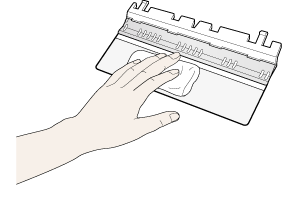
Clean the paper path guide with a soft, dry cloth.
|
 |
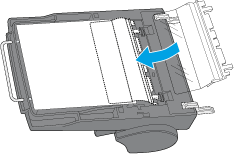
Reattach the paper path guide, making sure that the paper path guide clips correctly into place.
|
If the problem persists after cleaning, replace the paper path guide with the spare one that comes with your Automatic Document Feeder.

[Top]
| Version NPD0703-00, Copyright © 2004, SEIKO EPSON CORPORATION |

