|

Reference Guide
|
|
Using Option / Using the Automatic Document Feeder
Installing the Automatic Document Feeder
Follow the steps below to install the Automatic Document Feeder on your Epson scanner.
 |
Make sure your scanner is turned off.
|
 |
Remove your scanner's document cover by opening it and pulling it straight up.
|
 |
Remove the protective materials from the Automatic Document Feeder.
|
 |
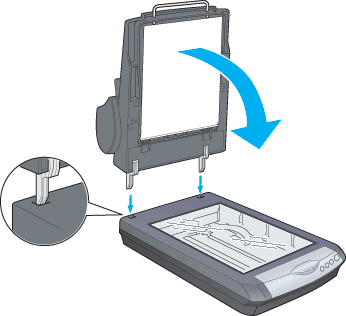
Insert the hinges on the Automatic Document Feeder into the holes at the back of the scanner and close the Automatic Document Feeder.
|

 |
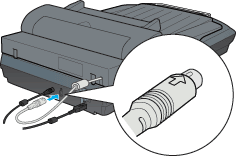
Attach the Automatic Document Feeder's connector to the scanner's option connector.
|

 |
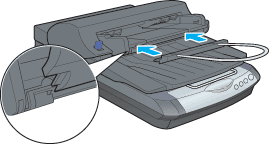
Attach the paper support to the Automatic Document Feeder.
|


[Top]
| Version NPD0703-00, Copyright © 2004, SEIKO EPSON CORPORATION |