 |
|
|||
 |
||||
Replacing the Roller Assembly Kit
You need to replace the parts on the roller assembly kit after scanning every 100,000 times.
|
Removal part
|
Part number
|
Number of scanning
|
|
Roller Assembly Kit
|
B12B813421
|
100,000
|
To replace the roller assembly kit, follow the steps below.
 |
Turn off the scanner.
|
 |
Remove all paper from the input tray.
|
 |
Unplug the AC adapter from the scanner.
|
 |
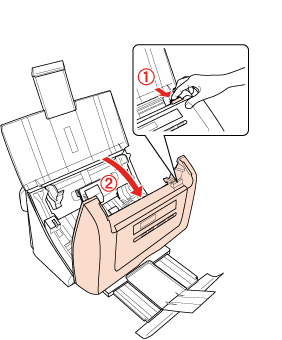
Pull the cover open lever and open the scanner cover.
|
 |
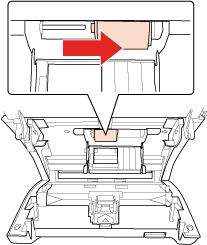
Press the hook on the separation pad, then remove the installed separation pad.
|
 Caution:
|
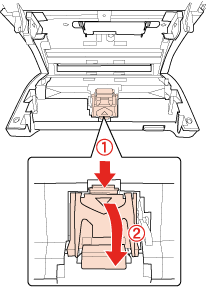
Do not touch the pick spring. Hold the separation pad holder as shown below.
 |
 |
Insert the bottom side of the new separation pad first, then press the hook on the separation pad to attach to the correct position.
|
 |
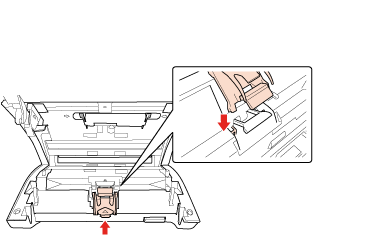
Press the hook on both sides of the paper feed roller cover, then open the cover.
|
 |
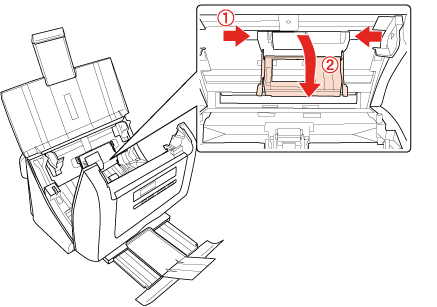
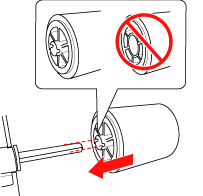
Slide and remove the installed paper feed roller.
|
 Caution:
|
Do not touch the surface of the paper feed roller. Hold the paper feed roller as shown below.
 |
 |
Attach the new paper feed roller to the correct position.
|
 Caution:
|
Do not install the paper feed roller in reverse direction.
|
 |
Close the cover of the paper feed roller, then close the scanner cover.
|
 |
Turn on the scanner.
|
 |
Start EPSON Scan Settings. Then, click Maintenance.
|
 |
Click Reset on the right of the Number of Scans.
|

 |
Click OK.
|