 |
 |
|
||
 |
||||
Replacing the Roller Assembly Kit
You need to replace the parts on the Roller Assembly Kit after scanning every 100,000 times.
|
Removal part
|
Part number
|
Number of scanning
|
|
Roller Assembly Kit
|
B12B813501
|
100,000
|
To replace the Roller Assembly Kit, follow the steps below.
 |
Turn off the scanner.
|
 |
Remove all paper from the input tray.
|
 |
Unplug the power cord from the product.
|
 |
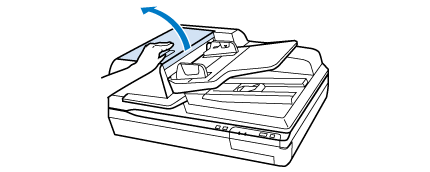
Open the Automatic Document Feeder (ADF) cover.
|
 |
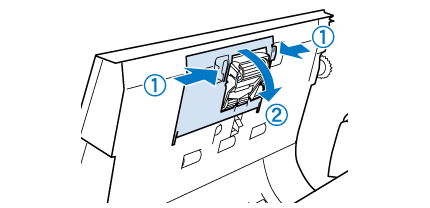
Press the hook on both sides of the pickup roller cover, then open the cover.
|
 |
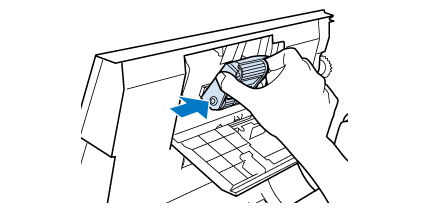
Slide and remove the installed pickup roller.
|

 |
Attach the new pickup roller to the correct position.
|
 Important:
|
Do not touch the surface of the roller.
|
 |
Close the pickup roller cover.
|
 |
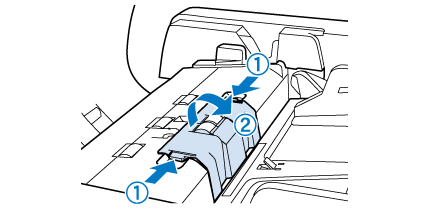
Press in the hooks on both sides of the separation roller cover, and then open the cover.
|
 |
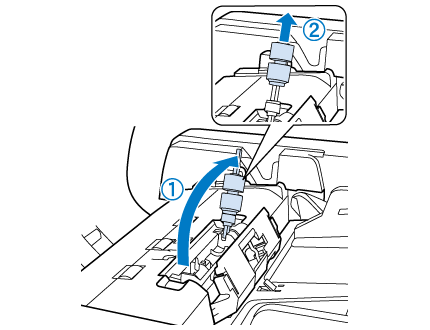
Grip the shaft of the separation roller, lift it up, and then remove the separation roller.
|
 |
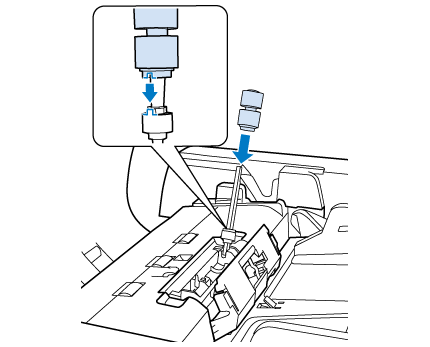
Attach the new separation roller to the correct position.
|
 |
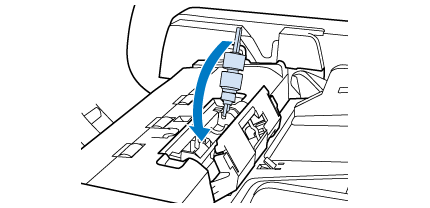
Press the shaft of the separation roller down until you hear it click into place.
|
 |
Close the separation roller cover.
|
 |
Close the ADF cover.
|
 |
Plug the power cord, and then turn on the scanner.
|
 |
Start Epson Scan Settings.
|
Windows:
Start > All Programs or Programs > EPSON > EPSON Scan > Epson Scan Settings
Start > All Programs or Programs > EPSON > EPSON Scan > Epson Scan Settings
Mac OS X:
Select Applications > EPSON Software > EPSON Scan Settings.
Select Applications > EPSON Software > EPSON Scan Settings.
 |
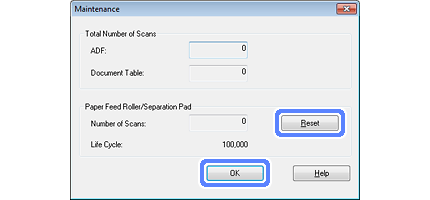
Click Maintenance.
|
 |
Click Reset, and then click OK.
|
 Important:
|
Make sure you reset the counter after replacing the Roller Assembly Kit.
|