 |
 Cleaning the inside of the printer Cleaning the inside of the printer
Cleaning the pickup roller
The printer needs only minimal cleaning. If the printer’s outer case is dirty or dusty, turn off the printer and clean it with a soft, clean cloth moistened with a mild detergent.

 |
Caution: |
|
|
Never use alcohol or paint thinner to clean the printer cover. These chemicals can damage the components and the case. Be careful not to get water onto the printer mechanism or any electrical components.
|
|
Cleaning the inside of the printer
Clean the inside of the printer if print quality deteriorates, white lines appear on prints, or if the outlines of letters or black areas are smudged.
Follow the steps below to clean the inside of the printer and the paper feeder.
 |
Make sure the printer is turned off.
|
 |
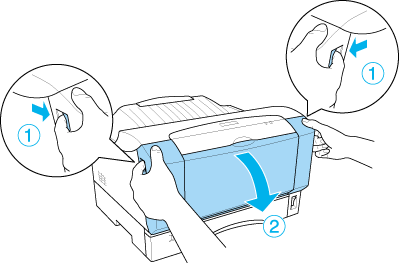
Open the printer’s front cover by placing your fingers on the grooves on both sides of the cover as shown below, and then pull it towards you.
|
 |
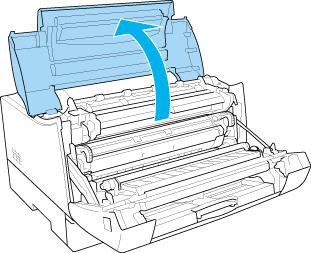
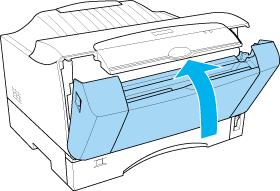
Open top cover.
|
 |
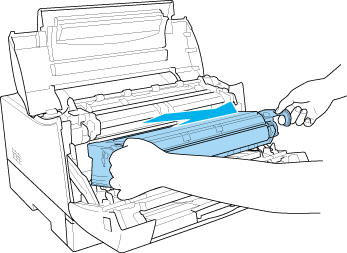
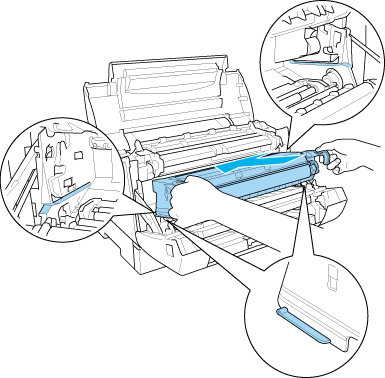
Remove the imaging cartridge from the printer.
|
|  |
Note: |
| |
|
Be careful not to touch the transfer roller.
|
|
 |
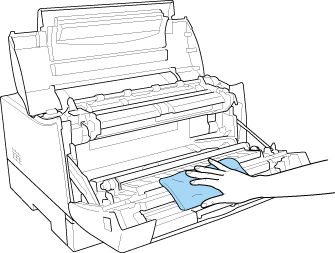
Remove any dirt inside the printer with a clean, dry, lint-free cloth. Do not use compressed air.
|
|  |
Warning: |
| |
|
Be careful not to touch the fuser, which is marked CAUTION Hot Surface Avoid Contact, or the surrounding areas. If the printer has been in use, the fuser and the surrounding areas may be very hot.
|
|
 |
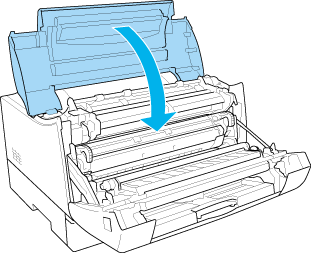
Insert the imaging cartridge carefully so that it does not bump any components inside the printer.
|
| |
Note: |
| |
|
Be careful not to touch the transfer roller.
|
|
 |
Close top cover.
|
 |
Close front cover.
|
 |
Remove all paper from the MP tray and clean the tray with a clean, dry, lint-free cloth.
|
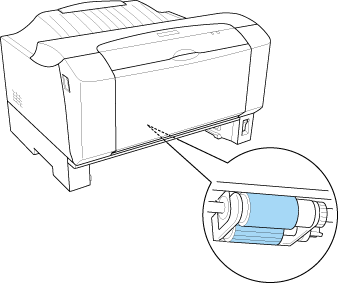
Cleaning the pickup roller
If the paper jam occurs frequently, wipe the pickup roller with a clean dampened cloth.
Follow the steps below to clean the pickup roller.
|
|
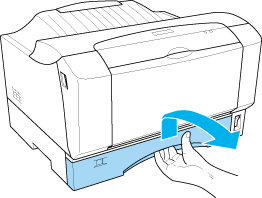
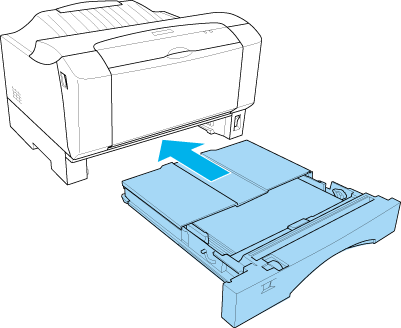
Raise the edge of the lower cassette slightly when pulling it out.
|
|
|
Gently wipe the rubber parts of the pickup roller inside the lower cassette with a wet, well-wrung cloth.
|
|
|
Reinsert lower cassette in the printer.
|
| |


 Top
Top