|

Reference Guide
|
|
How To / Installing Options
Duplex Unit
Follow these steps to install the optional Duplex Unit.
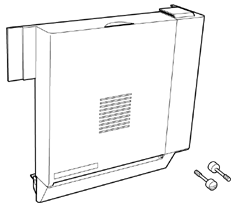
The illustration below shows all the items packed together with the Duplex Unit.
 |
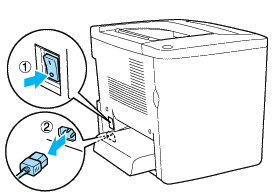
Turn the printer off and unplug the power cord.
|
 |
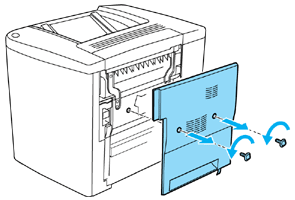
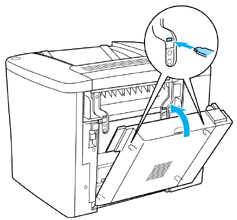
Remove the two screws and the shield from Cover AB with a cross-head screwdriver.
|
 |
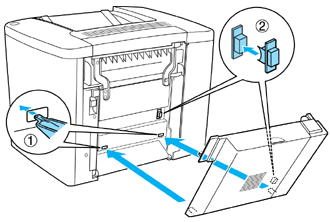
Put the Duplex Unit on the right of the printer as shown below. Make sure that the unit hooks onto the lower tabs and the connector connects into the slot.
|
 |
Make sure that the unit hooks onto the upper tabs when attaching the unit.
|
 |
Press Cover DM as shown below.
|

 |
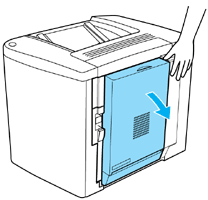
While supporting the Duplex Unit, open Cover AB.
|
 |
Check that the two tabs on the unit are correctly hooked onto Cover AB.
|

 |
While supporting the Duplex Unit, open Cover DM.
|
 |
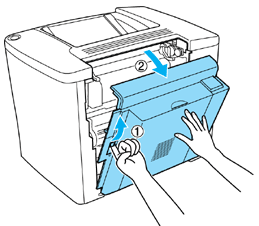
Secure the Duplex Unit to Cover AB with the two screws provided. Tighten the screws with either a screwdriver or a coin.
|

 |
Close Cover DM.
|

 |
Open Cover AB to which the Duplex Unit is attached.
|
 |
Connect the spring on the Duplex Unit to the printer.
|

 |
Close Cover AB.
|
Removing the Duplex Unit
Perform the installation procedure in reverse.

[Top]
| Version 1.00E, Copyright © 2002, SEIKO EPSON CORPORATION |

