|
 Installing an interface card Installing an interface card
 Removing an interface card Removing an interface card
Your printer comes with a Type B interface slot. Various optional interface cards are available to expand your printer’s interface options.
Installing an interface card
Follow the steps below to install an optional interface card.
 |
Caution: |
 |
|
Before you install the interface card, be sure to discharge any static electricity by touching a grounded piece of metal. Otherwise, you may damage static-sensitive components.
|
|
 |
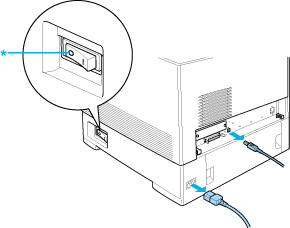
Turn the printer off and unplug the power cord and all the interface cables.
|

 |
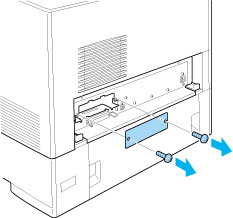
Remove the two screws and the Type B interface card slot cover as shown below.
|

 |  |
Warning: |
 |  |
|
Do not remove screws and covers that are not described in the instructions.
|
|
 |  |
Note: |
 |  |
|
Keep the slot cover in a safe place. You will need to reattach it if you remove the interface card later.
|
|
 |
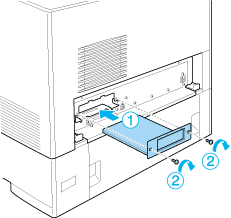
Slide and push the interface card into the slot firmly, then fasten the screw as shown below.
|

 |
Reconnect all the interface cables and the power cord.
|
 |
Plug the printer’s power cord into an electrical outlet.
|
 |
Turn on the printer.
|
To confirm that the option is installed correctly, print a Status Sheet. See Printing a Status Sheet.
Removing an interface card
 |
Caution: |
 |
|
Before you remove an interface card, be sure to discharge any static electricity by touching a grounded piece of metal. Otherwise, you may damage static-sensitive components.
|
|
Perform the installation procedure in reverse.
| 


 Installing an interface card


 Top
Top