 |
 Handling precautions Handling precautions
Replacing a toner cartridge
Always observe the following handling precautions when replacing the consumable products:
|  |
Warning: |
| |
-
If toner is spilled, use a broom and dustpan or a damp cloth with soap and water to clean it up. Because the fine particles can cause a fire or explosion if they come into contact with a spark, do not use a vacuum cleaner.
|
|
Replacing a toner cartridge
Follow the steps below to replace a toner cartridge.
 |
Confirm the color of the toner cartridge that needs to be replaced by checking the LCD panel or EPSON Status Monitor.
|
 |
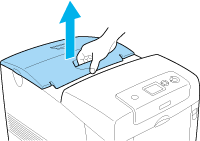
Remove the top cover.
|
 |
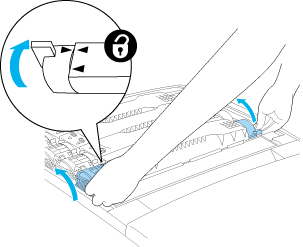
Turn the toner cartridge knobs to the unlocked position.
|
|  |
Note: |
| |
|
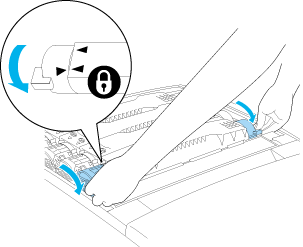
Hold the knobs with both hands.
|
|
 |
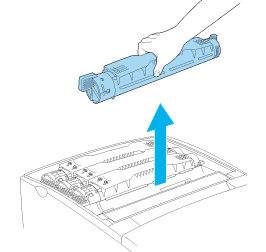
Lift the toner cartridge out of the slot.
|
| |
Note: |
 |
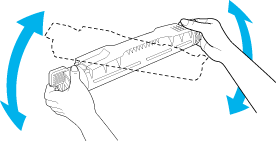
Take the new toner cartridge out of its package, and gently shake it from side to side and front to back to distribute the toner evenly.
|
| |
Warning: |
| |
|
Do not remove the protective tape yet.
|
|
 |
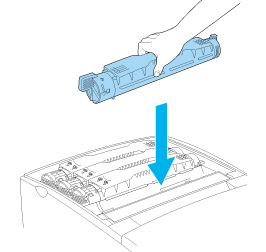
Hold the new toner cartridge as shown below, and lower it into the slot.
|
 |
Turn the toner cartridge knob to the locked position.
|
| |
Note: |
| |
|
Hold the knobs with both hands and turn them until they click.
|
|
|  |
Caution: |
| |
|
Be sure to turn the knob all the way to the locked position. Otherwise, you may have toner problems or leakage.
|
|
 |
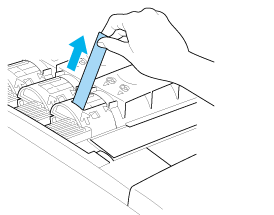
Remove the protective tape, pulling straight up from the toner cartridge. Make sure to pull the tape up slowly to avoid tearing it.
|
 |
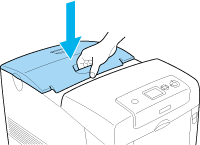
Replace the top cover.
|
| |


 Top
Top