 |
 Cleaning the density sensor Cleaning the density sensor
Cleaning the photoconductor unit
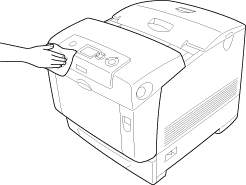
The printer needs only minimal cleaning. If the printer’s outer case is dirty or dusty, turn off the printer and clean it with a soft, clean cloth moistened with a mild detergent.
 |
Caution: |
|
|
Never use alcohol or paint thinner to clean the printer cover. These chemicals can damage the components and the case. Be careful not to get water onto the printer mechanism or any electrical components.
|
|
Cleaning the density sensor
When Clean Sensor is displayed on the LCD panel, follow the steps below to clean the density sensor.
 |
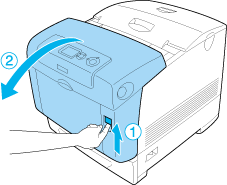
Turn off the printer.
|
 |
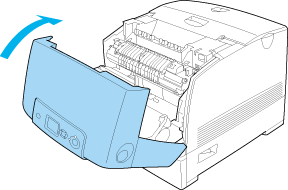
Press the latch on cover A and open the cover.
|
 |
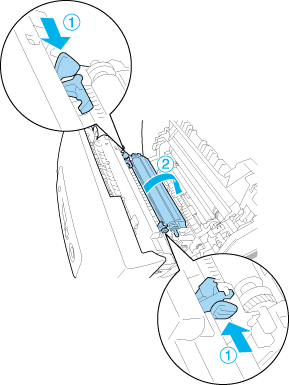
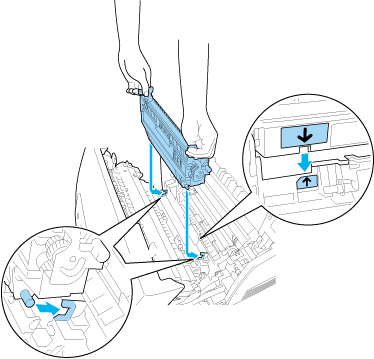
Grasp the two orange tabs and pull them up.
|
 |
Pull the transfer unit out of the printer.
|
|  |
Warning: |
| |
|
Be careful not to touch the fuser, which is marked CAUTION HIGH TEMPERATURE, or the surrounding areas. If the printer has been in use, the fuser and the surrounding areas may be very hot.
|
|
 |
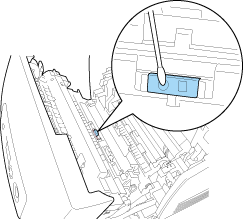
Gently wipe the transparent plastic window on the density sensor with a dry soft cloth or cotton swab.
|
 |
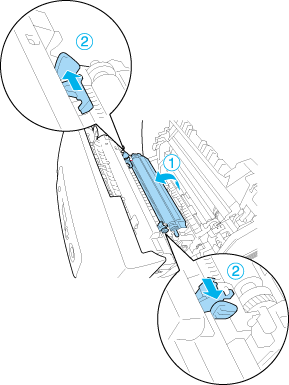
Hold the transfer unit by the orange tabs and lower it into the printer, making sure that it fits into the guides. Push the transfer unit in and up until it clicks into place.
|
 |
Pull the transfer unit toward you and push the orange tabs into place.
|
| |
Warning: |
| |
|
Be careful not to touch the fuser, which is marked CAUTION HIGH TEMPERATURE, or the surrounding areas. If the printer has been in use, the fuser and the surrounding areas may be very hot.
|
|
 |
Close cover A.
|
 |
Turn on the printer.
|
Cleaning the photoconductor unit
If printouts have dots at every 30 mm, wipe a roller in the photoconductor unit with a dry soft cloth or cotton swab.
Follow the steps below to clean the photoconductor unit.
|
Caution: |
|
|
Do not take too much time to clean the photoconductor. Exposing the photoconductor to too much light may damage the printer.
|
|
|
|
Turn off the printer.
|
|
|
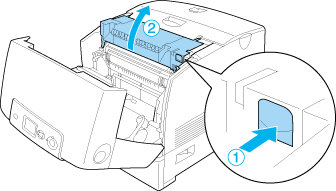
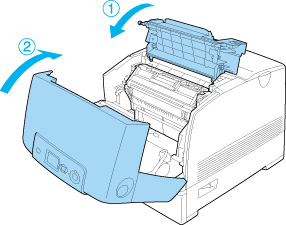
Press the latch on cover A and open the cover.
|

|
|
Raise cover D.
|
|
|
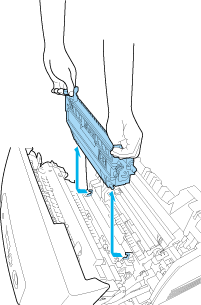
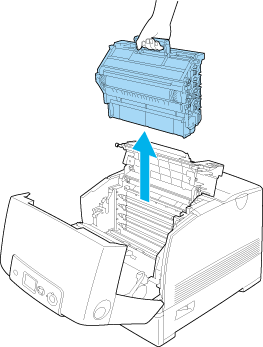
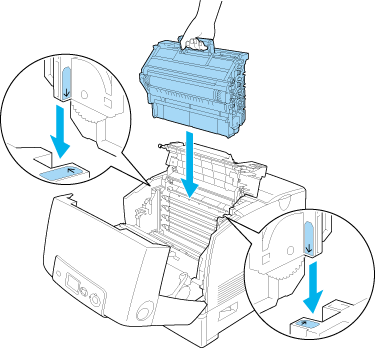
Hold the photoconductor unit by the handle, and slowly lift it straight out of the printer.
|
| |
Warning: |
| |
|
Be careful not to touch the fuser, which is marked CAUTION HIGH TEMPERATURE, or the surrounding areas. If the printer has been in use, the fuser and the surrounding areas may be very hot.
|
|
|
|
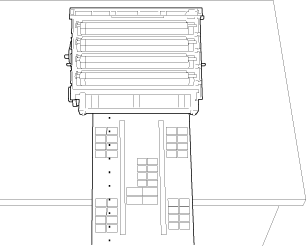
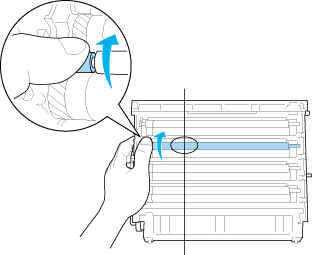
Place the printout that has dots on it and the photoconductor unit on a flat table as shown below.
|
|  |
Note: |
|
|
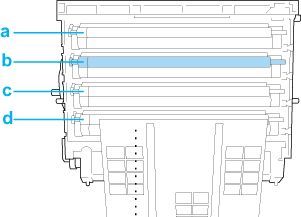
Look for the roller that is the same color as the dots on the printout. Then, look for the place on the roller that is vertically in the same position as the dots on the printout.
|
| |
Note: |
| |
|
The illustration indicates that the dots on the printout are magenta as an example.
|
|
|
|
Turn the gray part of the black roller to find the spot.
|
| |
Caution: |
| |
|
Be careful not to scratch the surface of the drum and rollers. Also, avoid touching the drum and rollers, since oil from your skin may permanently damage their surface and affect print quality.
|
|
|
|
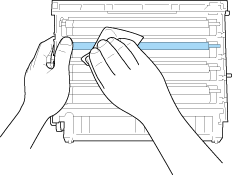
Wipe the spot off the black roller with a dry soft cloth or cotton swab.
|
| |
Caution: |
| |
-
Be careful not to scratch the surface of the drum (green roller) and rollers (black rollers). Also, avoid scratching the drum and rollers, since oil from your skin may permanently damage their surface and affect print quality.
|
|
|
|
Holding the handle firmly, lower the photoconductor unit into the printer, making sure the posts on the sides of the unit slide into the slots.
|
| |
Warning: |
| |
|
Be careful not to touch the fuser, which is marked CAUTION HIGH TEMPERATURE, or the surrounding areas. If the printer has been in use, the fuser and the surrounding areas may be very hot.
|
|
 |
Close covers D and A.
|
 |
Turn on the printer.
|
| |


 Top
Top