 |
 Precautions for clearing jammed paper Precautions for clearing jammed paper
 Paper Jam MP C1 A Paper Jam MP C1 A
 Paper Jam C1 A Paper Jam C1 A
 Paper Jam C2 C1 A Paper Jam C2 C1 A
 Paper Jam A B Paper Jam A B
 Paper Jam A D Paper Jam A D
If paper becomes jammed in the printer, the printer’s LCD panel and EPSON Status Monitor provide alert messages.
Precautions for clearing jammed paper
Be sure to observe the following points when you clear jammed paper.

 |
Warning: |
 |
-
Be careful not to touch the fuser, which is marked CAUTION HIGH TEMPERATURE, or the surrounding areas. If the printer has been in use, the fuser and the surrounding areas may be very hot.
|
|
 |
Remove all the paper from the MP tray.
|

 |
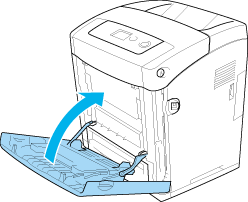
Close the MP tray.
|
 |
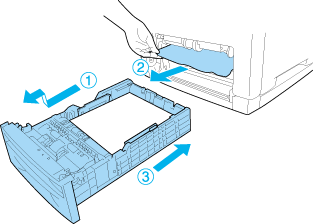
Remove the standard paper cassette, gently pull out any sheets of paper, and reinstall the paper cassette.
|
 |
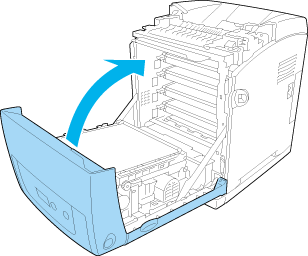
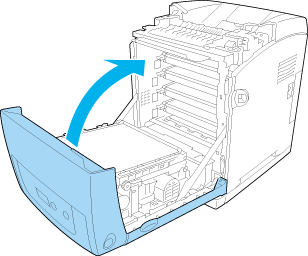
Press the latch on the front cover and open the cover.
|

 |
Close the front cover.
|
 |
Note: |
 |
|
If the MP tray opens, remove all the paper and then close the MP tray.
|
|
 |
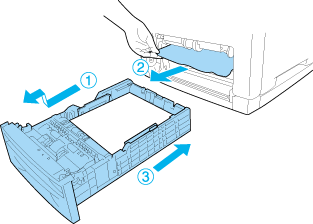
Remove the standard paper cassette, gently pull out any sheets of paper, and reinstall the paper cassette.
|
 |
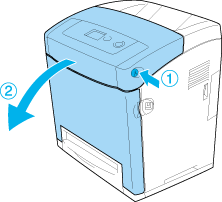
Press the latch on the front cover and open the cover.
|
 |
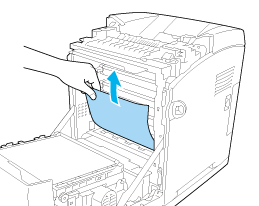
Gently pull out any sheets of paper.
|
 |  |
Caution: |
 |  |
|
Do not touch the transfer belt and light-sensitive drums to avoid damaging them.
|
|
 |
Gently pull out any sheets of paper on the transfer unit.
|

 |  |
Caution: |
 |  |
|
Be careful not to damage the transfer belt.
|
|
 |
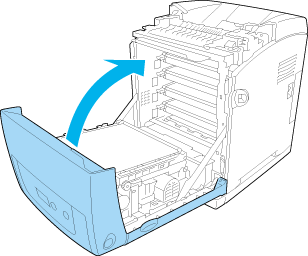
Close the front cover.
|
 |
Note: |
 |
|
If the MP tray opens, remove all the paper and then close the MP tray.
|
|
 |
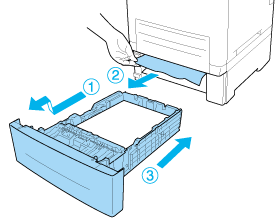
Remove the optional paper cassette, gently pull out any sheets of paper, and reinstall the paper cassette.
|
 |
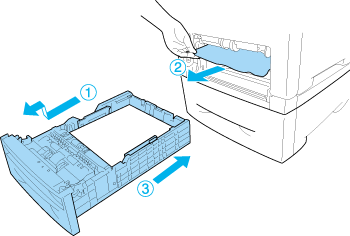
Remove the standard paper cassette, gently pull out any sheets of paper, and reinstall the paper cassette.
|
 |
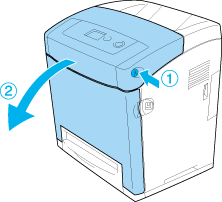
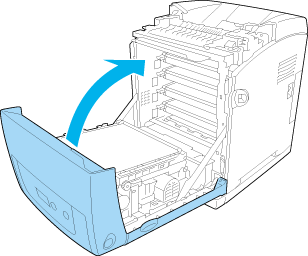
Press the latch on the front cover and open the cover.
|
 |
Close the front cover.
|
 |
Note: |
 |
|
If the MP tray opens, remove all the paper and then close the MP tray.
|
|
 |
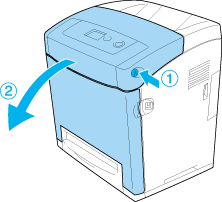
Press the latch on the front cover and open the cover.
|
 |
Gently pull out any sheets of paper on the transfer unit.
|

 |  |
Caution: |
 |
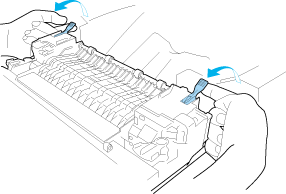
Raise the outer green knobs on the fuser unit to open the paper path.
|
 |  |
Warning: |
 |  |
|
Be careful not to touch the fuser, which is marked CAUTION HIGH TEMPERATURE, or the surrounding areas. If the printer has been in use, the fuser and the surrounding areas may be very hot. If you must touch one of these areas, wait 30 minutes to allow the heat to subside before doing so.
|
|
 |
Gently pull out any sheets of paper straight towards you.
|

 |
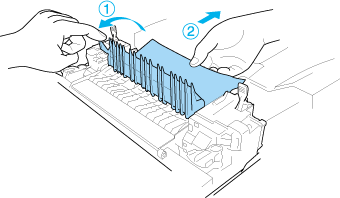
Raise the fuser paper guide on the fuser unit and pull out any sheets of paper.
|
 |
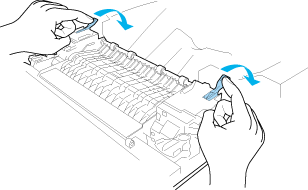
Lower the outer green knobs on the fuser unit to close the paper path.
|
 |
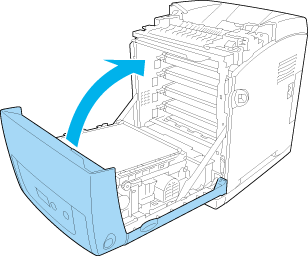
Close the front cover.
|
 |
Note: |
 |
|
If the MP tray opens, remove all the paper and then close the MP tray.
|
|
 |
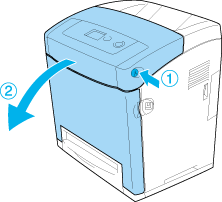
Press the latch on the front cover and open the cover.
|
 |
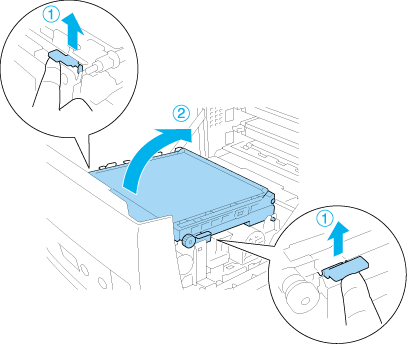
Pull up the blue tabs on both sides of the transfer unit, then raise the transfer unit and set it against the printer.
|
 |  |
Caution: |
 |  |
|
Do not touch the transfer belt on the transfer unit to avoid damaging it.
|
|
 |
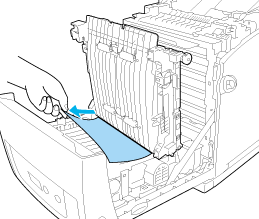
Gently pull out any sheets of paper under the transfer unit.
|
 |
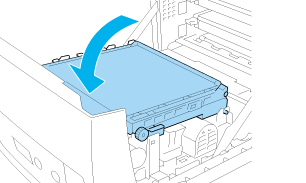
Pull down the transfer unit and lock it.
|
 |
Close the front cover.
|
|  |


