 |
 Handling precautions Handling precautions
 Replacing the transfer unit Replacing the transfer unit
Always observe the following handling precautions when replacing the consumable products.
Do not touch the surface of the consumable product. Doing so may impair print quality.
 |
Warning: |
Replacing the transfer unit
Follow the steps below to replace the transfer unit.
 |
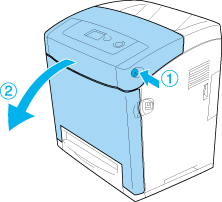
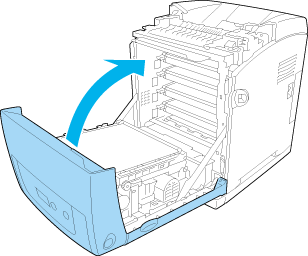
Press the latch on the front cover and open the cover.
|
 |  |
Caution: |
 |
Take the light shielding paper from the new transfer unit’s package and attach it to the printer.
|

 |
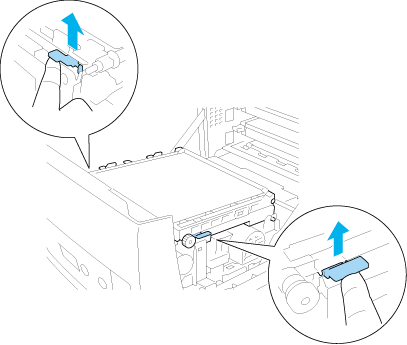
Pull up the blue tabs on both sides of the transfer unit.
|
 |  |
Warning: |
 |  |
|
Be careful not to touch the fuser, which is marked CAUTION HIGH TEMPERATURE, or the surrounding areas. If the printer has been in use, the fuser and the surrounding areas may be very hot. If you must touch one of these areas, wait 30 minutes to allow the heat to subside before doing so.
|
|
 |
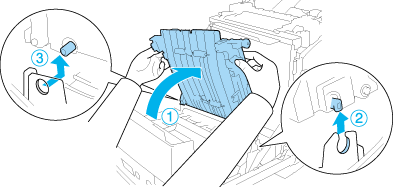
Raise the transfer unit and pull it up out of the printer.
|
 |
Take the new transfer unit from its package.
|
 |
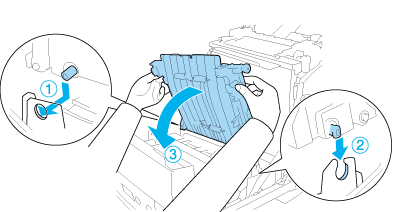
Lower the transfer unit inside the printer making sure that the posts on the transfer unit into the guides, then pull down the transfer unit.
|
 |
Remove the protective material from both sides of the transfer unit.
|
 |  |
Caution: |
 |  |
|
Do not touch the transfer belt on the transfer unit to avoid damaging it.
|
|
 |
Remove the protective material on the transfer unit.
|

 |
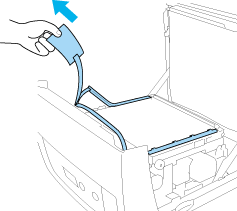
Remove the light shielding paper from the printer.
|

 |
Close the front cover.
|
|  |


