 |
 Handling precautions Handling precautions
 Replacing an imaging cartridge Replacing an imaging cartridge
Always observe the following handling precautions when replacing the consumable products:
 |  |
Warning: |
 |  |
-
If toner is spilled, use a broom and dustpan or a damp cloth with soap and water to clean it up. Because the fine particles can cause a fire or explosion if they come into contact with a spark, do not use a vacuum cleaner.
|
|
Replacing an imaging cartridge
Follow the steps below to replace an imaging cartridge.
 |
Confirm the color of the imaging cartridge that needs to be replaced by checking the LCD panel or EPSON Status Monitor.
|
 |
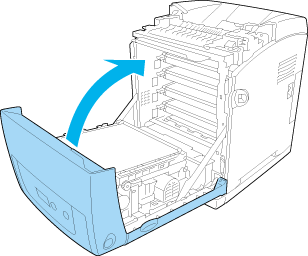
Press the latch on the front cover and open the cover.
|

 |  |
Caution: |
 |
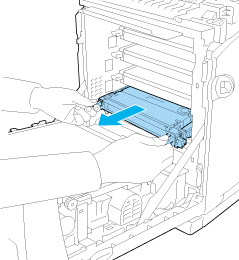
Remove the used imaging cartridge from the printer.
|

 |  |
Warning: |
 |  |
|
Be careful not to touch the fuser, which is marked CAUTION HIGH TEMPERATURE, or the surrounding areas. If the printer has been in use, the fuser and the surrounding areas may be very hot. If you must touch one of these areas, wait 30 minutes to allow the heat to subside before doing so.
|
|
 |  |
Caution: |
 |  |
|
Do not touch the transfer belt on the transfer unit to avoid damaging it.
|
|
 |
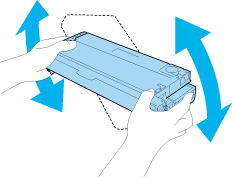
Take the new imaging cartridge out of its package, and gently shake it from side to side and front to back to distribute the toner evenly.
|

 |
Remove the cartridge seal, pulling straight from the imaging cartridge. Make sure to pull the tape slowly to avoid tearing it.
|

 |
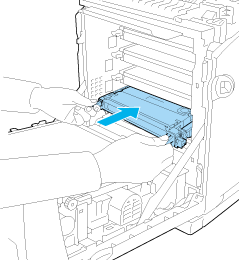
Insert the new imaging cartridge all the way until it stops.
|

 |
Remove the orange plastic cover by pinching the center of the cover and pulling it.
|

 |
Close the front cover.
|

|  |


